
Adobe Illustrator offers many ways to style up text. Whether you want to create a billboard design, an invitation card, or any logo for the company, you can create a variety of text that can enhance and create amazing looks for your design. The designer must learn various professional text styling tricks to add to their designs like billboards, visiting cards, and logos that may inspire the viewers.
Creating a flip text for various purposes is a great idea. It’s a great way to add your logo in the center and flip text around the circle. Adobe Illustrator made it easy for the designer to flip text on any path.
Table of Contents
What is Flip Text?
A flip text is used to add text on top and as well as at the bottom of a shape.
It’s all up to you if you want to make it upside down or you want to keep the text upside, up.
You can also learn:
- Add Shadow to Text in Adobe Illustrator
- Fill a character with Text in Adobe Illustrator
- Cut out Text from an Image in Adobe Illustrator
- Fill Text with an Image in Adobe Illustrator
- Add Gradient to Text in Adobe Illustrator
- Fill a Shape with Text in Adobe Illustrator
- Curve Text in Adobe Illustrator
- Add Texture to Text in Adobe Illustrator
If you are a beginner who is learning Adobe Illustrator, or you don’t have any idea to create flip text on a path in Illustrator, then you are in right place. In this tutorial, we are going to give you step by step guide on How to Flip Text on a Path in Illustrator.
Let’s Start.
Easy way to Flip Text on a Path in Illustrator
In this tutorial, we are going to flip text on a path in Illustrator. The method is easy and can be applied in any version of Adobe Illustrator. Flip text can be used for any path, it’s not necessary to use only a closed path. You can use an open path to flip text.
We are using a circle in this tutorial to flip text, as it can be used to make various designs. Let’s create a circle first.
Make a Circle in Adobe Illustrator
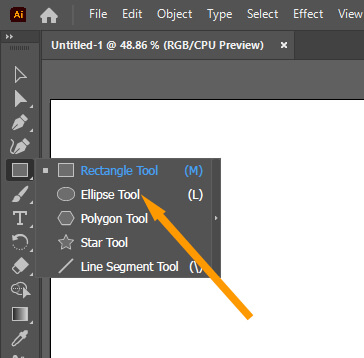
Step 1: In the left toolbar, right-click or long-press on the Rectangle tool. Select Ellipse Tool from the list of tools that appeared. You can also use the keyboard shortcut key L to use the Ellipse Tool in Illustrator.
Step 2: You can draw the circle using the Ellipse tool. Don’t forget to Press and Hold the Shift key while drawing the circle on the artboard. Create the circle according to your requirements. Here we have created 400px x 400px circle.

Type on a Path in Adobe Illustrator
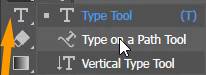
Step 3: In the left toolbar, right-click or long-press on the Type Tool. Select Type on a Path Tool.
Step 4: The pointer will be converted to Type on a Path Tool.

Step 5: Bring the pointer anywhere to the edge of the Circle. You can see that the Path is written with the pointer. If you move the pointer to any other area the Path word disappears.

Step 6: Left-click anywhere on the Path of Circle.
Step 7: The Path will be filled with text. It will be a random text that is by the default setting of Illustrator. The stroke of the circle disappeared.

Format the Text in Adobe Illustrator
Step 8: The size of the font is small. If you want to enlarge it, go to Properties > Character > Set the Font Size. You can set the font size according to your need.

Step 9: Keep the text selected, and now type the required text that you want to add.

Select the Text in Adobe Illustrator
Step 10: After you type the text now grab the Selection Tool from the left toolbar and select the Text.

You can see this will look like this.

Step 11: Take your pointer on the line, just like I did here. The pointer shape will be changed as you can see here in the right.

Step 12: Now click on the line and move it to adjust the position of the Text.

Copy the Text in Adobe Illustrator
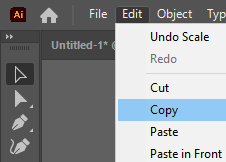
Step 13: Go to Edit > Copy. You can also use the keyboard shortcut key Ctrl+C to copy the text.
Paste the Text in Front
Step 14: Go to Edit > Paste in Front. You can also use the keyboard shortcut key Ctrl+F to paste the text in front.

Flip Text in Adobe Illustrator
Step 15: Grab the line with the left click and “move it inside” the circle to add the text inside the circle and adjust the position.

Step 16: As you can see the inner part of the text is small whereas the outer part of the text is large, to adjust it you need to enlarge it. Grab it from a corner and enlarge it as needed.

Now you can see the text is Flip and you can add any text to flip and create your designs and logos according to your choice.

It’s Easy to Learn How to Flip Text on a Path in Illustrator
Now you know how to Flip text on a Path in Adobe Illustrator. You can easily make logos, billboards, invitation cards for birthdays or wishing cards, or any type of design you can easily create by using the Flip Text in Illustrator. You can also watch our complete video tutorial that is given at the start of this tutorial. This tutorial provides you with complete knowledge of Flip text on a Path in Illustrator.
How to Convert Text to Path in Illustrator
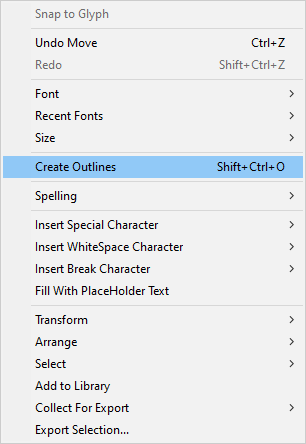
If you want to convert text to path in Illustrator, then right-click on the Text and select Create Outlines. You can also press Shift+Ctrl+O from the keyboard.
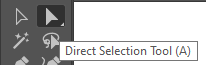
Now select the text with the Direct Selection Tool.
The text is converted to Path in Illustrator. You can edit the path and change the style according to your choice.
We believe that with the help of this tutorial you will have a good command of the Flipping Text on a Path in Illustrator. Create a more amazing design with this amazing tool. Don’t forget to share your experience with us. We will be glad to know your response.
All Done! Enjoy.


Leave a Reply