
You need to make gears if you are designing wheels for a bike or a car. While creating a logo for the auto industry then the gear will also be needed. Making gear is easy if you know the right steps. You can create gear of any color and any size.
Adobe Illustrator provides you with the quick and easiest way to draw gear by using the Star Tool. You can set the corners to the gear shape easily. Then you can color the gear of your choice by using the Fill Tool.
Table of Contents
Make a Gear in Adobe Illustrator – Video Tutorial
You can watch the below video tutorial to learn how to make gear in Adobe Illustrator. You can change the color of the gear according to your choice by following the steps from the video.
There is no need to draw a gear because you can easily create one using the Star Tool and a circle. Don’t worry about the corners of the star as we will just make them like gear within no time.
You can also learn:
If you are new or don’t have any idea to make gear in Adobe Illustrator then you are at the right place. In this tutorial, you will learn how to make gear for logos or any project easily in Adobe Illustrator.
So let’s start.
Make a Gear in Adobe Illustrator
To make gear in Illustrator, draw a star by using the Star Tool with 12 or more if needed. Select the star using the Direct Selection Tool, from the control panel, select Chamfer Corner and then increase the Radius to 10px. Draw a circle inside the shape, which should be smaller than the gear shape. Select fill to black for both. Select both shapes and then go to Window > Pathfinder > Minus Front. Gear Shape is ready.
Following are the detailed steps to make gear in Adobe Illustrator.
To draw a gear we need Star Tool to make a star, Control Panel, Ellipse Tool, and Pathfinder. All these will help to make the perfect gear.
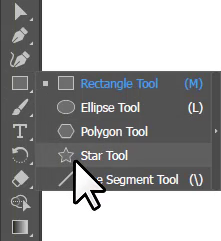
Step 1: Grab the Star Tool that is available under the Rectangle Tool from the left toolbar.
Step 2: Draw a star using the Star Tool, while you are drawing press the Up Arrow to increase the corners of the Star.

Or click once and the star panel will appear. Add the number of corners and press OK.
Step 3: Go to Window > Control to get the control panel, if you don’t see it.

The Control panel will appear under the menu bar. There are different options available that can be used to convert the star to a gear shape.

Step 4: Grab the Direct Selection Tool from the left toolbar.

Step 5: Select the Star using the Direct Selection Tool.

Step 6: In the Control panel, you will find an option for the corner. Click once on the corner.

Under the corner, you will find different options. The options are:
- Corners
- Radius
- Roundings
In the corners section, you can see three different corner styles are available. For gear, we need to select the last one.
By default, the corner style for the star shape is round. To make a gear shape from the star you need to change it to the last corner style which is Chamfer. Chamfer corner styles convert the sharp points to flat ones. Because the gear also have flat corners.
Step 7: Select Chamfer corner style for the star to convert to a gear shape.

Increasing the radius will adjust the chamfer corners to the gears corners. You can get bigger corners or smaller, depending on the gear shape you are creating.
Step 8: Increase the radius up to 10px.

The star is now converted to the gear shape as you can see below. You can increase or decrease the radius depending on the gear shape you want to create.

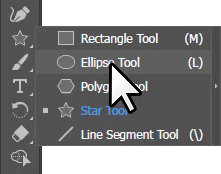
Step 9: Grab the Ellipse Tool from the left toolbar that is available under the Rectangle Tool.
Step 10: Bring the pointer to the center, press & hold the Shift+Alt key to make a circle in the center of the gear.

Step 11: Select both shapes using the Selection Tool.

Step 12: Select the fill color for the shape by Properties > Appearance > Fill. You can also keep the gear with no fill and only black stroke color if needed.

Step 13: Keep both shapes selected and from the Pathfinder that appears on the right side of the workspace select Minus Front.

Minus Front will select the inner circle and will make the shape single. It means that you will not have to separate shapes. It will become a single shape with no fill in the center. That can be used on any background color.
If you can’t find Pathfinder on the right side of the workspace then go to Window > Pathfinder. The Pathfinder panel will appear. Select Minus Front.
The gear shape is complete as you can see below. If you have followed the right steps, the gear you made should also look the same.

You can fill any color in the gear according to your choice and change the size as well if needed.

You have learned to make gear in Adobe Illustrator.
In this tutorial, you have learned to make a gear shape in Adobe Illustrator. You can make a gear of any size, color, and stroke color of your choice. Make sure you make the right gear shape so that your logo or design looks perfect. The amazing part is that you can duplicate or copy the gear and then resize them easily using the Selection Tool. You can color the gear into any color of your choice depending on the theme of your brand.
Have More Questions?
If you have any questions related to making gear in Adobe Illustrator, you can ask in the comment section below. We have also answered some most frequently asked questions below that can help you in your future projects.
How to duplicate object in Illustrator
To duplicate objects, select the object using the Selection Tool. Press & hold the Alt key and then drag the object to make its duplicate.
How to make circle in Illustrator
To make a circle in Illustrator, grab the Ellipse Tool from the left toolbar under the Rectangle Tool. Press & hold the Shift key and then click and drag to make a circle.
All Done! Enjoy.


Leave a Reply