
Are you excited about making a design with ribbon? You are still thinking about how to make ribbons. Don’t worry. Combining some different styles of rectangles can help you make a ribbon quickly and easily.
The most confusing thought that comes into mind while making a ribbon is that either you want a Curved Ribbon or Banner Ribbon. We use many types of ribbons in the designs. So we will help you make different styles of ribbons.
You can also learn:
- Make a Leaf in Illustrator
- Make a Flower in Illustrator
- Make Crescent Moon in Illustrator
- Make a Star in Illustrator
- Make Arrows in Illustrator
If you are new to Illustrator, or you don’t have the idea to make Ribbon in Illustrator, then you are in the right place. In this tutorial, you will learn the right way to make a ribbon in Adobe Illustrator.
Let’s start.
Table of Contents
Make Ribbon in Illustrator
First thing first, we will create a simple Banner Ribbon, then we will modify that banner to make a Curved Ribbon as well. So starting with the Banner Ribbon.
Step 1: Rectangle Tool can be used to make a ribbon easily, so grab the Rectangle Tool from the left Toolbar.
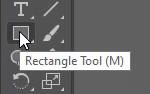
You can also press M from the keyboard to start using the Rectangle Tool.
Here we have to draw a Rectangle of Width 320px and Height 56px. Click once on the artboard by using the Right mouse button. A Rectangle panel will appear. Add the values and click OK.

As you click OK, the Rectangle shape appears on the artboard.

Or simply draw the rectangle of the accurate size.
You can draw any size of the rectangle, but we recommend you to draw a rectangle of a given size to achieve the same results.
Step 2: Draw a Square by pressing and holding the Shift key using the Rectangle Tool of the same height and width of 56px.

Step 3: Place the small square on top of the Rectangle just like we did here.

Step 4: Now press the + button from the keyboard to use Add Anchor point Tool or select Add Anchor Point Tool from your Toolbar.

Note: If you can’t find Add Anchor Point Tool in your toolbar, then go to Edit Toolbar and select Add Anchor Point Tool and drag it to your toolbar.

Step 5: Click on the Path of the shape to Add Anchor Point. Remember to add the Anchor point right at the path of the shape.

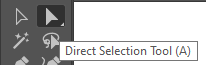
Step 6: Grab the Direct Selection Tool from the toolbar. You can also press A from the keyboard to use the Direct Selection Tool.
Step 7: Select the Anchor point that you have created earlier by using the Add Anchor Point Tool and pull it to the inner part of the Square. Just like we did here.

Note: Hold the Shift key while you are pulling the Anchor point so that it goes straight and accurate.
The shape will look like this after moving its Anchor Point.

Step 8: Right-Click on the Shape > Arrange > Send to Back.

The shape will be placed at the back of the rectangle shape.

Now it’s time to combine both shapes. There are two ways. One is by using the Line segment Tool and the other is by using the Pen Tool. Because we want to draw a line to give it a look of ribbon.
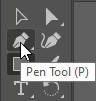
Step 9: Here we are using Pen Tool to draw a line. Grab the Pen Tool from the left toolbar.
Step 10: Draw a line between both shapes, just like we did here.

Step 11: Select line and square by using the Selection Tool.

Step 12: Copy the line and the square by pressing Ctrl+C from the keyboard and paste it by pressing Ctrl+V.
Remember to hold the Alt key and then drag both selected shapes. As you release them a copy will be created.
Copy will be created.

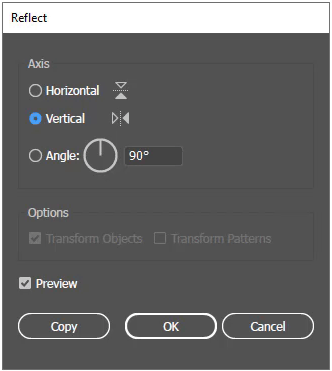
Step 13: Keep both shape selected, right click > Transform > Reflect.
Step 14: From the Reflect panel, set the Axis to Vertical and press OK.
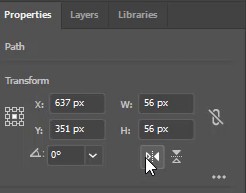
You can also reflect quickly by Properties > Path > Flip Horizontal.
Both selected shapes are reflected.

Step 15: Right-click on both selected shapes > Arrange > Send to Back.
Step 16: Adjust the shape with the Rectangle just like we did here.

Step 17: Select all the Shapes by using Selection Tool. Right Click select Group.

All the Shapes will be grouped.
Here is the perfect ribbon. Your Ribbon should also look like this.

Fill Color in Ribbon
Let’s fill our favorite color inside the ribbon.
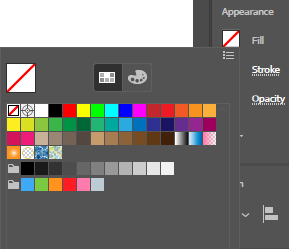
Step 18: Go to Properties > Appearance > Fill > Select the color.
This is the final look of the Ribbon that we have created.

Add Text to Ribbon
You can add text to the Ribbon by using the Type Tool.

How to Make Curved Ribbon in Illustrator
If you want to curve the Ribbon that you have created, that is also an effortless task in Illustrator.
Select the Ribbon using the Selection Tool.

Go to Object > Envelope Distort > Make with Wrap.

From the Wrap option select Style > Flag and click OK.

Here is the look of the Curved Ribbon.

You can also select Arc style to apply to the Ribbon. Here is what the Ribbon looks like.

You Have Learned to make Ribbon in Illustrator.
In this tutorial, you have learned to make Ribbon in Adobe Illustrator. You can color the Ribbon according to your choice. Write anything on the ribbon according to your design requirements.
You can also watch the detailed video tutorial to learn How to Make a Ribbon in Illustrator that is given at the start.
Have More Questions?
If you have any questions related to making Ribbon in Illustrator, you can ask in the comment section below.
Download Ribbon design Vectors
You can also download the Ribbons to use in your designs.

All Done! Enjoy.


Leave a Reply