
In Adobe Illustrator, we do not find a tool that can be used to draw a right triangle, but we do see tools that can be used to draw rectangles, ellipses, and polygons. However, we might want to draw a right triangle often. In all of our efforts, we can not be able to draw a perfect triangle by merging lines. In this tutorial, we are going to tell you a few simple methods, which you can adopt to make a right triangle.
But when it’s come to creating a right triangle we can only adopt one method to draw a triangle in Illustrator. We use the rectangle tool and anchor point.
Table of Contents
How to Make a Right Triangle in Illustrator
A right triangle is drawn using the following process, which is written down in steps:
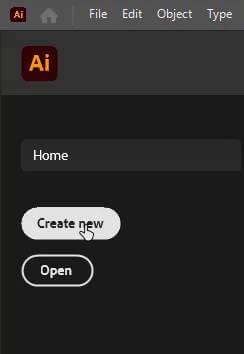
Create a Document
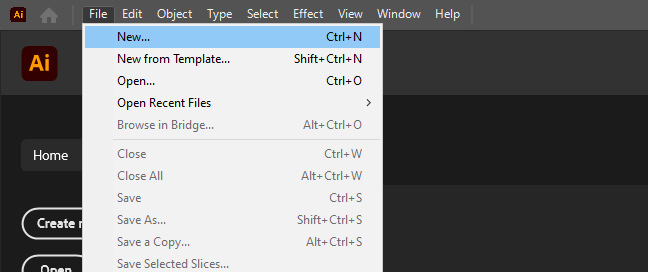
Start by opening your Adobe Illustrator, and creating a new document.
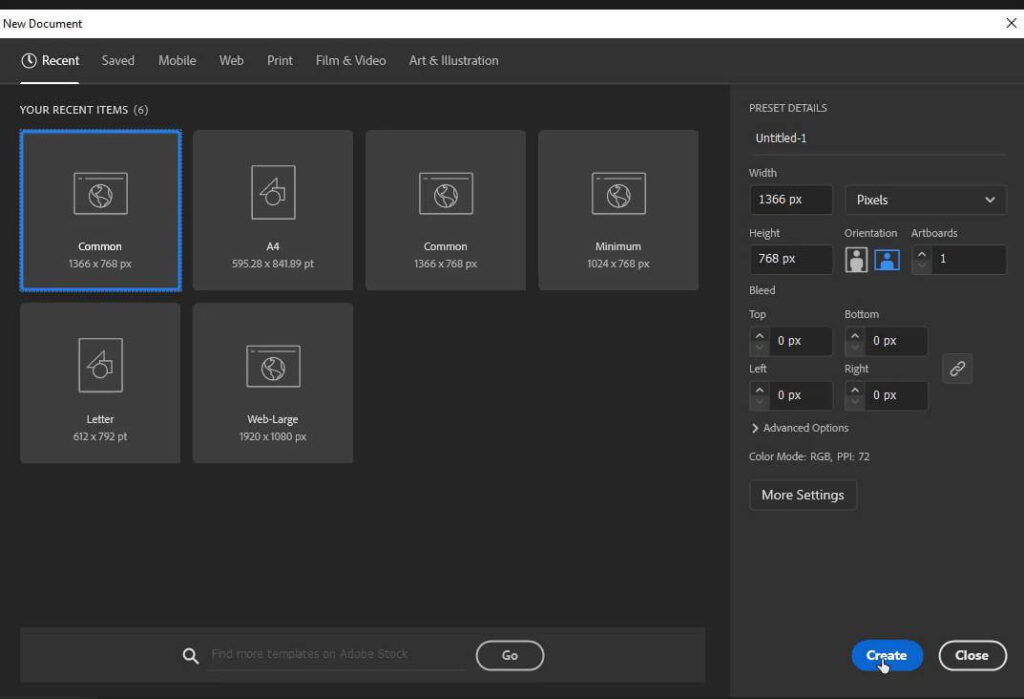
To create a new document, click on the File menu and choose artboard size and click Create.
Using Rectangle Tool
Now click on the rectangle tool from the left toolbar, you can also press M from your keyboard, and draw one square on your artboard.
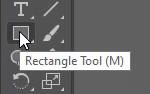
While drawing, press the shift key so that we can draw a perfect square, as we need a square that can be drawn by using the rectangle tool.

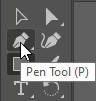
Using Pen Tool
Now after drawing a square go to the left toolbar and select “Pen Tool” or you can simply press “P” from your keyboard.
Now take your pen tool at the corner of the square and there will appear a small minus(-) sign with a pen.
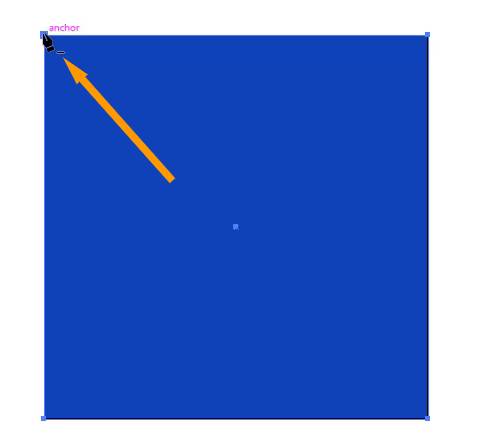
Click once on any one point of the square, and it will convert your square into a right triangle.

In this way, you can make a right triangle in Adobe Illustrator.

How to Make a Triangle in Illustrator
You can draw a triangle by using different tools in Adobe Illustrator such as:
- By using the “Pen Tool”
- By using the “Polygon Tool”
- By using the “Shaper Tool”
By Using the Pen Tool
Click on the Pen Tool from your left toolbar, or simply press “P” from the keyboard.
Click anywhere on your artboard and then drag your mouse to the other side a line will follow your pointer movement.

Click to make another point and then move your pointer to create another line that would be attached to the first line. (You have to create two lines one horizontal and one vertical and both will be combined automatically due to the pen tool).

As you click to make the third point you will see a triangle, press V from the keyboard so that your pen tool disappears and now you have a triangle by using a pen tool in Adobe Illustrator.

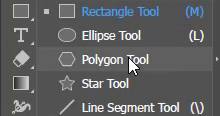
By Using The Polygon Tool
Right-click on the rectangle tool from your left toolbar, a list will appear with a different tool.
Select “Polygon Tool”.
Click once on your artboard, a small window for polygon tool will appear on your artboard.
Give value 3 insides options or you can use the up and down arrow given in the window to increase or decrease sides and then click OK.

After clicking OK a triangle will appear on your artboard.

By Using Shaper Tool
Click on switch workspace in the top right corner in Adobe Illustrator.
As you click on it you will see a list to switch between different workspaces, choose Essential Classis.
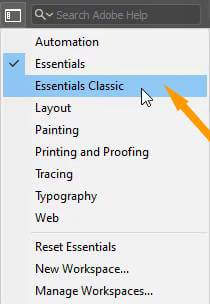
It will show all hidden tools in your workspace.
Now in the left toolbar select the shaper tool or simply press Shift+N from your keyboard.

Simply draw a triangle on your artboard with the help of this tool. Make sure you draw a triangle.

As soon as you release the mouse button, it will automatically convert the rough shape of a triangle into a perfect triangle.

How to Make a 90 Degree Triangle in Illustrator
A right triangle is also called a 90-degree triangle, you can draw a 90-degree triangle in Adobe Illustrator by drawing a rectangle on the artboard. Press the shift key while drawing it. Doing this will result in a square. Because we need a square, and we will turn it into a 90-degree triangle. Select the pen tool and click on an anchor point of the square (as when we take the pen tool to any corner of the square it shows an anchor point) and it will be converted into 90-degree triangle.
How to Make a Triangle in Illustrator
Right-click on the rectangle tool from the left toolbar in Adobe Illustrator and then select the star tool from the drop-down list of different shapes.

Click once, anywhere on the artboard, after that a small window will appear for the star points and radius. In the points section, enter value 3 and hit OK.

A small triangle will appear on your artboard. You can easily rotate it in any direction or resize it by using Selection Tool if you want.

How to Make 3D Triangle in Illustrator
Select your triangle from your artboard that you want to make 3D.
Click on the Effect menu from the top menu bar in Adobe Illustrator. A drop-down list will appear with different options. From the drop-down list click on 3D and then select Extrude and Bavel from the 3D options.
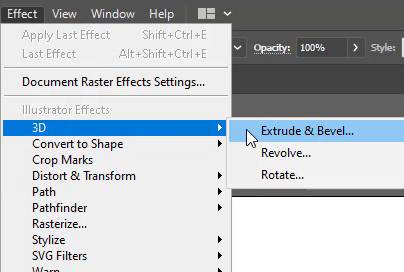
After that 3D Extrude and Bavel Options window will appear and you can also see that your triangle is converted to a 3D triangle. Click OK on the 3D Extrude and Bavel Options window or you can also change the direction of the 3D effect to any side from the rotation section available. You can change the rotation to X-axis, Y-axis, and Z-axis. You can also change Extrude depth from 0 pt to 2000 pt. from the “Extrude Depth” option available.

Now you can see your 3D triangle on the artboard.


Leave a Reply