
Making a Silhouette is a very interesting task when you want to create your own instead of downloading free stock.
Table of Contents
What is Silhouette?
Silhouette is a single-color image usually black on a white background.
You can create your own stock of silhouettes by spending some time not a lot of time. Just a few minutes are required to create one.
Make a Silhouette in Adobe Illustrator – Video Tutorial
You can watch the below-detailed video tutorial to learn how to make a silhouette in Adobe Illustrator.
If you are new or don’t have any idea to make a silhouette in Adobe Illustrator, then you are at the right place. In this tutorial, you will learn how to make a silhouette in Illustrator.
You can also learn:

Let’s Start.
How to Make a Silhouette in Adobe Illustrator
Pen Tool works great to make a silhouette in Adobe Illustrator. So we are going to use Pen Tool.
1st Method: Using Pen Tool
Step 1: Place the image on the Artboard. You can place the image by dragging it from its location and placing it on the artboard.

Note: Resize and Embed the image if needed.
Step 2: Lock the layer of the image from the Layers panel. Click between the eye icon and layer name to lock the layer. You can open the layer panel, by Window > Layer.

Step 3: Create a new sublayer from the layer panel.

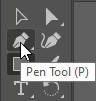
Step 4: Grab the Pen Tool from the left toolbar.
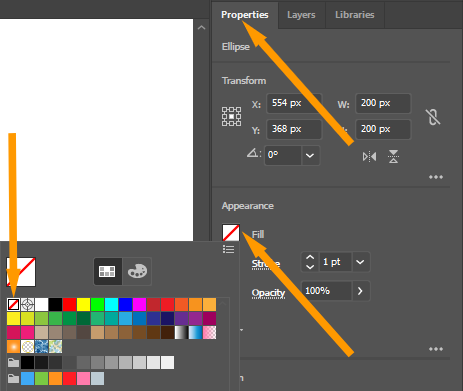
Step 5: Set the Fill to none by Properties > Appearance > Fill.
Step 6: Draw the outline on the area that you want to select to create a silhouette using the Pen Tool.
You need to make anchor points using the Pen Tool on the area that you want to select. At the end attach the starting anchor point to attach the anchors.

You can learn: How to Trace an Image in Illustrator Using Pen Tool
Step 7: After creating outlines, go to Fill and select the color to fill in the shape. You can fill any color of your choice by Properties > Appearance > Fill.

The black fill color is applied to the shape.

Step 8: Unlock the layer, by layer panel, and delete the original image.
Here is the final Silhouette that is created.

2nd Method: Using Image Trace
You can also create Silhouette in Illustrator using Image Trace.
Step 1: Place the image on the artboard.
Step 2: Trace the image into Low Fidelity Photo. You can choose the image trace option that is available under Properties > Quick Actions > Image Trace > Low Fidelity Photo.

The image is traced.

Step 3: Expand the Image. You can expand the image by the option that is available under the control panel.

Step 4: Ungroup the image. you can ungroup the image by the option that is available under the control panel.

Step 5: Unselect the image first.
Step 6: Grab the Selection Tool.

Step 7: Select all unwanted areas using the Selection Tool and delete using the Delete button from the keyboard.

Step 8: Now select the remaining part that you want to make a silhouette using the Selection Tool.

Step 9: Go to Properties > Appearance > Fill and select fill color.
Here is the silhouette that is created using the Image Trace.

You have learned to make a silhouette in Adobe Illustrator.
In this tutorial, you have learned to make a silhouette in Adobe Illustrator. You can make silhouettes of any image by creating an outline on the area that you need. We have shared two different ways to make a silhouette in Adobe Illustrator. You can select any method that you think is more suitable.
We recommend making silhouettes using the Pen Tool as it looks more professional. All sides are perfectly created. You can see both silhouettes below and tell us in the comment section which one is perfect.

Illustrator silhouette free download
You can download the silhouette that we have created in this tutorial for free here.
Have More Questions?
If you have any questions related to making a silhouette in Adobe Illustrator. We have also answered some most frequently asked questions below.
How to outline vector in Illustrator
To outline a vector in Illustrator, select the vector shape and use Properties > Appearance > Stroke. Select any color of your choice. The outline of the shape will be created in the selected stroke color.
How to change the color of a silhouette in Illustrator
You can change the color of a silhouette using the Fill Tool or Fill under the Appearance under the Properties. Select the silhouette and then select the color. The new color will be applied to the silhouette in Illustrator.
All Done! Enjoy.


Leave a Reply