
If you are new or you don’t have the idea to make a table in Illustrator, then you are in the right place. In this tutorial, we will give you a step-by-step guide to making a table in Adobe Illustrator.
Tables can be important while you are creating menus or a list of items in Adobe Illustrator. You can create tables in Adobe Illustrator in simple ways. Tables can help to manage data in a design.
Table of Contents
Make Table in Illustrator – Video Tutorial
Tables can be created with different rows and columns as you want. You can quickly create a table in multiple ways in Adobe Illustrator. We can also draw horizontal and vertical lines to create a table as well as you can draw a rectangle and then split it into a grid to make a table in Adobe Illustrator.
Learn Also:
- How to divide a rectangle into 3 equal parts in Adobe Illustrator
- How to divide a circle into 3 equal parts in Adobe Illustrator
- How to make a grid in Adobe Illustrator
Let’s Start.
3 Ways to Make a Table in Illustrator
In Adobe Illustrator, there are 3 different methods to make a professional table. You can draw a horizontal and vertical line, use Rectangular Grid Tool, and Split a rectangle into the grid to make a table in Illustrator.
1st Method: Rectangular Grid Tool
The easiest way to make a Table in Adobe Illustrator is by using the Rectangular Grid Tool. Let’s see the steps below.
Step 1: Go to the Edit Toolbar option, from the list select and drag Rectangular Grid Tool in the Toolbar.

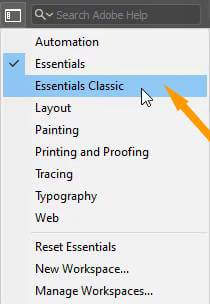
You can also switch workspace to Essential Classic and then long-press or right-click on Line Segment Tool and then select Rectangular Grid Tool.

Step 2: After selecting the Rectangular Grid Tool, draw the grid.

Step 3: As you can see it’s a table, that is drawn by using the Rectangular Grid Tool.

Note: If you want to increase or decrease the Horizontal or Vertical Dividers that double click on the Rectangular Grid Tool, and change the number according to your requirements.

2nd Method: Split into Grid
Another method to make a table in Illustrator is by using the Rectangle and then Split into Grid. Let’s see the steps.
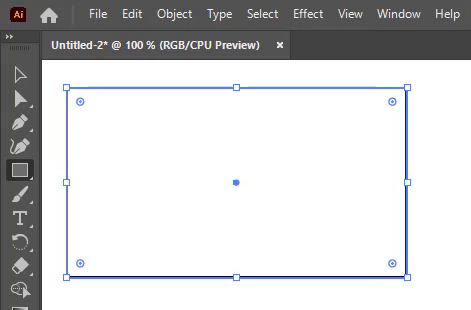
Step 1: Select the Rectangle Tool from the left toolbar.
Step 2: Draw a rectangle on the artboard.
Edit Table in Illustrator
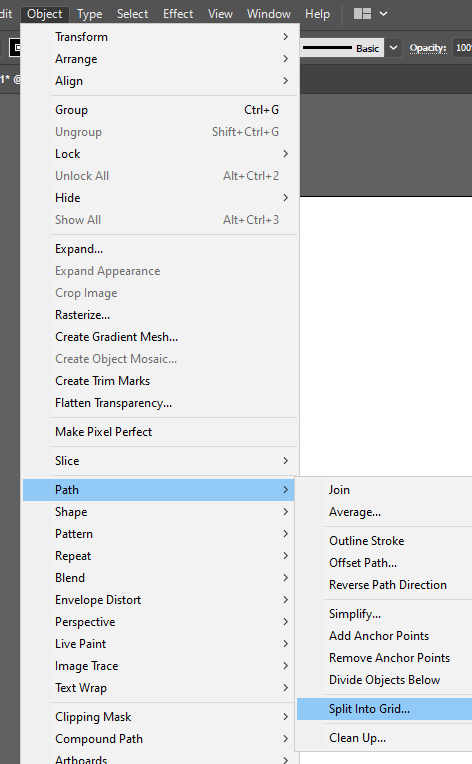
Step 3: Go to Object > Path > Split into Grid.
Step 4: Split into Grid panel will appear.
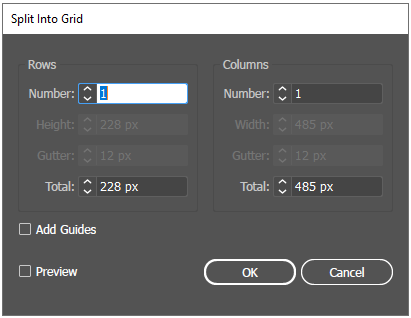
Step 5: Add the Number of Rows and Columns.
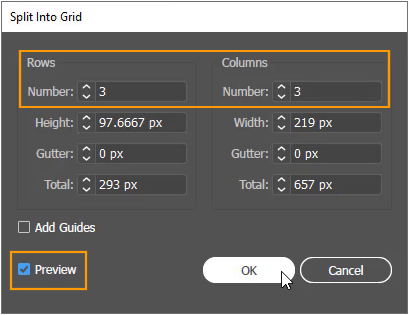
Note: Make sure to check Preview to see the changes.
Step 6: Click OK to make a table.
This is the table that we have created by using the Rectangle.

3rd Method: Make Table using Line Segment Tool
You can also use the Line Segment Tool to Make a Table. Horizontal and Vertical rows are used in this regard to create the table. Let’s see the step-by-step guide below.
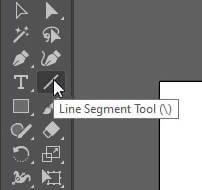
Step 1: Right-click or long-press on the Rectangle Tool and then select the Line Segment Tool from the left toolbar.
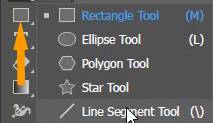
You can also use \ as a keyboard shortcut to use the Line Segment Tool.
Note: If you are in the Essential Classic workspace then you can find the Line Segment Tool in the toolbar as the main tool.
How to Make a Table in Illustrator 2022
Step 2: Press and Hold Shift key to draw straight horizontal lines on the artboard first. You can draw as many lines as you want. Here we have drawn 4 horizontal lines.

Step 4: Now draw Vertical lines on the artboard on the top of Horizontal lines. As you can see in the image below.

This table is created by using the Line segment tool. You can increase or decrease the number of rows according to your choice easily.

In this tutorial, we have learned to make a table in Adobe Illustrator, using 3 different ways. All methods are easy to follow. You can choose any method to create a table in Illustrator. You can also watch our detailed video tutorial on How to Make a Table in Illustrator, which is given at the top.
Do You Have More Questions?
If you have any questions related to Tables in Adobe Illustrator, then feel free to ask in the comment section below. We have also answered some most Frequently Asked Questions below.
How to Create a Text Table in Illustrator
To add text to the table select Type Tool from the left toolbar and type.
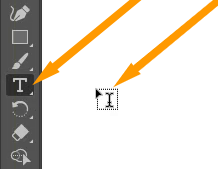
As you type in the table it becomes a text table in Illustrator.

All Done! Enjoy.


Leave a Reply