
Adobe Illustrator doesn’t have many shapes in the toolbar. It only has a few shape tools like Rectangle Tool, Round Rectangle Tool, Ellipse Tool, Polygon Tool, Star Tool, and Line Segment Tool. But you don’t find Trapezoid or Triangle Tool.
As you know that the trapezoid tool is not available, so you can use other tools to make trapezoids from them. You can draw trapezoids using the Pen Tool, Rectangle Tool, and Polygon Tool. By using the Rectangle Tool and Direct Selection Tool, you can easily convert the rectangle shape to a trapezoid, the same is the case with the polygon tool. By using Polygon Tool and Delete Anchor Point Tool, you can easily get a Trapezoid.
Table of Contents
Make a Trapezoid in Adobe Illustrator – Video Tutorial
You can also watch the below video tutorial to learn how to make a trapezoid in Adobe Illustrator. In the video, you will see three different methods to make a trapezoid in Illustrator.
You can also learn:


If you are new or don’t have any idea to make a trapezoid in Adobe Illustrator, then you are at the right place. In this tutorial, you will learn 3 easy ways to make a Trapezoid in Adobe Illustrator.
So let’s start.
Make a Trapezoid in Adobe Illustrator
To make a trapezoid in Illustrator, draw a polygon and then grab the Delete Anchor Point Tool. Click one by one, on two bottom corners to delete them. As you delete the corners of the polygon, the trapezoid shape will appear.
Following are the details steps of different methods to make a trapezoid in Adobe Illustrator.
1st Method: Make Trapezoid using Polygon in Illustrator
You can make a trapezoid using the Polygon with the help of the Delete Anchor Point Tool. Let’s see how it works.
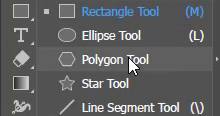
Step 1: Grab the Polygon Tool from the left toolbar. You can find the Polygon Tool that is available under the Rectangle Tool in the toolbar.
Step 2: Press & hold the Shift key, then click and drag to create a Polygon shape. Pressing the Shift key will help to draw a Polygon straight.

Step 3: Grab Delete Anchor Point Tool. The tool is available under the Pen Tool. The shortcut key for Delete Anchor Point Tool is – from the keyboard.

Note: If you can’t find the Delete Anchor Point Tool from the toolbar then switch the toolbar to Advance by Window > Toolbar > Advance. Now you will be able to find Delete Anchor Point Tool in the toolbar under the Pen Tool.
Step 4: Now click once on the bottom corners that have anchor points. Here the first corner is deleted.

Step 5: Repeat the same with the second corner.

Here is the Perfect Trapezoid shape.

You can make an irregular trapezoid by using the Direct Selection Tool and moving the corners.
2nd Method: Make Trapezoid using the Rectangle in Illustrator
You can also easily make a Trapezoid using the Rectangle in Illustrator. Let’s see how it works.
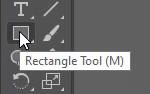
Step 1: Grab the Rectangle Tool from the left toolbar. The shortcut key to use the Rectangle Tool is M from the keyboard in Illustrator.
Step 2: Click and drag to make a Rectangle. You can also make a square shape by holding the Shift key while drawing and it will turn out a Square.

Step 3: Grab the Direct Selection Tool from the toolbar. The shortcut key to use the Direct Selection Tool is A from the keyboard.

Step 4: Now, click and drag over the top two corners of the rectangle to select the corner points. You can also select them by pressing & holding down the Shift key and then clicking on both one by one. As they turn blue it means that the corners are selected. Repeat the same for the square shape.

Scale Tool in Illustrator
Step 5: Grab the Scale Tool from the left toolbar. The shortcut key to use the Scale Tool is S on the keyboard. We will scale the selected corner points to turn them into trapezoids. Repeat the same for the square shape.

Step 6: Click and drag the outside of the shape upward to scale the selected two points. You will notice the rectangle is changing to a trapezoid. Leave when you think you’ve got the trapezoid shape that you need. Repeat the same step for the square shape to make it a trapezoid.

Here is the final trapezoid shape from rectangle and square.

3rd Method: Make Trapezoid using the Pen Tool in Illustrator
You can also make the Trapezoid using the Pen Tool in Illustrator.
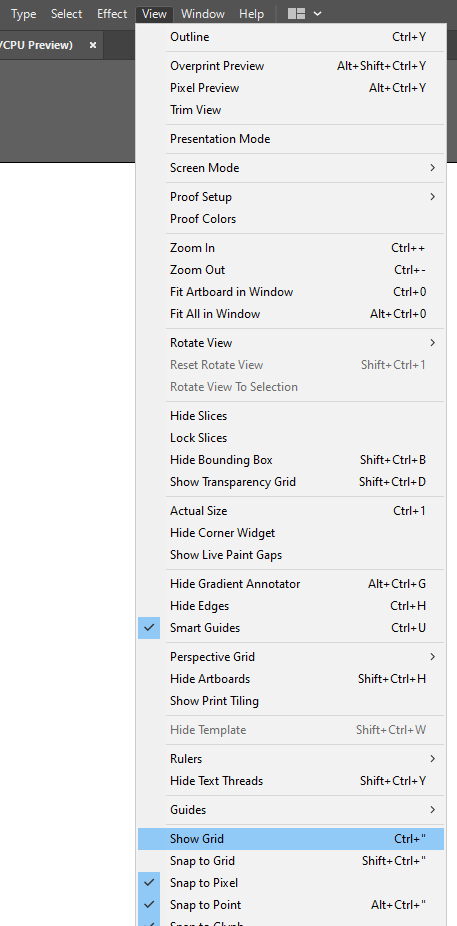
Step 1: Show the Grid by View > Show Grid. The shortcut key to show the grid in Illustrator is Shift+”. To make a perfect trapezoid, you need to use the grid.
The grid will appear.
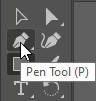
Step 2: Grab the Pen Tool from the toolbar. The shortcut key to use the Pen Tool is P from the keyboard.
Step 3: Make the Trapezoid by following the steps given below. To end the shape, click on the first point.

Note: Make sure to leave equal boxes available on the grid to make a perfect trapezoid. If you select the fill color, then the color will be filled to the shape as you start creating it.
Here is the final trapezoid.

You have learned 3 different ways to make trapezoids in Adobe Illustrator.
In this tutorial, you have learned how to make a trapezoid in Adobe Illustrator. We have discussed three different ways to make a trapezoid. You can follow any way that suits you more and you find that easy.
The easiest way to make a trapezoid in Illustrator is by using the Polygon shape and then using Delete Anchor Point Tool to delete anchor points and convert them to a trapezoid.
Have More Questions?
If you have any questions related to making a trapezoid or any shape in Adobe Illustrator then ask in the comment section below. We have also answered some most frequently asked questions below.
How to Make a parallelogram in Illustrator
To make a parallelogram in Illustrator, draw a rectangle and then select Direct Selection Tool. Select any corner using the Direct Selection Tool and drag it to change its angle. Repeat this from two corners of the same side. The parallelogram is ready.
How to make a triangle in Illustrator
To make a triangle in Illustrator, draw a rectangle using the Rectangle Tool and then using the Delete Anchor Point Tool, delete any corner and the triangle is ready.
All Done! Enjoy.


Leave a Reply