
As you all know, grids are used to align and organize our elements onto the artboard. In Adobe Illustrator, we also use a grid. It helps a lot while working with different elements and every designer wants to use the grid to start creating perfect design easily.
Grids also help to save a lot of time, because you don’t have to spend a lot of time organizing the stuff.
Table of Contents
What is Grid? (A Brief Description)
A grid is a pattern of multiple horizontal and vertical lines that creates perfect squares when crossing each other.
What is Grid in Adobe Illustrator?
In Adobe Illustrator, the grid is a widely used tool to avoid any unorganized graphics on the artboard. Adobe Illustrator offers two types of Grid tools, that you can draw on to your artboard.
- Rectangular Grid Tool
- Polar Grid Tool
Both Grids are easy to make and have a lot of uses for graphic designers.
Many beginners don’t have an idea about, where is the Grid, the types of Grids, and how to use them or enable them on the artboard.
Grid is a widely used tool and If you want to make your Grid in Adobe Illustrator and you don’t have any idea how to do this, then you are at the right place. We will tell you to step by step different ways to make a grid in Adobe Illustrator.
Let’s Start.
How to Show Grid in Illustrator?
Adobe Illustrator also has a Grid that appears across the artboard and lets you organize all the elements on the artboard. If you have multiple artboards then that’s also a great idea to use it. If you try to print the graphics from the artboard, this Grid does not print with the design.
Follow the given step to show the grid.
Step 1: Go to View and select Show Grid from the list of different tools available inside the View menu.
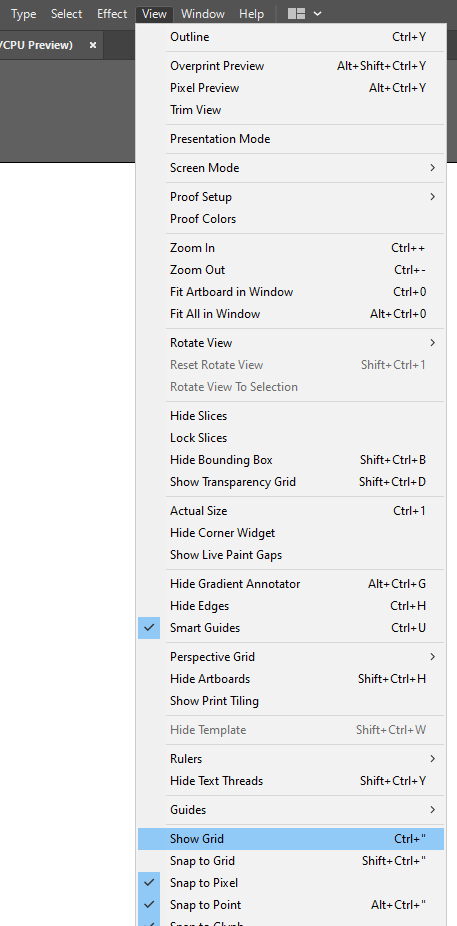
The Grid will appear.

You can also use Ctrl+” keyboard shortcut key to show the Grid.
Do the same steps to hide the Grid when needed.
How to Switch Workspace to Add Grid Tools:
If you want to make Rectangular Grid or Polar Grid then you must switch the workspace first to show them in Toolbar.
Step 1: Run Adobe Illustrator.
Step 2: Create a document.
Step 3: On the top right side you will see an option to switch workspace.
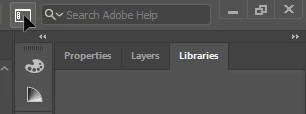
Step 4: As you click on it, a different workspace option will be available.
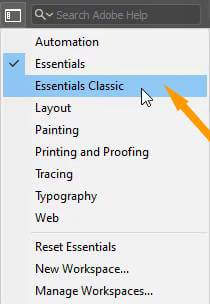
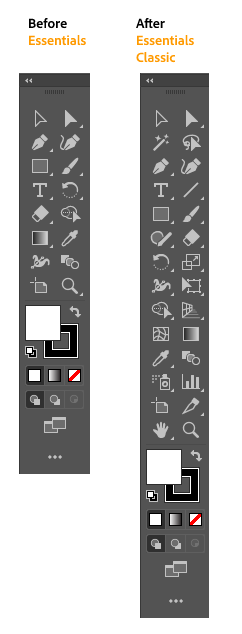
Step 5: Choose Essential Classic.
Step 6: As you click on Essential Classic, you will see that new tools are added to your left toolbar.
How to Make Grid in Adobe Illustrator? (2 Easy Ways)
Adobe Illustrator made it easy to make a Grid. There are two Grids available that we can make. We will now see both ways to make a grid.
What is Rectangular Grid in Adobe Illustrator?
A rectangular grid is a combination of horizontal and vertical lines.

How to Make Rectangular Grid in Illustrator?
Rectangular Grid is made with the Rectangular Grid Tool that is available in the tool of Adobe Illustrator. You can draw the Rectangular Grid onto any part of the artboard. It appears at the place where you need it. It will not flow throughout the whole workspace.
Following are the steps that you can follow to make a Rectangular Grid in Illustrator.
Step 1: Right Click or long-press on the Line Segment Tool in the left toolbar.
Step 2: Now select Rectangular Grid Tool.

Step 3: Click and drag anywhere on the artboard to create a Rectangular Grid, release the click when you have drawn the Grid according to your need.
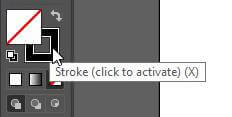
If you want to give any stroke color to the Rectangular Grid then you can use the Stroke color to change it according to your choice.
If you want to change the Height and Width and other settings for the Rectangular Grid then you can double click on the Rectangular Grid or double click anywhere on the artboard to see the Rectangular Grid options.

What is Polar Grid in Adobe Illustrator?
A Polar grid consists of multiple circles at the same distance.

How to Make Polar Grid in Illustrator?
In Adobe Illustrator we can easily create Polar Grid by using Polar Grid Tool. A polar Grid consists of multiple circles. A Polar Grid can easily be drawn at any part of the artboard.
Follow the given steps to make a Polar Grid in Illustrator.
Step 1: Right Click or long-press on the Line Segment Tool in the left toolbar.
Step 2: Select Polar Grid Tool.

Step 3: Click and drag on the artboard to create a Polar Grid, release the click when you have drawn the Grid according to your need.
If you want to change the stroke color of the Polar Grid then you can use the Stroke color from the stroke color palette to change it according to your choice.
If you want to change the Height and Width and other settings for the Polar Grid then you can double click on the Polar Grid or double click anywhere on the artboard to see the Polar Grid options.

How to Make a 3×3 Grid in Illustrator?
If you want to make a 3×3 Grid in Illustrator then you must follow these steps.
Step 1: Draw a rectangle on the artboard by using the Rectangular tool from the left toolbar.

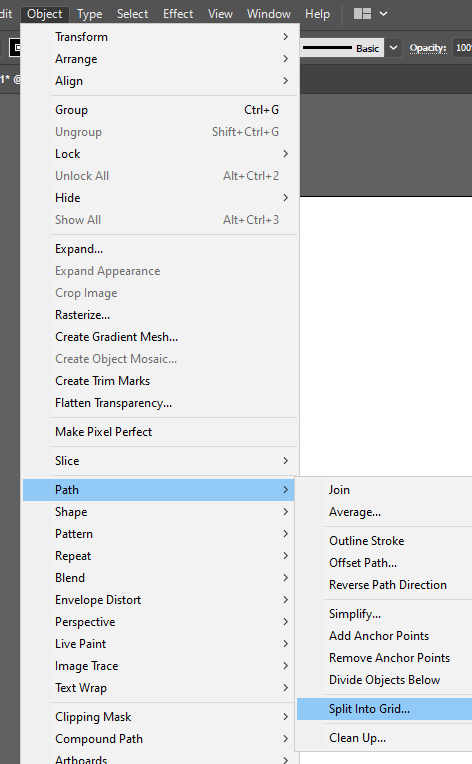
Step 2: Go to Object > Path > Split into Grid.
Step 3: Split into Grid panel will appear.
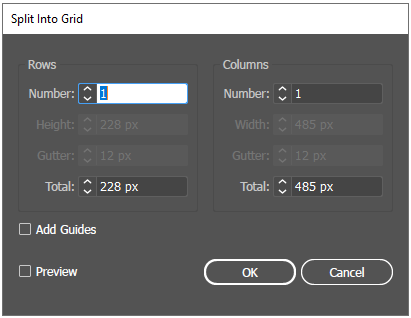
Step 4: Add 3 rows and 3 columns number.

Step 5: Click OK.
Your rectangle will be converted into a 3×3 Grid.

So in this tutorial, you have learned a lot about the Grids in Adobe Illustrator. You can now make Rectangular Grid, and Polar Grid and can also apply Grid to the complete workspace. These easy tricks are going to help you a lot in the Graphics you are going to make from now and as well as in the Future.
All Done! Enjoy.


Leave a Reply