
This tutorial will explain how to outline elements in Illustrator CC. we are going to add another outline to that. Go to the text tool. I will make a bold text and I will just increase the size of it.

Currently, this can still be edited. We could go up the “Type” menu and down to “Create Outlines”.
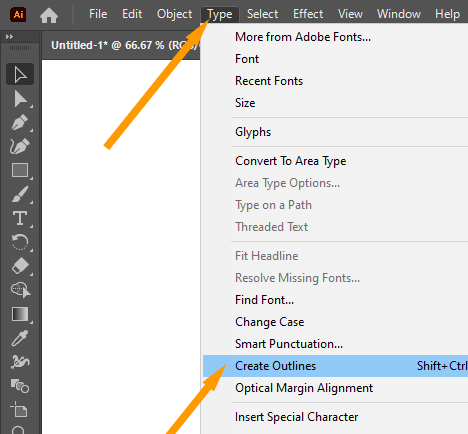
It shows that Illustrator identifies this as non-text now. It is just a pattern of paths.

The color will be left as it is for this. After that, I have to select the text. Go up to the Object and then click on Path, then Offset Path.

The preview box will remain on to see the live result. Let’s set 10 pixels for this. After that, click OK.

It is easily seen that the outside of the text is given another outline.

As you can see, there are two separate pieces of text. these are grouped with eachother.
I will turn that green.

Repeat the step again by going to Object Menu >> Path >> Offset Path.

Leave the Preview option on. I will leave the rest of the setting as it is, and click OK.

You can see another outline around the green outline. This is already selected.

Go to fill option to fill the color. I am selecting black.

So, this is the final outline. Using this method, you can create many outline.

Thank you for reading this tutorial.


Leave a Reply