
Just like the Undo in Illustrator, every designer also needs to redo some tasks. The redo option works after you have to undo something in Adobe Illustrator. Redo helps to perform the task again that we have undone by using the Undo option available in Adobe Illustrator.
Redo helps a lot to switch between the before and after results while making changes in a design. It can save a lot of time while working in Illustrator.
You can also learn:
To work quickly and switch between changes of design after doing Undo, Redo is available.
If you don’t know how to redo any step in Illustrator, then this tutorial is for you. In this tutorial, you are going to learn how to easily redo Adobe Illustrator.
Let’s start.
Table of Contents
How to Redo in Adobe Illustrator
In Adobe Illustrator, Redo can only be performed after you have to Undo anything. Otherwise, the Redo doesn’t work. There are two ways to perform Redo in Illustrator. We will discuss both methods one by one.
1st Method: Redo by Short key
The easiest way to Redo is by using the shortcut keys from the keyboard.
All you need to do is press Shift+Ctrl+Z from the keyboard to Redo the task that has been Undo.
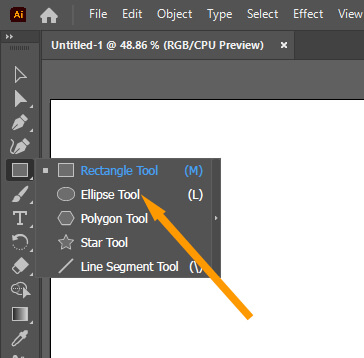
Step 1: We have created a circle using the Ellipse Tool.

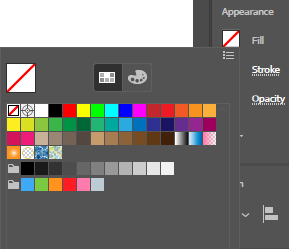
Step 2: Fill the color inside the circle using the Properties > Appearance > Fill.

Step 3:We Undo the color in the Circle by pressing Ctrl+Z from the keyboard and the circle is now without any color as it was before.
But then we realize that the color that was filled inside the circle was the one we needed.
So now, instead of filling the color again into the Circle, Redo it by pressing Shift+Ctrl+Z from the keyboard.
As you can see in the image below the color appears again, as it was in the circle.
2nd Method: Redo by Edit menu
The second method to Redo is by using the Redo option available in the Edit menu.
Go to Edit > Redo.

As you press Redo the step you have Undo in the design will be Redo. You can go again to Edit > Redo to Redo again if needed.
Step 1: As we have drawn a square and then filled the color

Step 2: But then we fill another color in the square to match it with the other design.

Step 3: To check which color looks better, instead of creating another shape and filling color inside it, go to Edit > Undo.

Step 4: Then previously selected color will appear in the shape.
Step 5: To Redo go to Edit > Redo.
Now you can see the second swatch appeared again in the shape.
You Have Learned to Redo in Illustrator.
In this tutorial, you have learned to Redo in Illustrator. There are two methods available. It depends on you either you prefer to use the shortcut key to Redo or you want to manually edit through the Edit menu.
Note: You can Redo the movement of the object, colors, or place the object. Anything can be Redo in Adobe Illustrator. When you press Shift+Ctrl+Z the last step that you have performed will be Redone.
You can also watch our video tutorial to learn How to Redo in Adobe Illustrator, which is given at the start.
Have More Questions?
If you have any questions related to Redo in Illustrator, then you can ask in the comment section below. We have also answered the most frequently asked question as well.
How to Redo in Illustrator Shortcut
The shortcut key to Redo in Illustrator is Shift+Ctrl+Z.
All Done! Enjoy.


Leave a Reply