
Every designer and Adobe Illustrator user faces the issue of losing the quality of the image when resizing. But you need to use the image in your design or project that you are creating. So that’s the point when you get stuck.
Table of Contents
Resizing Image in Adobe Illustrator – Video Tutorial
You might also don’t want that blur or pixelated image. You want to use the image without losing the quality after you resize any.
Adobe Illustrator comes with the best tools compared to the other software. As it provides the facility to create vector designs. So, we also have the best resizing methods for the image in Adobe Illustrator.
So if you are facing the same issue and struggling to solve it, then you are in the right place. In this tutorial, we will show you how to resize an image in Illustrator without losing the quality of the image.
Resize an Image in Illustrator Without Losing Quality
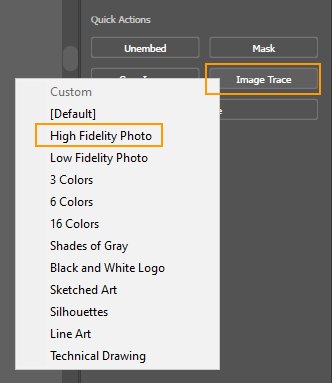
To set the quality of the image after resizing in Illustrator, select the image, and go to Properties > Image Trace > High Fidelity Photo. The image will appear in good quality.
Below, you can find detailed instructions to resize the image without losing its quality. So let’s start.
Creating a New Document
First of all, we will start by creating a new document in Adobe Illustrator.
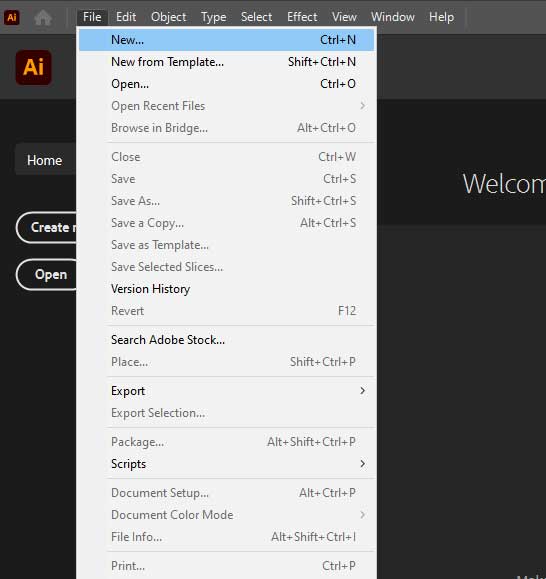
Create a New File by using “File Menu” > New.
You can select your desired document size, I am selecting the “Common” Document from the “New Document” window.
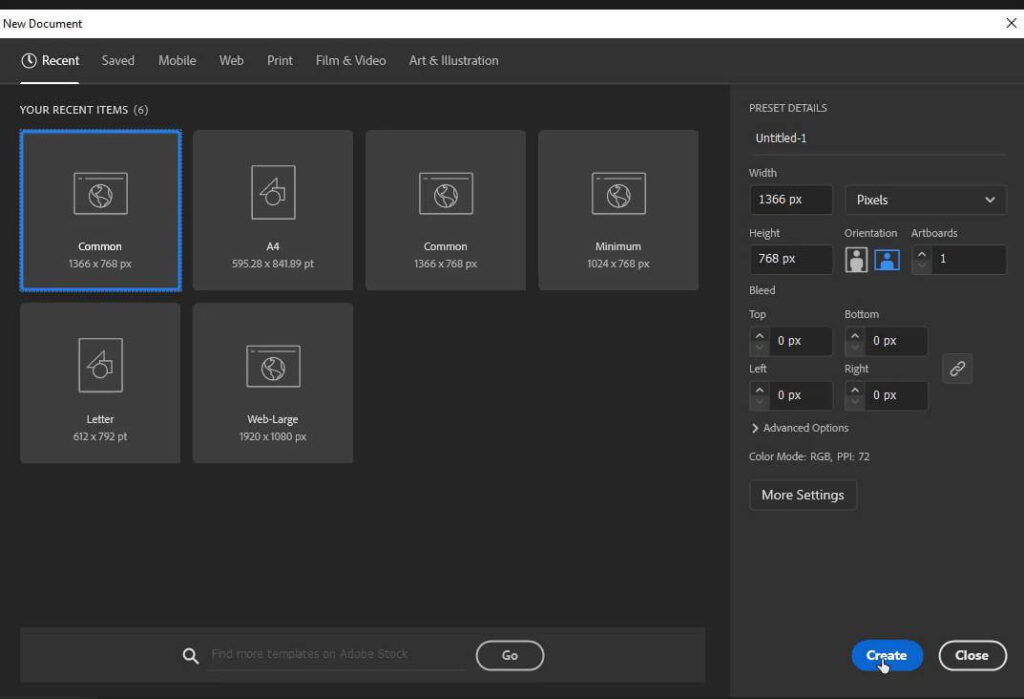
Adjust Preset Details according to your choice and click “Create”.
Place the image on the Artboard
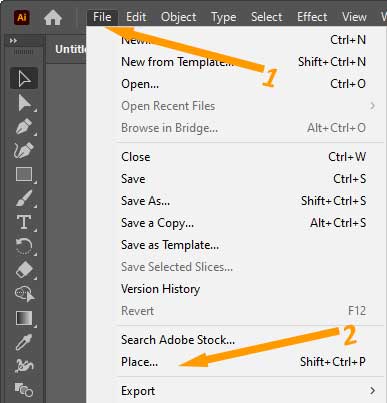
Step 1: Go to File > Place. You can also press Shift + Ctrl + P from the keyboard to place an image on the Adobe Illustrator artboard.
Step 2: Place window will appear.
Step 3: Select the image that you want to use from its location and click on Place.

Step 4: Click anywhere on the artboard to place the image.
Resize the Image in Adobe Illustrator
Step 5: To resize the image, grab the Selection Tool from the left toolbar.

Step 6: Select the image and then click and drag the image from its bounding box while pressing and holding the Shift key from the keyboard, so that it’s equally resized.

After resizing the image, you can see the blur. The edges are also pixelated. So we want to fix its quality.
Step 7: Go to Properties > Quick Actions > Image Trace.
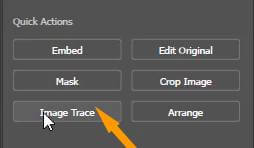
Step 8: Image Trace options will appear.
Step 9: Select High Fidelity Photo.

You can see that as you selected the High Fidelity Photo, the image that was blurred is now converted to a high-resolution image. You can see that the edges are not pixelated.

You have learned to resize an image without losing its quality.
In this tutorial, you have learned to resize an image and then set its quality so that it doesn’t look blurred. The blur images are not attractive if you are adding them as the main object on your artboard.
Have More Questions?
If you have any questions related to resizing the image without losing the quality ask in the comment section below. Here we have also answered some most frequently asked questions as well.
How to Expand Image in Illustrator
If you want to expand the image, after converting it to a High Fidelity photo then go to Properties > Quick Actions > Expand.
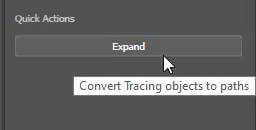
This will expand the image.
How to Enlarge a Logo Without Losing Quality
If you want to enlarge a logo without losing quality, then go to Properties > Quick Actions > Image Trace > High Fidelity Photo.
This will help you to enlarge a photo without losing quality.
All Done! Enjoy.


Leave a Reply