Sometimes after designing a complete text logo or a simple logo, you might need to change its colors. It’s because sometimes the color you picked, for the logo doesn’t match with the company color themes, or also the company wants to change the color theme for their logo or it might be that the logo needs to be in many different colors. Instead of creating a new one, just recolor the existing one.
You can also watch the detailed video tutorial below to learn how to change logo color in Adobe Illustrator.
Adobe Illustrator provides various ways to help you change the color of the logo easily. You don’t have to do a lot of effort to change the color of the text logo or any other logo.
You can also learn:
- How to Make a Text Logo in Illustrator
- How to Make a Logo in Illustrator
- How to Make a Circular Logo in Illustrator
If you are new or don’t have any idea to change the color of the logo in Adobe Illustrator, then you are in right place. In this tutorial, you will learn how to change logo color in Adobe Illustrator.
So let’s start.
How to Change Logo Color in Adobe Illustrator
To change logo color in Adobe Illustrator, select the logo using the Selection Tool and then go to Properties > Quick Actions > Recolor. The Recolor panel will appear. Move the color nodes until you get the color you needed for the logo. Click anywhere on the artboard and the selected color will be applied and the logo color will be changed.
1st Method: Recolor
Step 1: You can use any logo to change its color. Here we are using a combination logo of text and some shapes to change its color. The logo is in the .ai file. So we will open the logo file from its location by double click.

Step 2: As you can see the file is opened and the logo is located on the artboard.

Step 3: Grab the Selection Tool from the left toolbar.

Step 4: To change the color of the logo, first of all, we need to select the logo by using the Selection Tool. Select the logo.

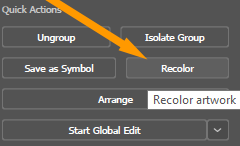
Step 5: You can use the Recolor option available, which can help you to color each color individually very quickly. So go to Properties > Quick Actions > Recolor.
Step 6: Recolor panel will appear.
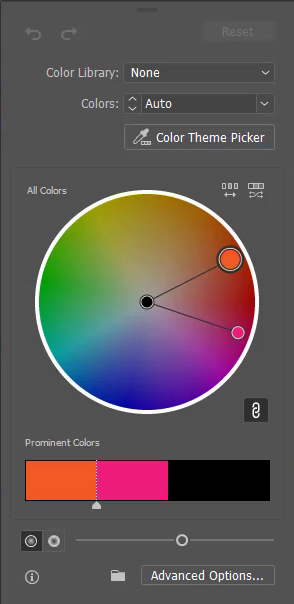
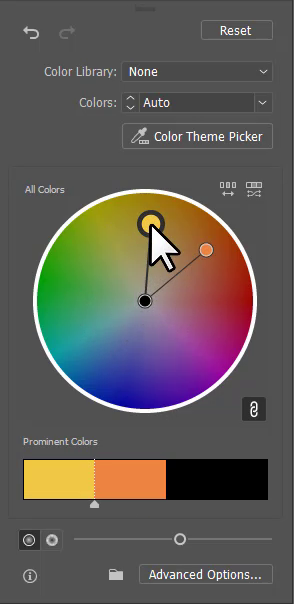
Step 7: Move the color nodes to change the color of the logo.
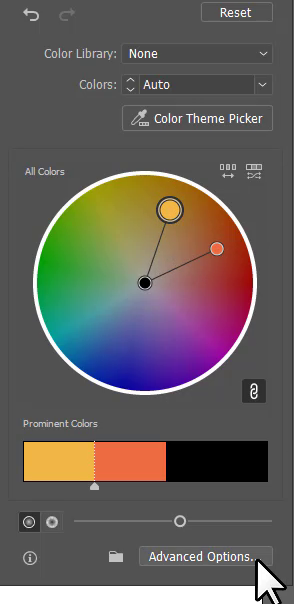
Step 8: You can also change the colors using the Advance Option of the Recolor panel. Click on the Advance Options using the mouse click.
Step 9: Recolor Artwork panel will appear. Here you can see some options available to recolor the logo.
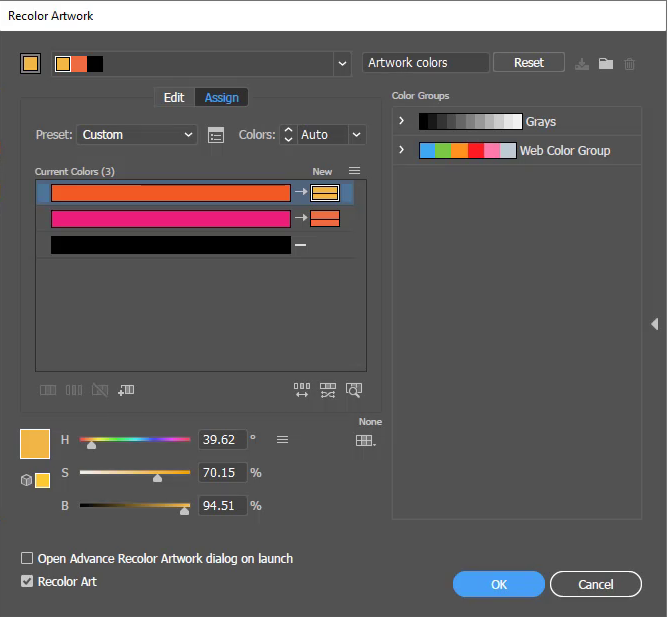
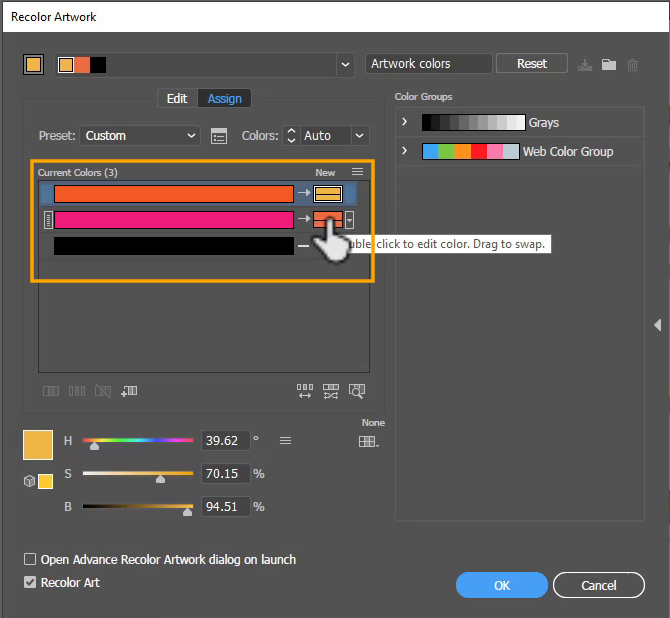
Step 10: As you can see it is showing you the color history as well. If you double-click on the new color applied to the logo, the Color Picker panel will appear.
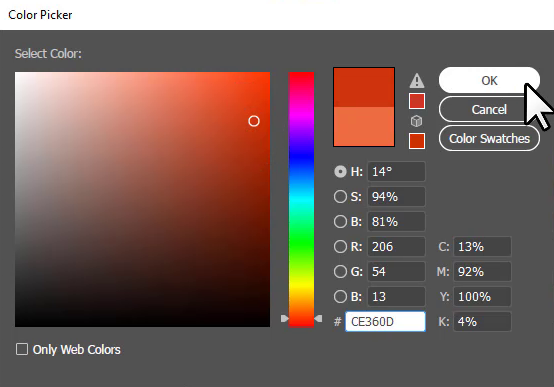
Step 11: Now select the color of your choice from the Color Picker panel. and click OK.
Step 12: The newly selected color will be applied of your choice. Click OK from the Recolor Artwork panel as well.
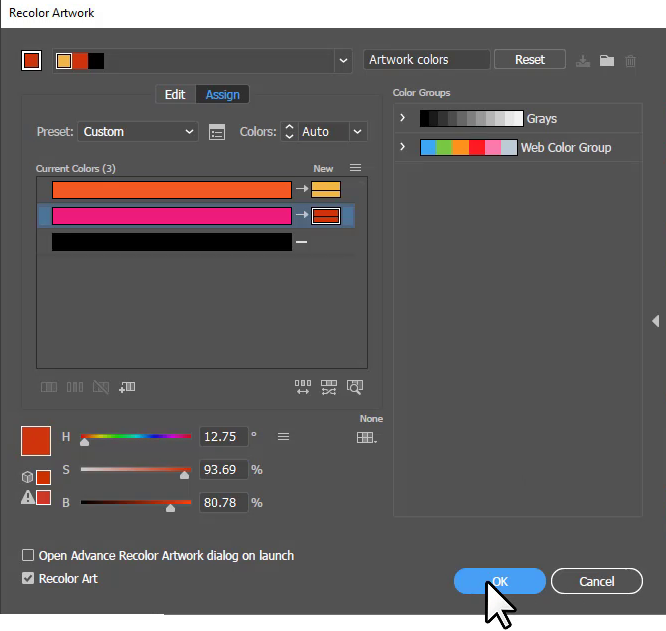
Note: Keep in mind that the Recolor panel selects one color of your choice and the other is automatically selected but by using the Advance options, you can change the other color of your choice as well.
Here is the logo with the new and changed color. You can recolor any logo of your choice by using the Recolor panel.

2nd Method: Fill
You can also use the fill color option to change the color of a logo as well.
Step 1: Select the logo first using the Selection Tool.

If you have a multi-colored logo, then ungroup the logo first. Here we have two colored logos and that is why we will ungroup them. If you don’t ungroup the logo, it might be changed, because for some shapes we have the stroke only and for some, we have filled. So if we change fill, the shapes with stroke only may change.
So ungroup the logo first by right click and selecting Ungroup. Make sure to ungroup each part.
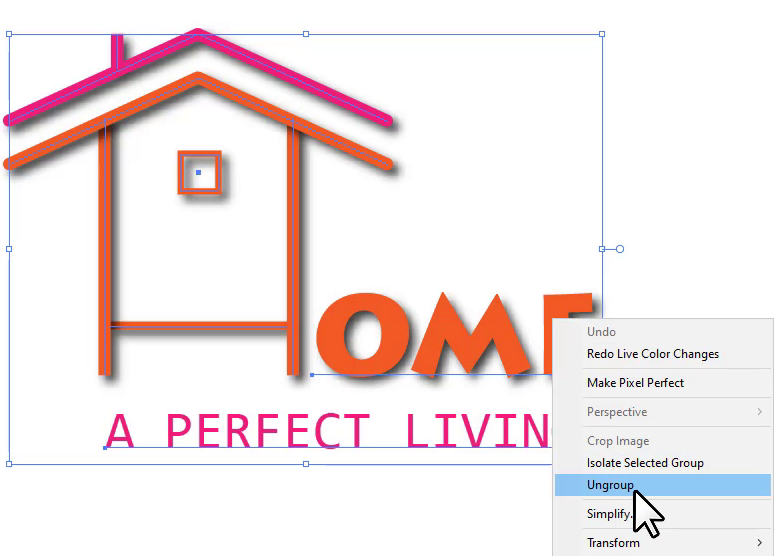
You can also ungroup by Properties > Quick Actions > Ungroup. Ungroup the logo until you see the Ungroup option visible. When all parts are ungrouped, you will see the option of the group.
Step 2: After ungrouping the logo, now grab the Selection Tool from the left toolbar.

Step 3: Select the area that you want to recolor. As we need to recolor the complete logo so we will select the text part first and then the shape.
Select the text first by using the Selection Tool.

Step 4: Go to Properties > Appearance. As you can see in the Appearance panel the fill is highlighted which means that the selected object has filled only.
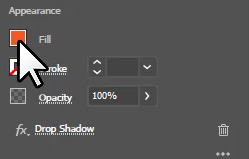
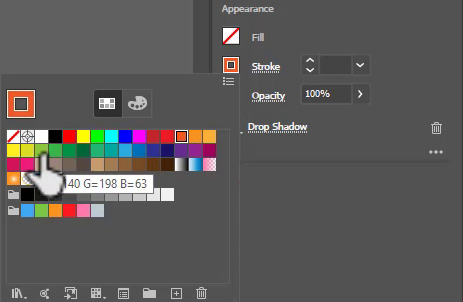
Click on Fill and select Required Color.
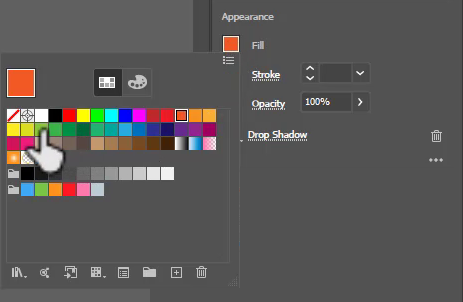
The selected part of the logo is changed to a new color.

Change the other text as well using the same steps.

Step 5: Now select the shape part using the Selection Tool.

Go to Properties > Appearance. Here you can see the Stroke is highlighted and the fill is empty. So we will change the stroke only.
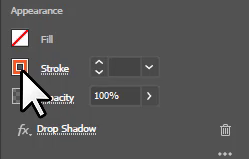
Click on the stroke color and then select the desired color from the panel.
The color of the shape part of the logo is changed. Here is the logo after changing the color from the Fill panel.

In the same way, change all the colors from the fill and stroke depending on the fill and stroke you have.
Note: If you have both fill and stroke to the logo, then change both one by one.
You have learned to change logo color in Adobe Illustrator.
In this tutorial, you have learned to change the color of the logo in Adobe Illustrator. Above given are two different methods to change logo color in Adobe Illustrator. You can use any method to change the logo color according to your choice.
If you don’t know how to make a logo, you can also learn:

Have More Questions?
If you have any questions related to making or changing logo color in Adobe Illustrator, ask in the comment section below. We have also answered some most frequently asked questions below.
Convert logo to one color in Illustrator
If you want to convert the logo color to one color in Illustrator, select the logo using the Selection Tool. Go to Properties > Quick actions > Recolor. The recolor panel will appear. Click on Advance options. In the current colors area, double-click on the color that you want to keep. Color Picker panel will appear. Select the hex code and copy it. close the Color Picker panel.
Now double click on the other color and paste the color code in the same box and click OK. Click OK from the Recolor Artwork. Now you will have the one-color logo.
How to color overlay in Illustrator
To color overlay the image in Illustrator, select the image, go to Edit > Edit Colors > Convert to Grayscale. Now grab the Selection Tool and draw a rectangle on the image. Fill any color like blue or pink, change its opacity to 32% or you can change it according to your choice. The overlay image will be created.
All Done! Enjoy.

Leave a Reply