
As one of the most widely-used vector graphics editors in the world, Adobe Illustrator provides users with a versatile range of tools for creating stunning illustrations, designs, and artworks. One of the key features of Adobe Illustrator is its ability to create realistic hair and fur textures for characters, animals, and other elements in your designs. In this article, we will show you how to draw hair in Adobe Illustrator step by step.
How to Draw Hair in Illustrator
1. Sketch your hairstyle
Before you start drawing in Adobe Illustrator, it’s always best to have a rough idea of the hairstyle you want to create.
Use a sketchbook or paper to sketch out your hairstyle. This will give you a better idea of the shapes and lines you need to create in Adobe Illustrator.
2. Set up your workspace
Once you have your sketch, it’s time to set up your workspace in Adobe Illustrator.
Open a new document and set the dimensions to match the size of your sketch.
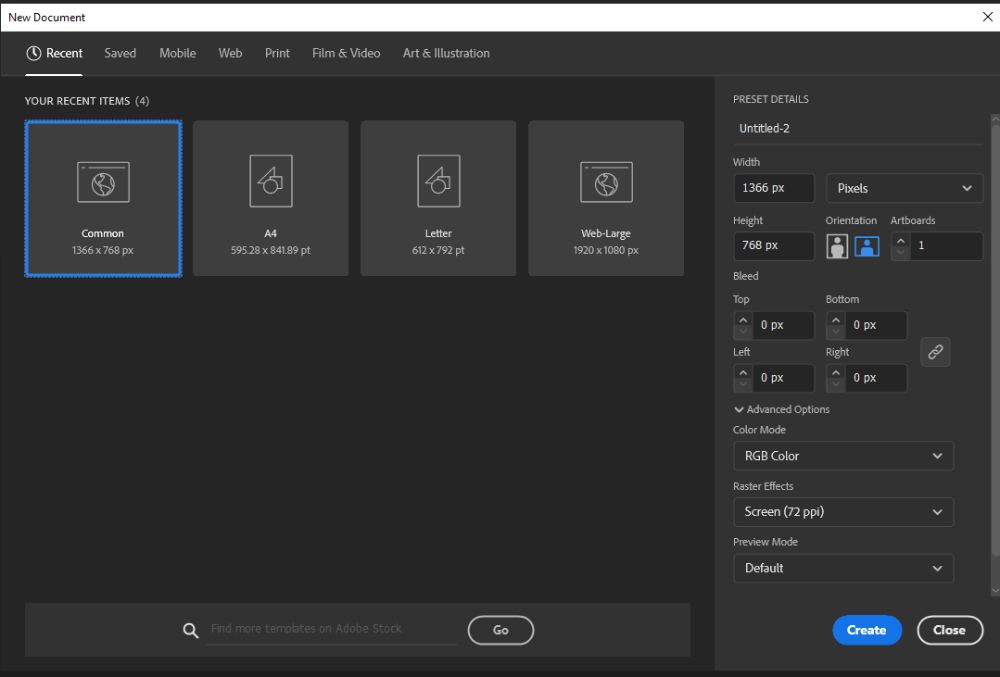
It’s also important to select the appropriate color mode and resolution for your project. For example, if you plan to use your artwork for print, set your color mode to CMYK and your resolution to 300 DPI.
3. Create the base shape
The first step in drawing hair is to create the base shape of the hairstyle. Use the pen tool to create the outline of the hair, following the lines of your sketch.
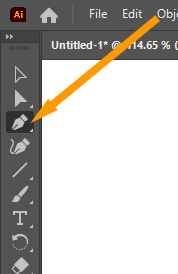
Make sure to use a stroke color that contrasts with the color of the hair, so you can see the shape clearly.
Image Source: https://www.youtube.com/watch?v=8JUjJNKJ9qA
4. Add layers of hair
Next, it’s time to add layers of hair to your hairstyle.
Use the pen tool to draw individual strands of hair, following the flow of the hairstyle.
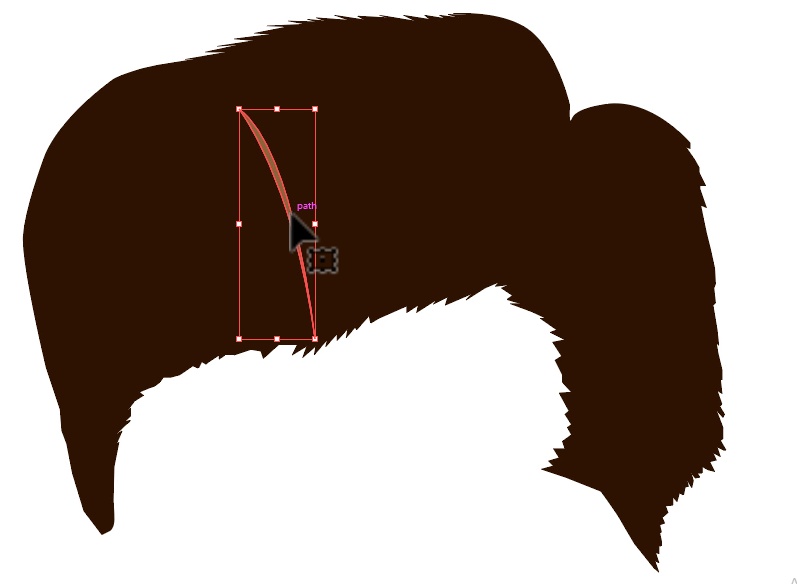
Vary the thickness and length of the strands to create a natural-looking texture.
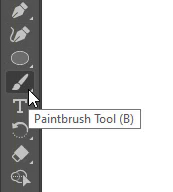
You can also use the brush tool to create softer edges and add more depth to the hair.
5. Add shading and highlights
To make the hair look more realistic, you’ll need to add shading and highlights.
Create a new layer above the base shape and use the pen tool to draw shadows on the hair.
Use a darker color than the hair color to create a sense of depth. You can also use the gradient tool to create a smooth transition between the shadow and the hair.
For highlights, create a new layer above the shading layer and use the pen tool to draw highlights on the hair. Use a lighter color than the hair color and follow the direction of the light source in your design. You can also use the gradient tool to create a smooth transition between the highlight and the hair.
6. Fine-tune your artwork
Once you’ve added shading and highlights, it’s time to fine-tune your artwork.
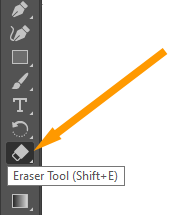
Use the eraser tool to remove any unwanted lines or shapes.
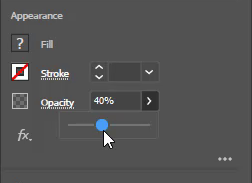
You can also adjust the opacity and blending modes of your layers to create a more natural-looking texture.
Don’t be afraid to experiment with different brushes and tools to achieve the look you want.
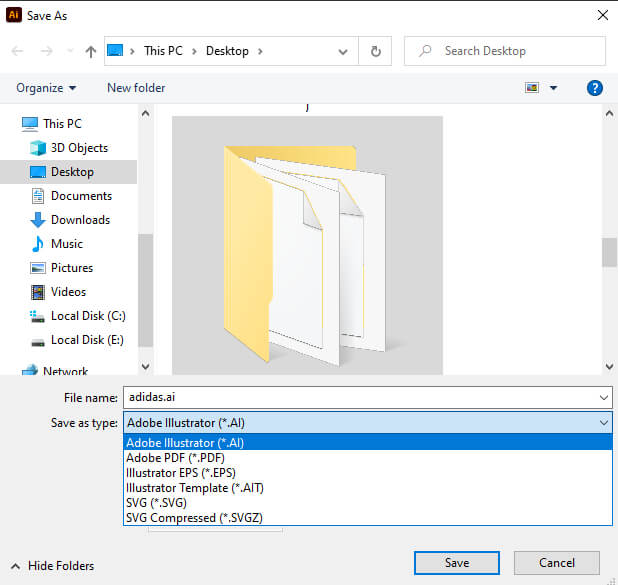
7. Save and export your artwork
Finally, it’s time to save and export your artwork. Save your Illustrator file in a format that preserves the layers, such as .ai or .eps.
You can also export your artwork as a high-resolution JPEG or PNG file for use in other applications.
In conclusion, drawing hair in Adobe Illustrator requires patience, practice, and attention to detail. By following these steps and experimenting with different tools and techniques, you can create stunning and realistic hairstyles for your illustrations and designs. Remember to keep your workspace organized and save your files regularly to avoid losing your progress.
Leave a Reply