Welcome to EZGyd.com. If you want to learn detailed “Graphic Design Basics”, then you are in the right place. We will give you a step-by-step guide to using the different tools in Adobe Illustrator. Today, we are starting Adobe Illustrator.
Graphic Design Basics Video Tutorial
Graphic Design Basics for Beginners:
So, the first question is whether Photoshop is good but Illustrator isn’t that good, or Illustrator is good and Photoshop isn’t that good.
Well, there is no comparison because Adobe is the organization that is making both software.
Read: Adobe Illustrator vs Adobe Photoshop

So obviously Adobe will not raise a conflict in its inventions. So, keep in mind that these are different software. Adobe Photoshop has a totally different work of editing images. Adobe Illustrator has a different job of making vector illustrations. Illustrator is software that is designed for making icons, logos, and similar work or if you go to a higher level, you can design a lot of similar graphics. This software has a big space If you learn this, the biggest benefit you get is that you can earn money. There are many websites like Upwork and Fiverr. So there are many more sites where you can earn money. For which you would have to learn first.
Read: What is Adobe Illustrator & What is it Used for
The interface of Adobe Illustrator
This is the Adobe Illustrator interface.
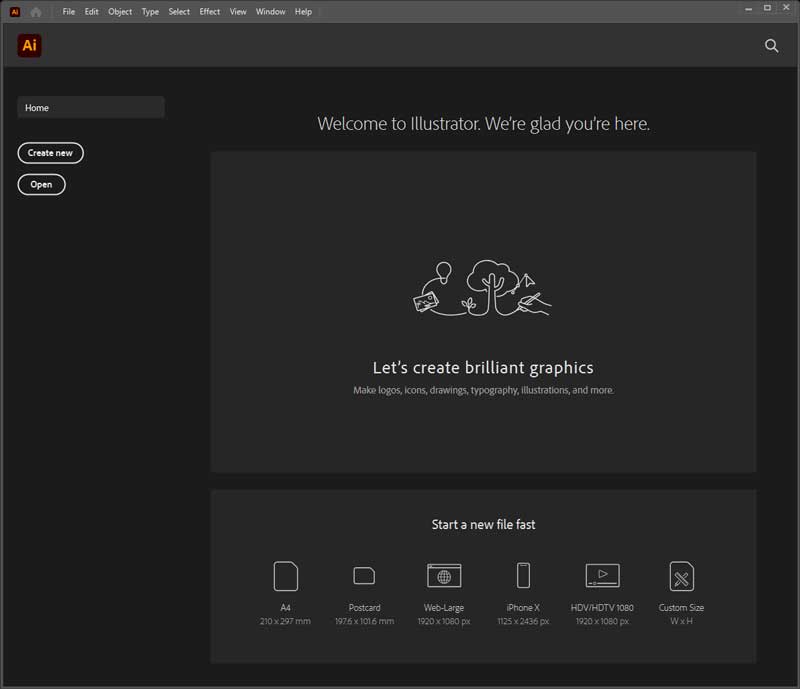
Here is a complete video tutorial about Adobe Illustrator Interface for beginners. You can watch the video or continue reading below.
When you start Illustrator, take a new file. Now when you take a new file illustrator is going to ask you a few things like;
- Create New
- Open
- Start a new file fast
Selecting Workspace Document
I am simply selecting the A4 size.
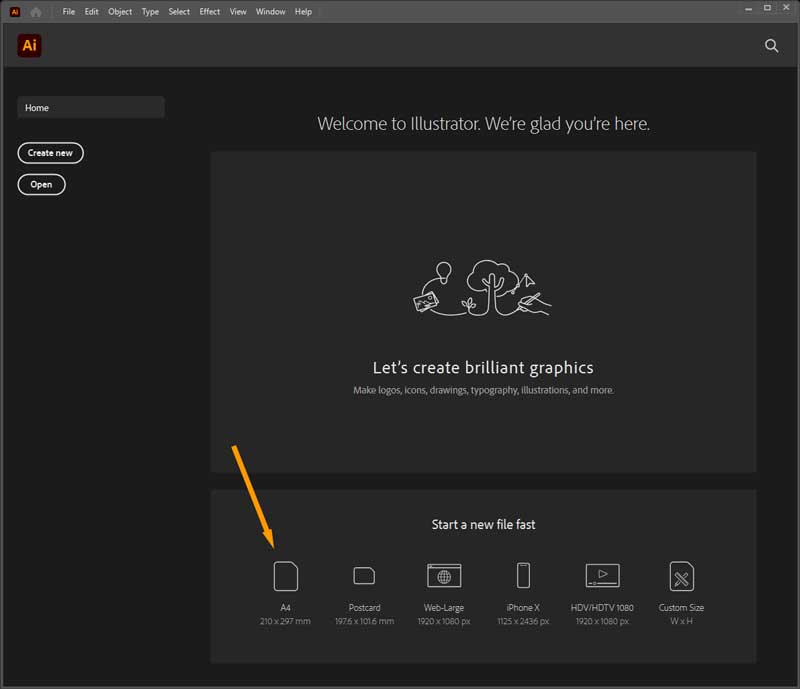
There are some more details on the interface here which I am going to discuss later. Otherwise, you will get bored, okay?
So here is our new document. This document is of A4 size.
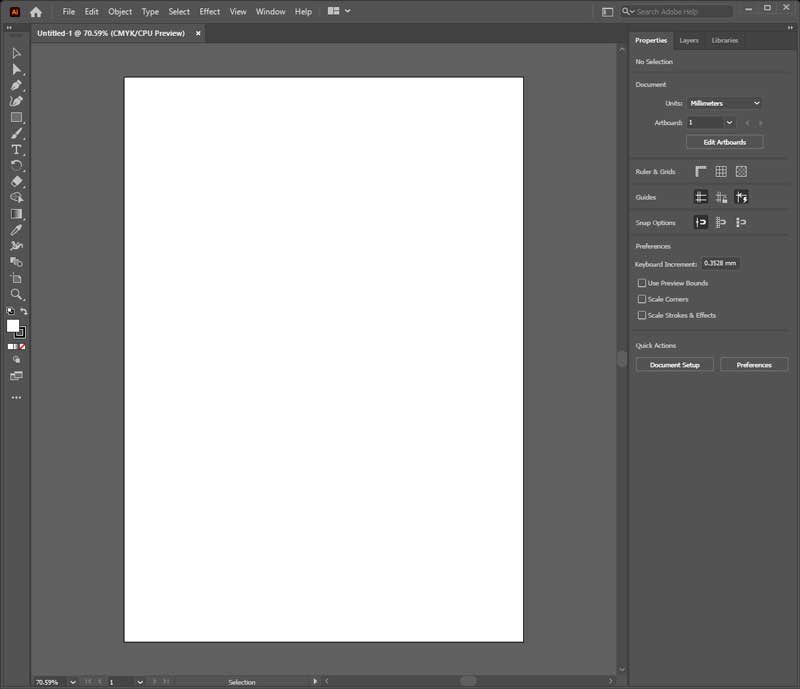
Tools in Adobe Illustrator Workspace
If you look at the left side, there is a toolbar. In the toolbar, there are many tools. We are going to use these tools in different tasks. Illustrator’s interface is very professional. You can move this toolbar from its place and place it back too.
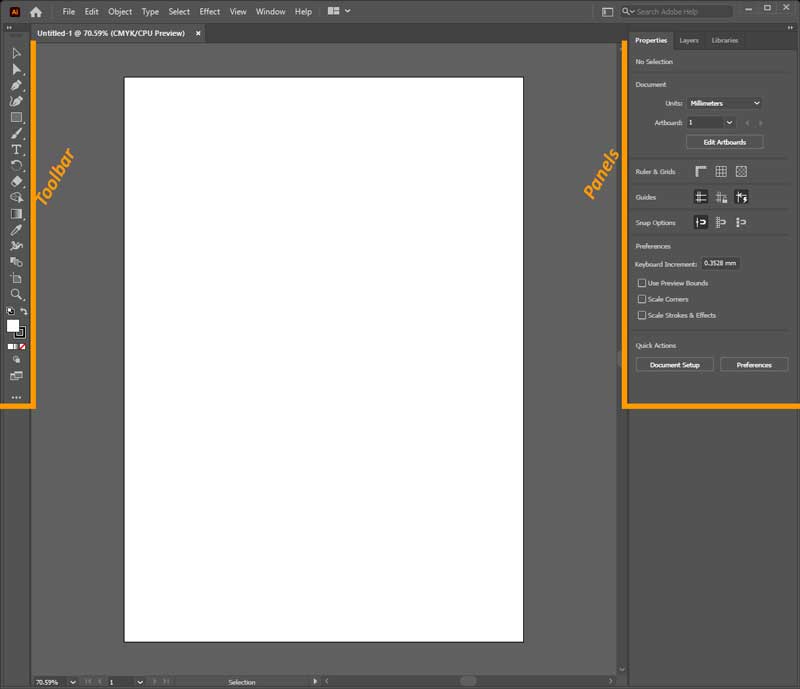
On the right side, these are panels.
Using Tools in Adobe Illustrator
First of all, we will start from the toolbar.
This is the selection tool. You can see, there is a sign of a black arrow.
Next to the selection tool is the direct selection tool, which has a white arrow. The direct selection tool is very interesting. It will give us the benefit to select and move a single anchor point in a shape.
To use these tools, I will make some shapes, then we will use these.
Creating a Rectangle
You can make rectangle shapes by selecting the rectangle tool. After selecting, Click and drag the mouse, and it will make a rectangle.
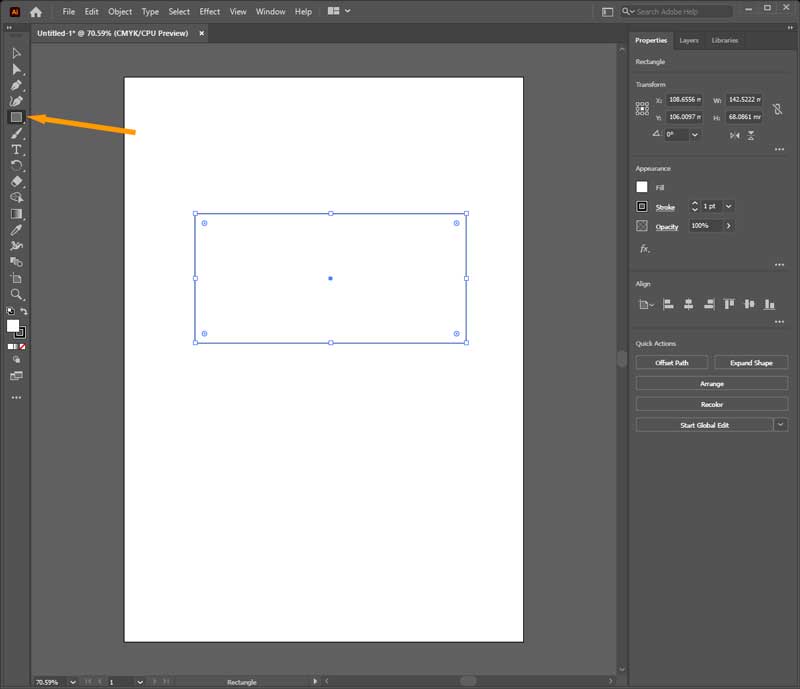
If we select this shape, a box appears around it. By selecting, we can move the object, wherever we want.
This box is called a bounding box and there are small boxes called resize handles.
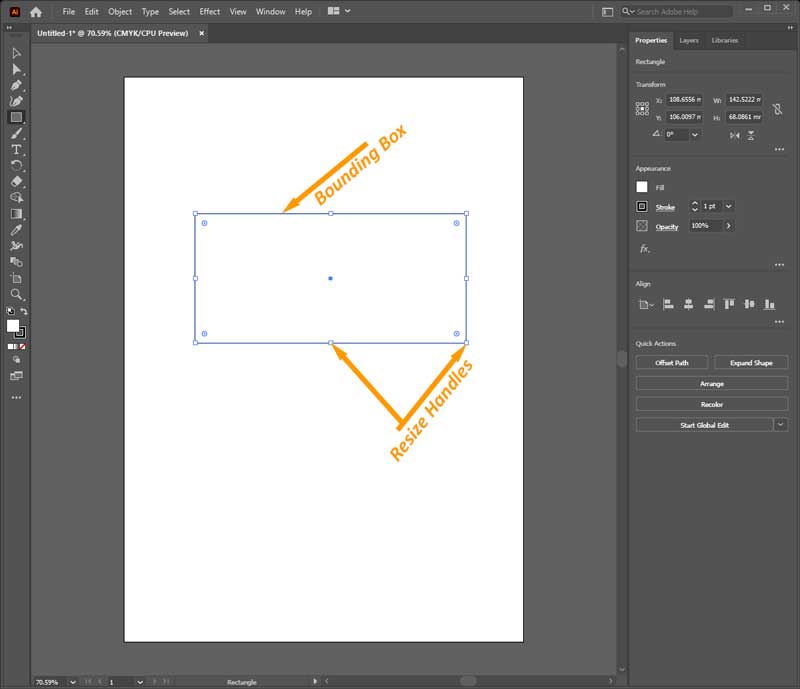
We use resize handles to make the shape smaller or larger.
Rotate Rectangle
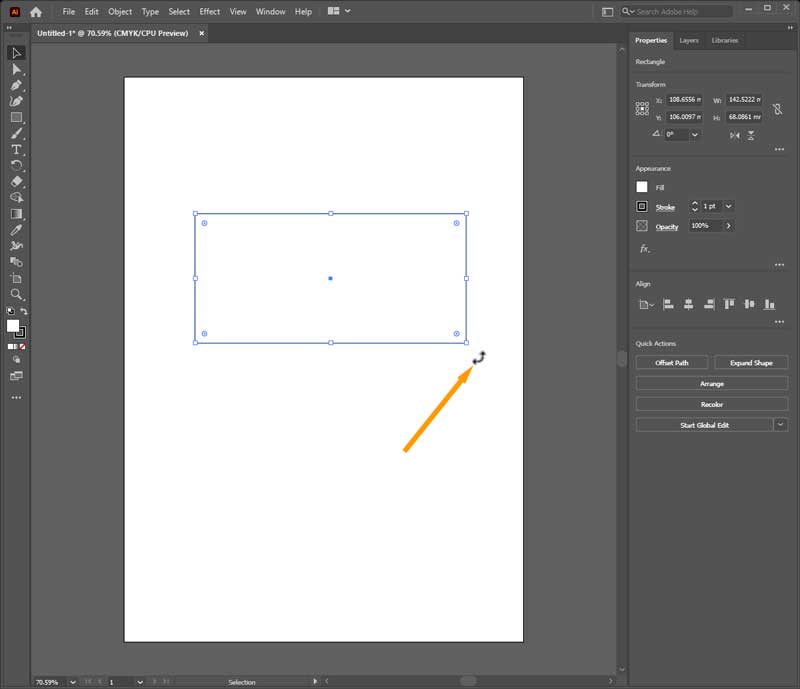
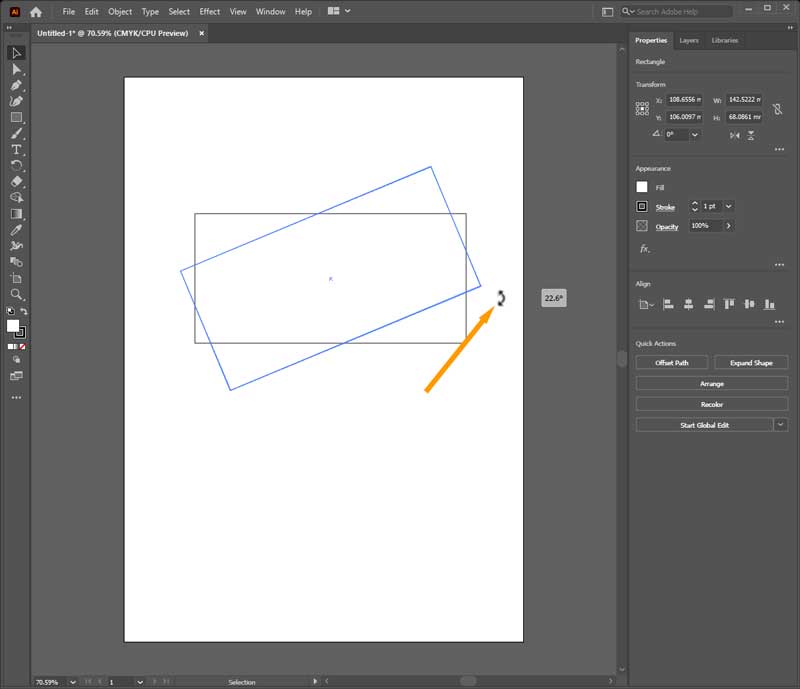
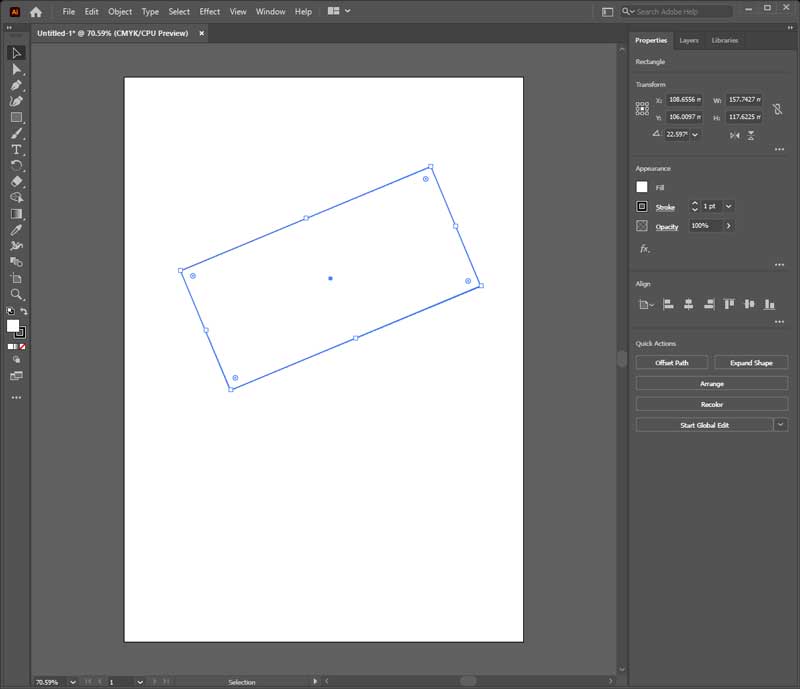
We can also rotate the object by using the selection tool. If we place the cursor near this resize handle, you can see, that the cursor is slightly tilted. At this time, if we click and drag the mouse, then you can see it is rotating.
Using Zoom Tool in Adobe Illustrator
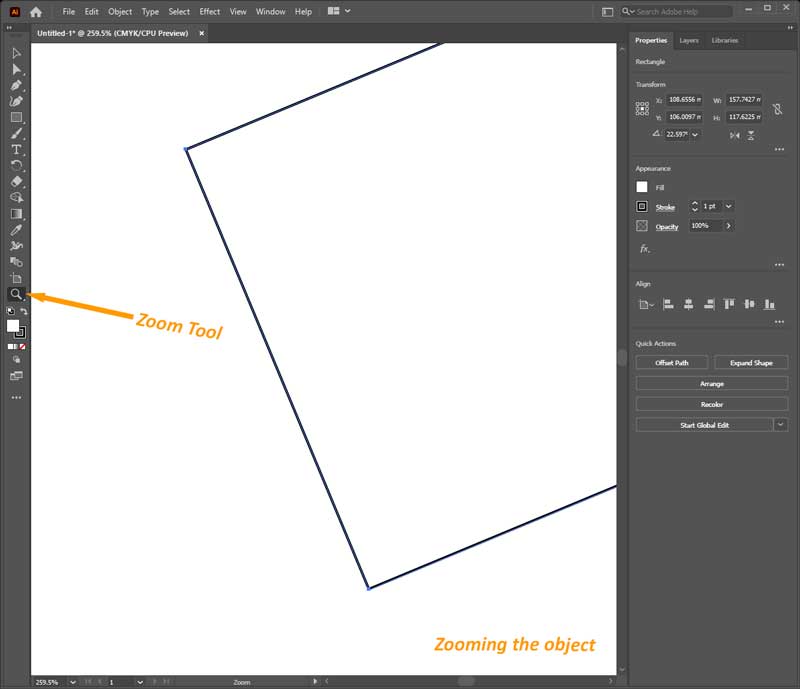
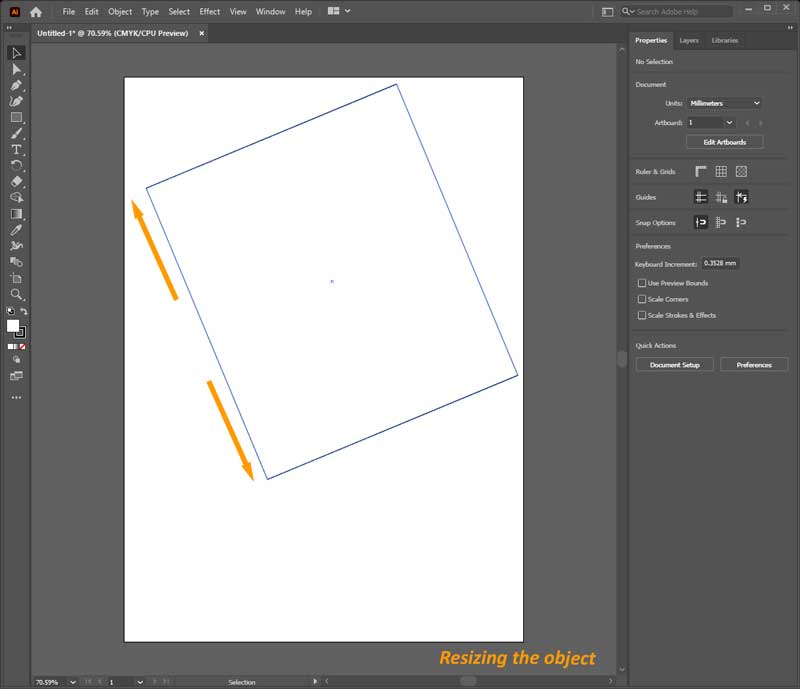
If you want to zoom, remember that there is a difference between the Zooming object and resizing object.
Zoom means you are seeing the object by bringing it closer to you.
Resizing Object in Adobe Illustrator
Resizing means you are making the object bigger.
For Zoom, there are various choices in Illustrator. For example, this is a zoom tool given in the toolbar.
If we click on the zoom tool, a magnifying glass with a plus (+) sign is appearing as our cursor. You can zoom on any object by clicking on it. If we press the alt key, the + sign will convert into a minus (-) sign. Now, you can zoom out on any object.
Adobe shows you the maximum 64000% zoom. So, we can do our illustration with details.
Using Fill in Adobe Illustrator
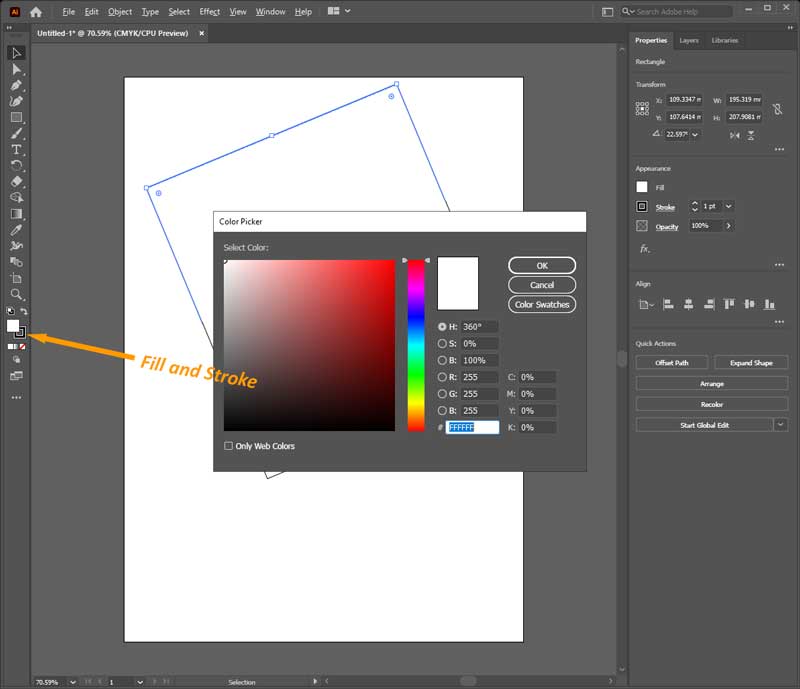
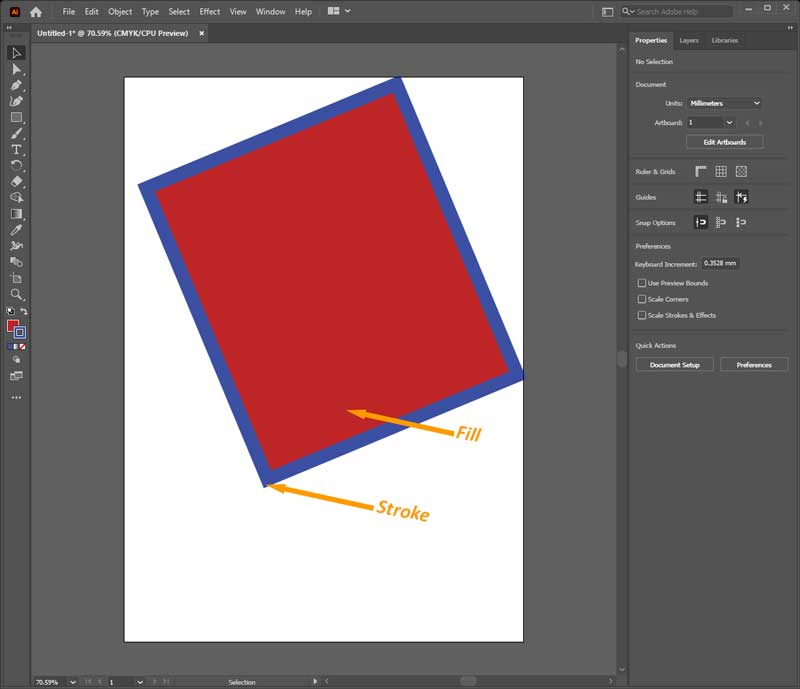
The last thing in the toolbar at the bottom, there are two boxes. We call these fill and stroke. “Fill” is the inside color of any object, and “stroke” is the outline of the object. If you want to change the color of fill or stroke, simply double-click on fill or stroke.
A color panel will appear where we can select any color.
These are the basics of using Adobe Illustrator. You can learn much more in our tutorials about graphic design basics to advance level. Adobe Illustrator is best for visualizing different designs for the web, banners, illustrations, and much more.
All Done! Enjoy.

Leave a Reply