
Adding Bleed is important to get the print to the edge of the paper. Otherwise, you will get an unwanted margin on your printed document. For example, you want the background of the document to have an image. So to avoid the white space you must add bleed first.
Add Bleed in Adobe Illustrator – Video Tutorial
You can also watch below video tutorial to learn how to add Bleed or Printer marks in Adobe Illustrator.
Adding Bleed is necessary to avoid the unwanted white space on the edges of your document. You can add Bleed while creating a new document and as well as to an existing document.
If you are new or don’t have any idea to add bleed to your document in Adobe Illustrator then you are in the right place. In this tutorial, you will learn how to add bleed in Adobe Illustrator.
So let’s start.
How to Add Bleed in Adobe Illustrator
To add Bleed in Illustrator while creating a new document, in the New Document panel and Bleed value in the Bleed section and select Create option. The artboard will be created. You will see that the artboard will have bleed marks that appear around the document.
Following are the detailed steps to add Bleed marks in Adobe Illustrator.
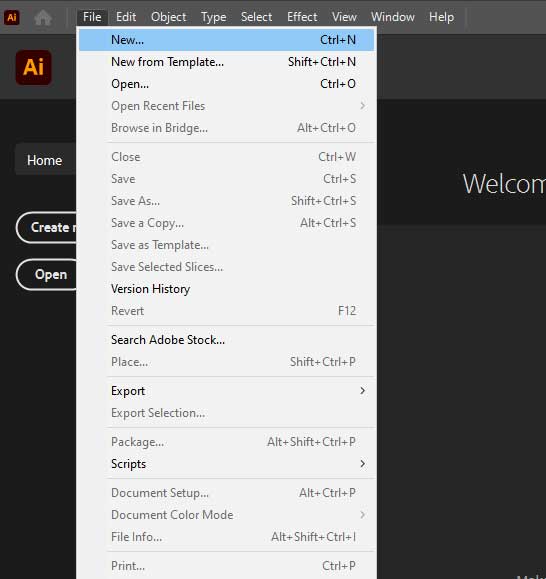
Step 1: As you start Adobe Illustrator, create a new document by File > New. You can also press Ctrl+N from the keyboard to Create a new Document.
Step 2: New Document panel will appear.

Step 3: From the New Document panel, choose the document size first before adding bleed. You will see the Bleed option available for the top, bottom, left, and right. The Bleed depends on the page size you choose.
You can choose the Bleed size according to your choice. The commonly used or standard US bleed size is 0.125″.
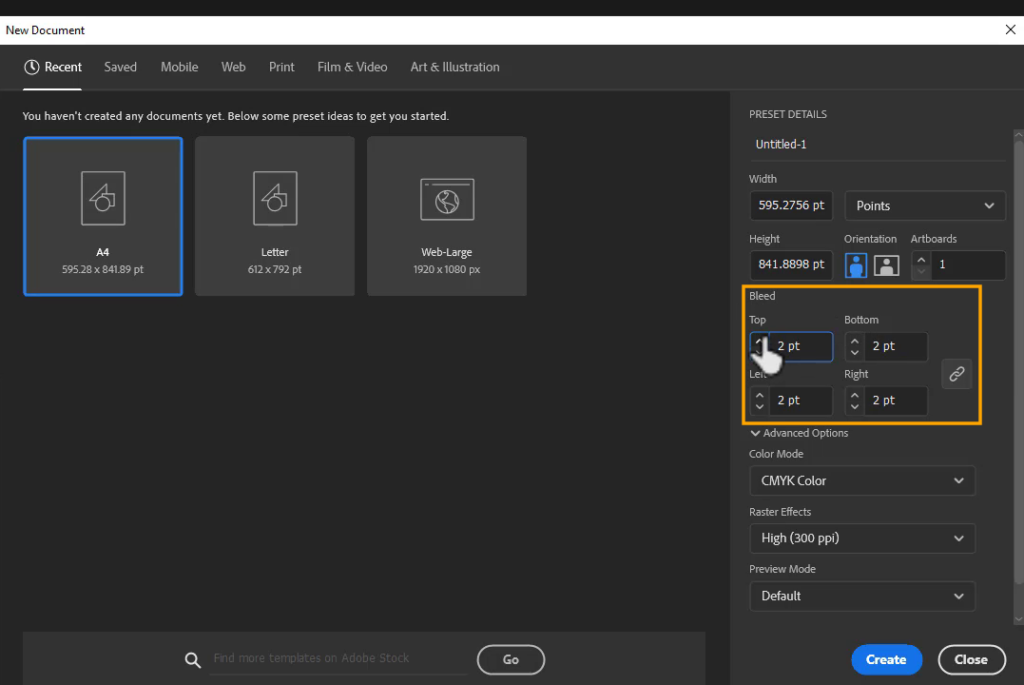
Make sure that the link button is activated otherwise only one side bleed will be added that you choose from the top, bottom, left, or right. If the bleed is activated the value you add to one box will be applied to all.
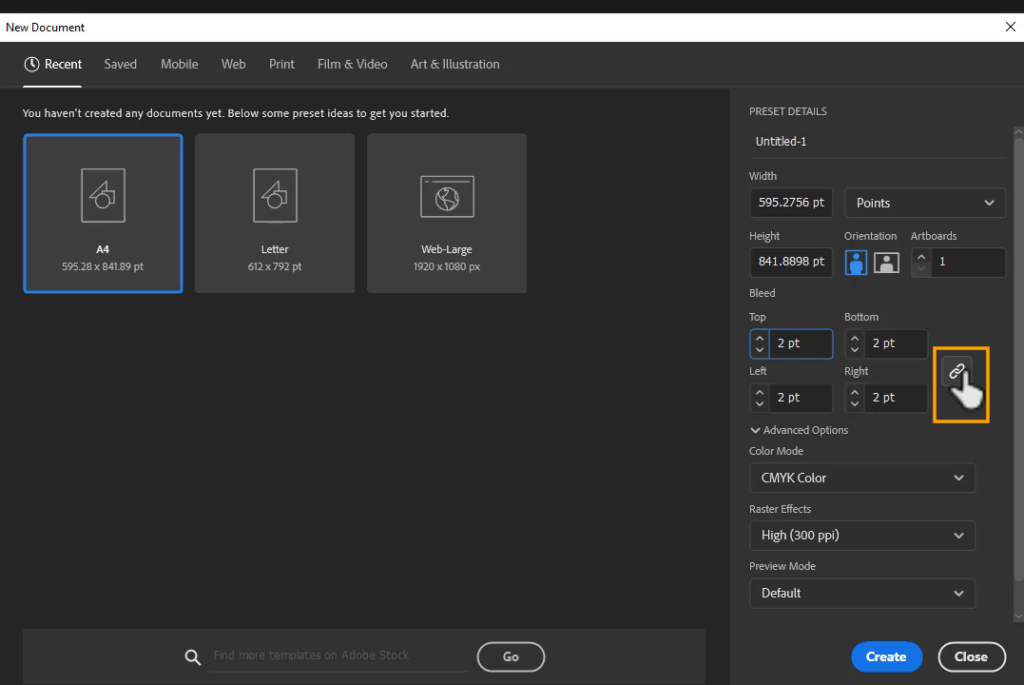
Step 4: Select Create option to add bleed marks and as well as create the document.

As you create the document you will see the bleed marks appear around the document.

Add Bleed or Crop Marks to an existing Document in Illustrator
Sometimes it happens that you have finished all the designs but forgot to add Bleed or crop marks while you created the document. Don’t worry. As you can see we have the following design and we don’t want any white margins after printing it. So it’s really necessary to add Bleed or crop marks to it.

To add Bleed or Crop marks to an existing document in Illustrator, go to File > Document Setup.

Document setup panel will appear. In the Document Setup panel, you will see the option of Bleed. Add the Bleed of your choice and click OK.
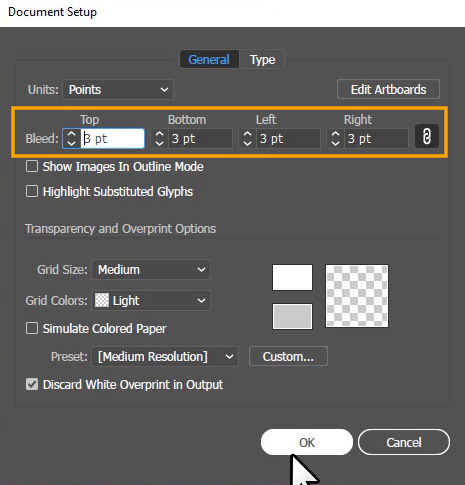
The Bleed marks will be applied around the document.

Stretch the design to Bleed marks if needed.

Add Bleed while saving Document
You can also add the bleed while saving the document in Adobe Illustrator.
To save the document with Bleed, go to File > Save as or press Shift+Ctrl+S from the keyboard.
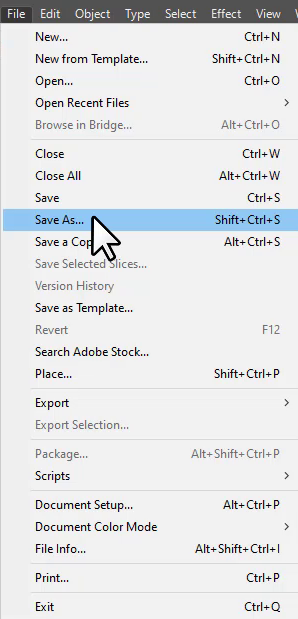
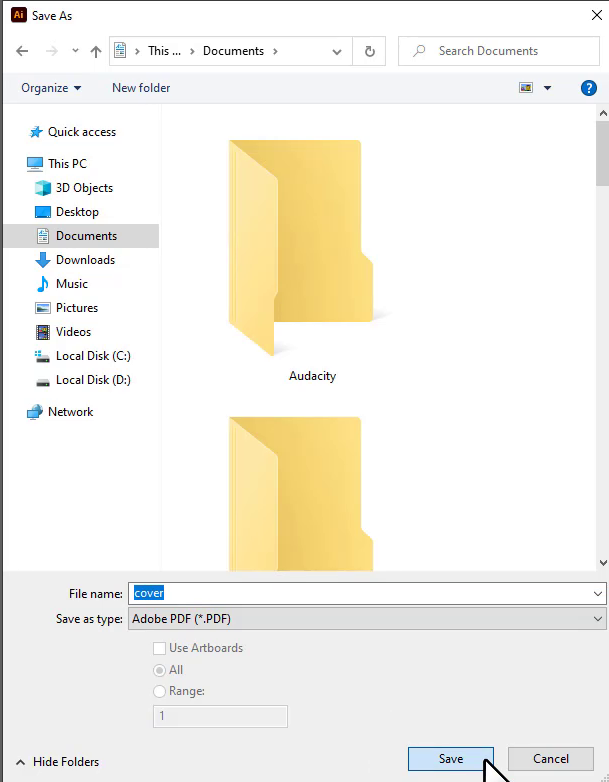
The Save As panel will appear. Select the location and from the Save as type, select Adobe PDF(*.pdf).
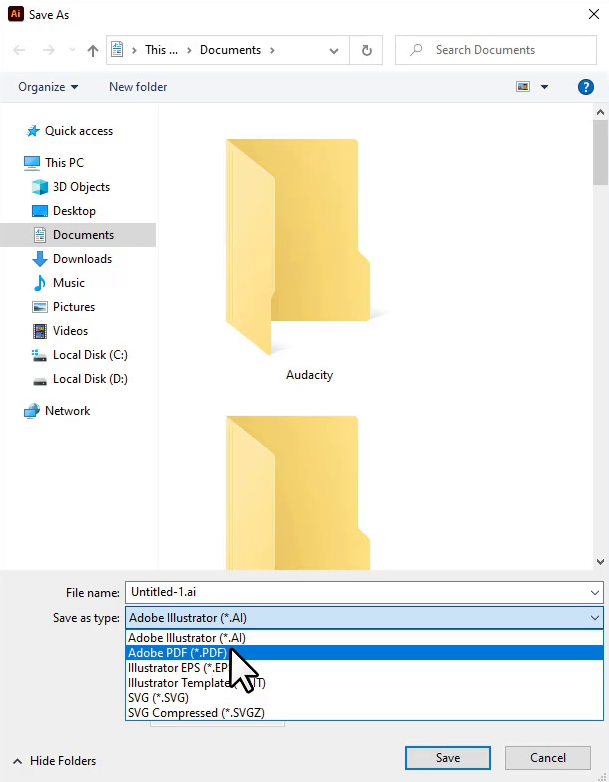
Click on Save.
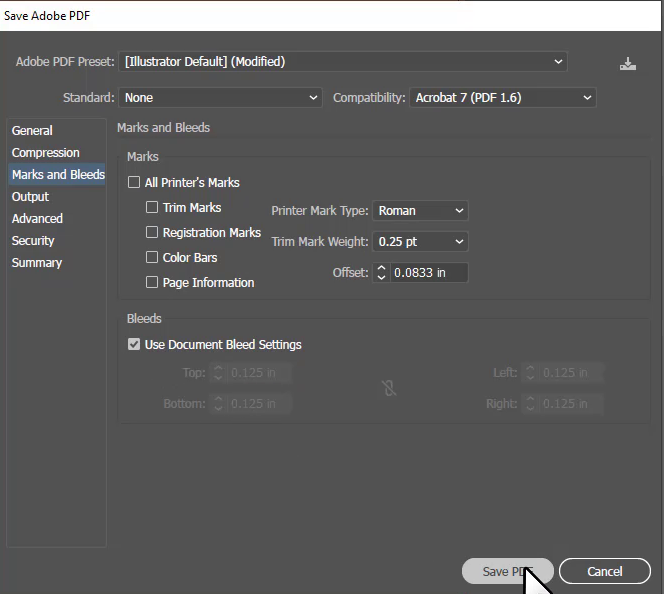
Save Adobe PDF panel will appear. From the Marks and Bleed section, you will see the Bleeds option, if you already have applied the Bleed then let it remain as it is otherwise you can also change or add the bleed here.
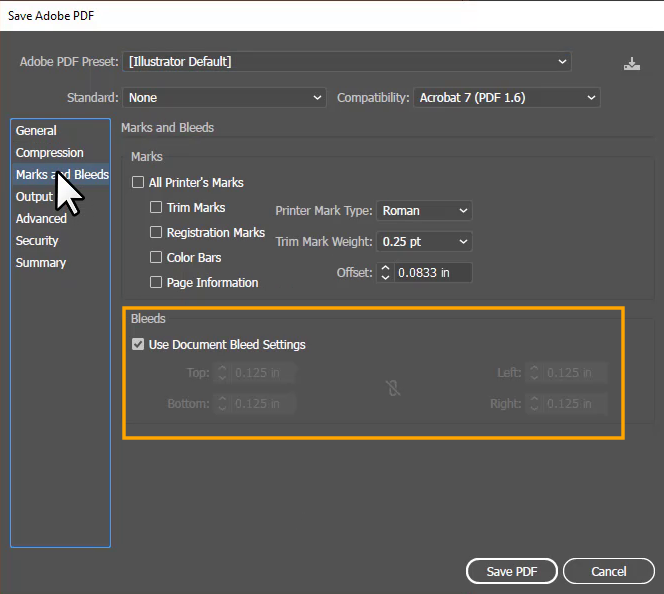
Then select Save PDF.
The document will be saved.
You have learned to add bleed in Adobe Illustrator.
In this tutorial, you have learned different ways to add bleed or crop marks to your document. You can add bleed marks to a new document or an existing document as well. Bleed or crop marks help you not have the white margin around the printed design. Because if you have a flyer or any card but the background color is added or any image, then make sure to add bleed marks. So that the design remains according to what you have made.
You can also learn:


Have More Questions?
If you have any questions related to adding bleed or crop marks to the document in Adobe Illustrator, you can ask in the comment section below. We have also answered some most frequently asked questions below.
How to add bleed in Illustrator PDF
To add bleed in pdf in Illustrator, save your document as pdf and select OK, as you select OK, the Adobe Save PDF panel will appear. You will find Marks and Bleed option. In this section add Bleed for the Document and select Save PDF.
How to remove bleed in Illustrator
To remove the bleed in Illustrator, go to File > Document setup. Set the Bleed to Zero and press OK. The bleed or crop marks will be removed.
Bleed not showing in Illustrator
If the bleed is not showing make sure you are not in the Trim View. Get out of the Trim View to see bleeds by View > Trim View.
Make sure to Turn on Guides as well to show the Bleed marks. If Bleed is not showing then go to View > Guides > Show Guides. The Bleed will show up.
All Done! Enjoy.
Leave a Reply