Adobe Illustrator is used to creating logos and different creative designs. But a designer always wants to add new fonts to match their work and creativity. A lot of fonts are available in Illustrator, still being a designer we want more and more fonts.
You can also watch the detailed video tutorial to learn how to add fonts in Illustrator and make your design more creative.
You don’t have to separately install fonts for Adobe Illustrator. The font you install on your computer is also added to Adobe Illustrator. So no need to worry about installing fonts directly through the software.
If you are new or don’t have any idea to install fonts in Adobe Illustrator then you are in the right place. In this tutorial, you will learn to add or install new fonts in Adobe Illustrator.
How to Add Fonts to Illustrator Windows 10
Choose a font from any font website like “dafont.com” or Adobe font you like and download it. Right-click on the file and select Extract Here. Open the font file from any of these extensions (.otf, .ttf, or .fnt) and click on Install. The font will be installed on the Computer. Now select the text in Illustrator and then in the font style type the font name and then select to apply.
Note: Make sure to restart the Adobe Illustrator, if it is open while installing the font. So that the font appears in Adobe Illustrator.
Step 1: You can choose any of your favorite fonts to download it. Here we are using Magesta fonts from “dafont.com”. Click on the Download button to download it.
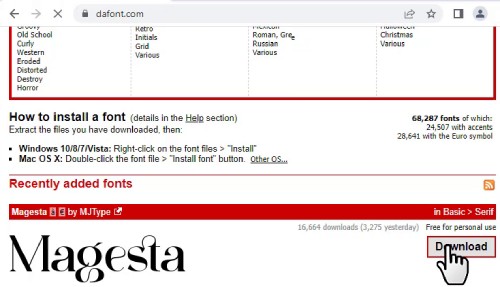
The font is downloaded and you can access the font file from the Downloads folder.
Step 2: Right-click on the .zip file with a font file and then select Extract Here.
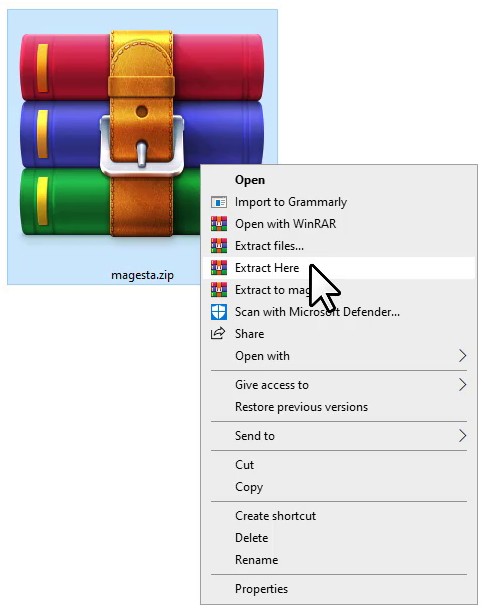
The files are extracted.

Step 3: Right click on the (.otf, .ttf, or .fnt) file and select Install.
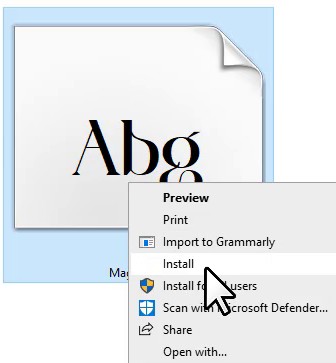
You can also open the file and then click on Install.
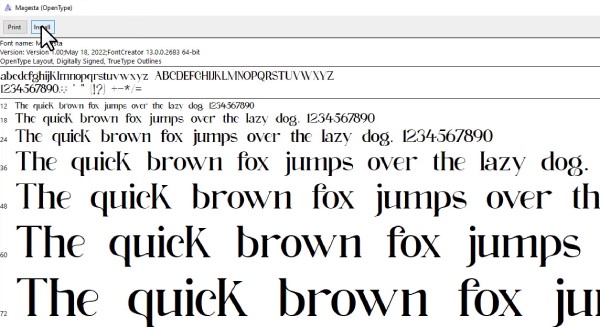
The font is installed, and now you can use it in Adobe Illustrator.
Note: Make sure to close the Adobe Illustrator before installing the font or restart it to be able to use the font.
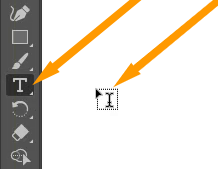
Step 4: Now type any words in Illustrator using the Type Tool.
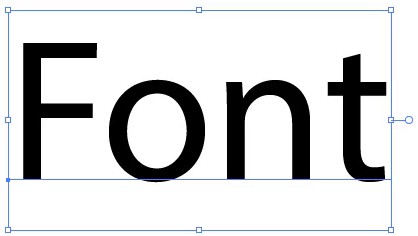
Step 5: In the Properties > Character > Set the font family, type the name of the font that you have installed. Click on the font as it appears and the newly added font will be applied to the selected text.
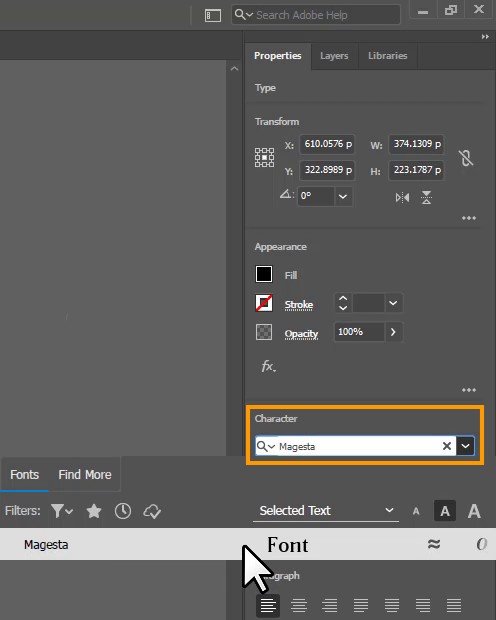
The new font that we have installed/added is applied to the text.

You have learned to add fonts to Adobe Illustrator.
In this tutorial, you have learned to add fonts in Adobe Illustrator. You can now easily download and apply the new font to any text design or logo.
Have More Questions?
If you have any questions related to adding fonts in Adobe Illustrator, you can ask in the comment section below. We have also answered some most frequently asked questions below.
Illustrator Fonts
Adobe Illustrator has a variety of fonts. You can select and apply any font to your logos, banners, posters, and any design you are creating. Adobe Fonts have a variety of fonts that can be used in Adobe Illustrator if you need more creative fonts other than those available in the Font family of software.
How To Add Fonts To Illustrator 2022
Choose a font from any font website like “dafont.com” or Adobe font you like and download it. Right-click on the zip file and select Extract Here. Open the font file from any of these extensions (.otf, .ttf, or .fnt) and click on Install. The font will be installed on the Computer. Now select the text in Illustrator and then in the font style type the font name and then select to apply.
All Done! Enjoy.

Leave a Reply