
The textures can give life to your design and as well as you will see the shapes and images becomes more attractive. As you all know Adobe Illustrator is popular for all its editing tools that can help you to create wonderful art and illustrations. You can add textures to text and logos easily with a few easy steps.
Learn to Add Texture in Illustrator – Video Tutorial
You can also watch the below video tutorial to learn how to add texture in Adobe Illustrator.
A lot of designers create different illustrations and sometimes they don’t find it interesting to see, so we always recommend trying the textures and you will love your designs. You can add textures to t-shirt designs, logo designs, and billboards as well. Don’t worry about the textures to select from, as Adobe Illustrator has a library of textures as well, that can easily be used and modified according to the need of designers.
You can also learn:

If you are new or don’t have any idea to add texture in Adobe Illustrator, then you are in the right place. In this tutorial, you will learn how to add texture in Adobe Illustrator in multiple ways and all the methods are easy to understand.
So let’s start.
How to Add Texture in Adobe Illustrator 2022
To add texture to any object select it first then from the fill or swatches panel, go to Window > Swatch the Library Menu > Patterns > Basic Graphics > Basic Graphic_Textures. Select any texture that you want to apply to the shape. The selected texture will be applied to the selected object.
The following are given different methods to add the texture of your choice to the object or choose from the Illustrator library.
Method 1: Texture Library
In Adobe Illustrator, you can find many different types of textures that you can choose to apply to the objects or text easily. The process of applying texture from the library is very simple and quick.
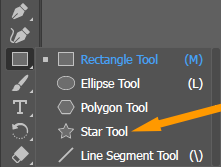
Step 1: Draw a shape or you can also add text and then use it to apply texture to it. Here we are using the Star Tool to draw it and then we will use it for the next steps. You can select the Star Tool that is available under the Rectangle Tool.
Step 2: Here is the star that we have drawn using the Star Tool. You can also use any other shape like a circle, Rounded Rectangle, or Triangle as well.

Step 3: Grab the Selection Tool from the left toolbar. You can also use the keyboard shortcut V to use the Selection Tool in Adobe Illustrator.

Step 4: Now select the shape using the Selection Tool.

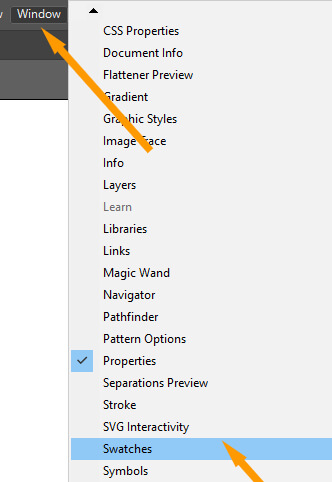
Step 5: Go to Window > Swatches.
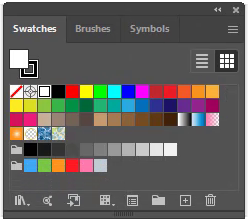
Step 6: Swatches panel will appear.
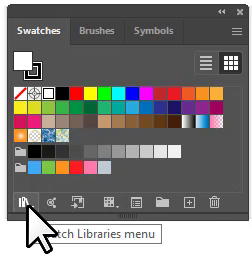
Step 7: From the Swatches panel click on the Swatch Libraries menu.
Step 8: You will library list will appear. From the list go to Patterns > Basic Graphics > Basic Graphic_Texture.
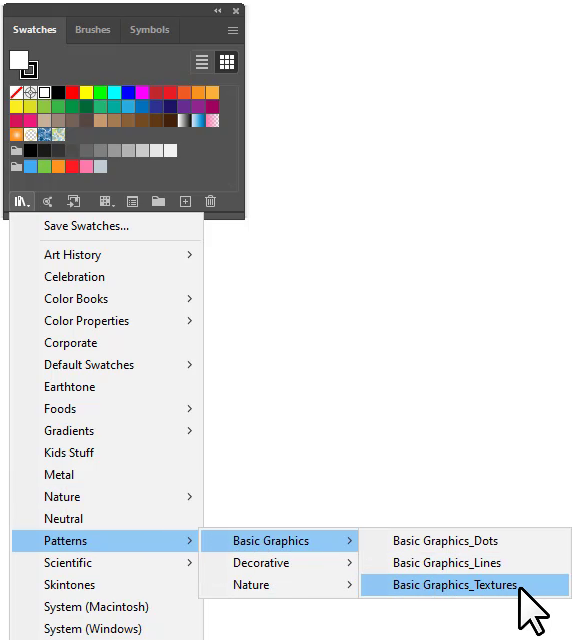
Step 9: Basic Graphic_Texture panel will appear.

Step 10: Now select any texture that you like to apply to the selected shape.
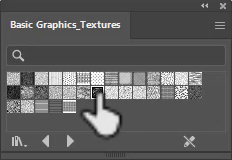
The texture that you have selected from the Basic Graphic_Texture panel is applied to the shape.

2nd Method: Effect > Texture
You can also use the texture effect from the Effect menu to apply it to any shape.
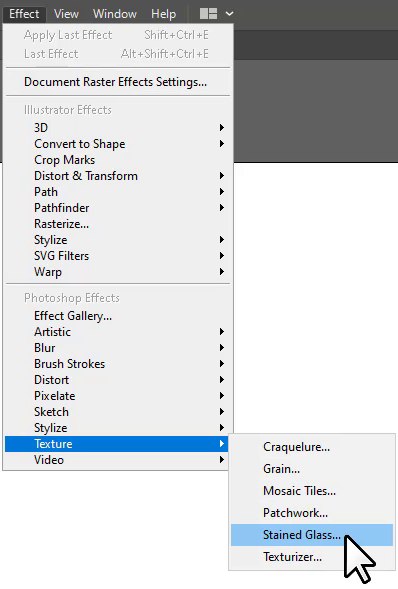
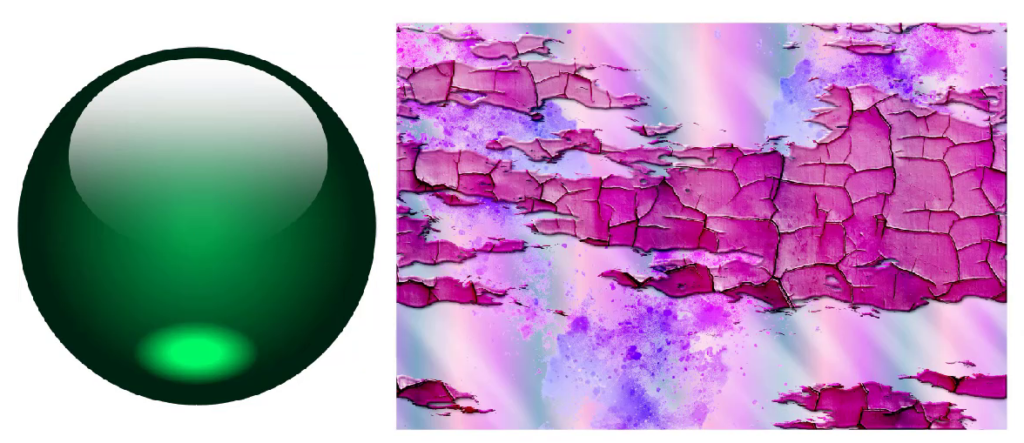
Step 1: Select the shape that you want to use to add texture to it using the Selection Tool.

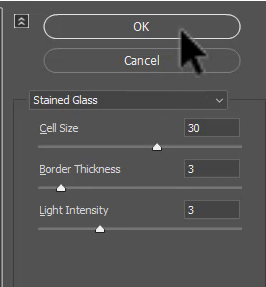
Step 2: Go to Effect > Texture. As you click on texture, you will see different options. Select an option. Here we are selecting the first option, Stained Glass.
Step 3: The panel for the selected texture will appear. Here you can also switch the texture if you want to. There are a total of six different textures available. For this texture, you can change the cell size and border thickness.
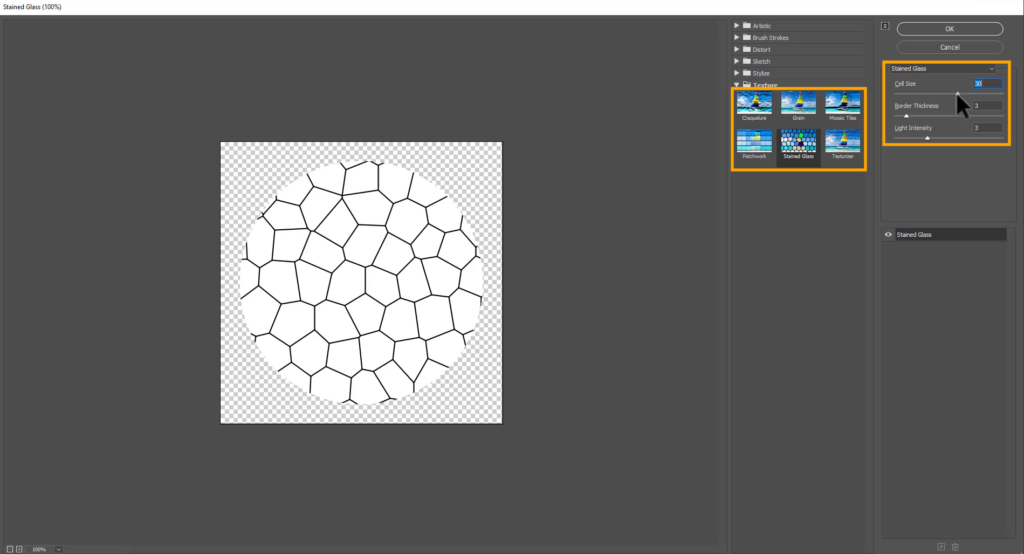
Step 6: Click “Ok” when you are done.
Here is the texture applied to the shape.

3rd Method: Add texture through the image
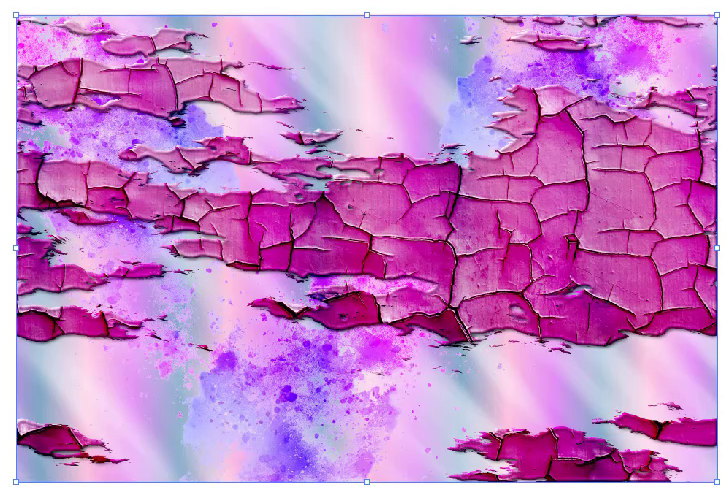
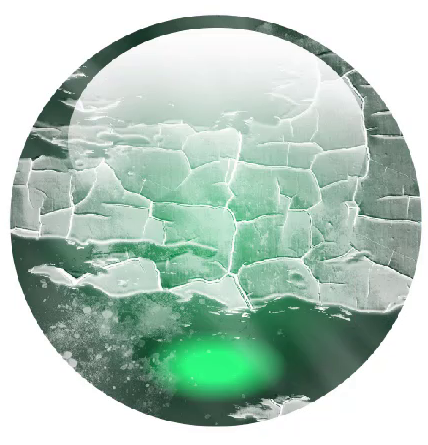
Step 1: Place both objects on the artboard. Here you can see we have the original shape that we want to use and then the texture image as well.
Step 2: Place the texture on top of the main object.
Step 3: Using the Selection Tool, select both objects.
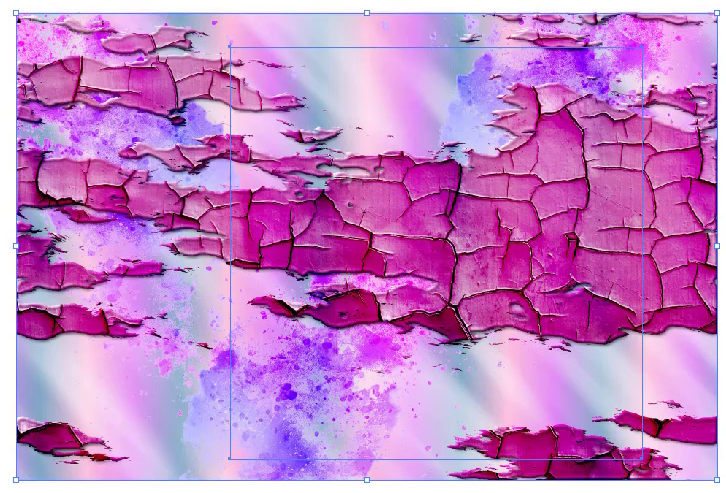
Step 4: Go to Properties > Appearance > Opacity.
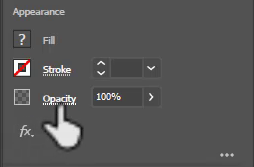
Step 5: From the Opacity panel, select Make Mask.

The texture is masked by the object, as you can see.
You have learned to add texture in Adobe Illustrator.
In this tutorial, you have learned to add texture in Adobe Illustrator, using three different ways. You can choose any method like choosing from the library of textures or adding the texture through the image.
Have More Questions?
If you have any questions related to adding texture in Adobe Illustrator, you can ask in the comment section below.
All Done! Enjoy.
Leave a Reply