
Arrows are widely used in different infographics, direction maps, and many other designs. to help figure out things easily, I commonly used the arrows for addresses on the roads and streets boards designs. You may have also seen a billboard that contains arrows just to get your attention and guide you in the direction of the location.
So that’s why every designer wants to learn to make arrows in the Illustrator. There are many pre-made cool arrows for illustrators that can also be used. But if you want to make your arrow, then we will also guide you.
Making arrows is not a hard task because there are many illustrator arrowheads available inside Adobe Illustrator. You can change the start and end point of the arrow if you make an arrow by using the Stroke Panel. Stroke Panel gives you multiple styles of arrows. Easy and the multiple designs of an Arrow are inside the Stroke Panel as well, and also in the other tools.
You can also learn:
In this tutorial, we will tell you how to make an arrow in Illustrator. So let’s start.
In Adobe Illustrator, there are multiple ways to make an arrow. It all depends on you, and which type of arrow you are looking for. You can create an arrow, or you want to select the arrow from pre-made arrows.
To make arrows in Illustrator, draw a line, and then from the stroke panel, select the arrowhead for the line. It will create the arrow.
5 Quick & Easy Ways to Make Arrows in Illustrator
There are different tools available to Draw arrows in Adobe Illustrator.
- Stroke
- Symbols
- Glyphs
- Brushes
- By Shapes
1st Method: How to Make Arrow by Stroke Panel
If you want to draw an arrow most easily then you should make an arrow by the Stroke.
How to Draw an Arrow in Illustrator
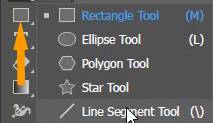
Step 1: Select Line Segment Tool from the Rectangle Tool, or press “\” from the keyboard to draw a line.
Step 2: Draw a line on the Artboard.

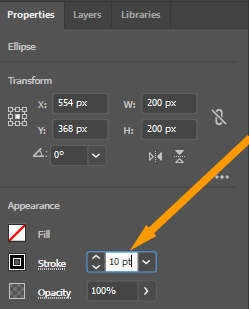
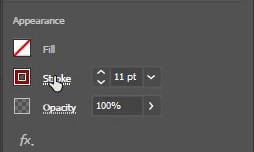
Note: Increase the line stroke by 10pt from Properties > Appearance > Stroke.
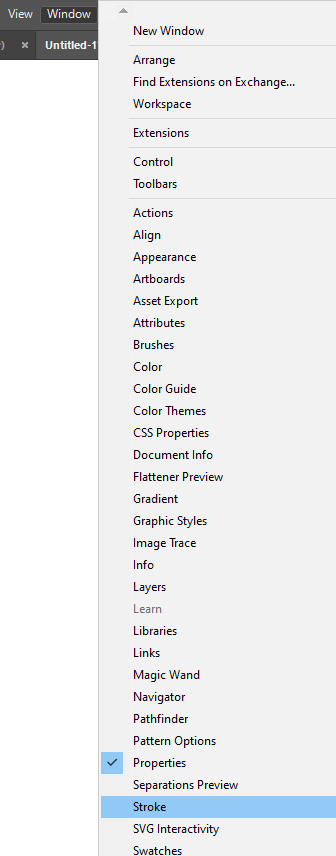
Step 3: To convert the line to an arrow, go to Window > Stroke or you can also press Ctrl+F10 from the keyboard as the short key for the Stroke panel.
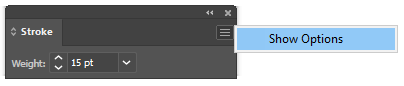
Step 4: A stroke panel will appear.
Step 5: Click on Show Options.
Step 6: From the arrowheads select the start point.

The start point will be applied to the line.

Step 7: After applying the start point of the arrow now apply the endpoint to the line.
The arrow is now complete.
You can select any start point or end point of the arrow to the line. It’s all up to you.
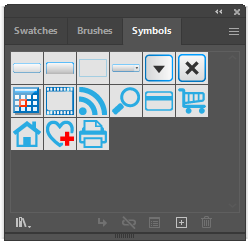
2nd Method: Arrow by Symbols panel
In this method the Arrow is available inside the Symbols panel, we just have to place it on to the artboard.
Step 1: Go to Window > Symbols or you can also use the short key for Symbols Shift+Ctrl+F11.

Step 2: The symbol panel will appear.
Step 3: Click on More Options > Open Symbols Library > Arrows.

Step 4: Arrows panel will appear.
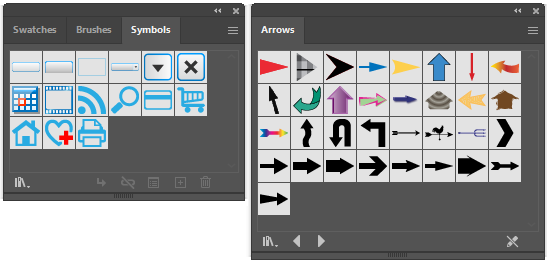
Here you can see that there are multiple arrows available. You can easily use any of them.
Step 5: Click on the Arrow that you want to use and then drag it to the artboard.
Step 6: It will appear on the artboard.
You can add as much as you want according to your choice. Resize them as needed. You can also change the color of the arrow by double click on the arrow and then clicking OK from the pop-up. Now go to Properties > Character > Fill/Stroke. Select any fill or stroke to apply to the arrow.
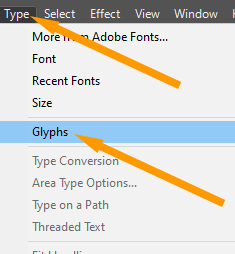
3rd Method: Arrow by Glyphs
In Adobe Illustrator, more arrows are available in Glyphs, you can choose them easily with just a few steps.
Step 1: Go to Type > Glyphs.
Step 2: Glyphs panel will appear.
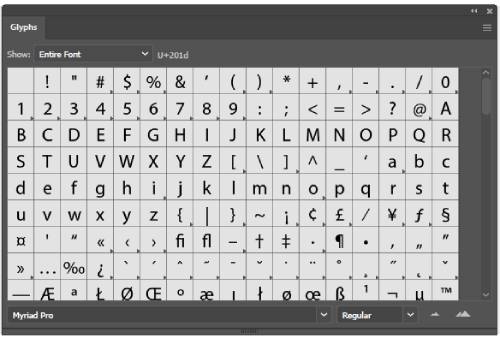
Now let’s change the Glyphs panel’s fonts to add the arrows in it.
Step 3: Change the option available “Myriad Pro” to Wingdings.
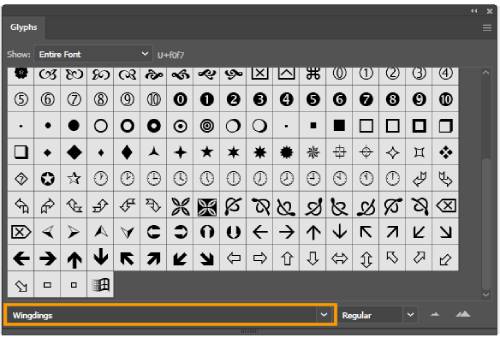
Step 4: When you scroll it, you can see at the end there are multiple arrows available.
Step 5: Select Type Tool from the left toolbar.
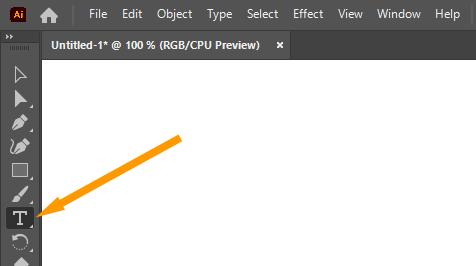
Step 6: Make a Text box on the artboard.

Step 7: Now Double Click on the Arrow that you want to add to the artboard from the Glyphs Panel.
Step 8: The arrow will appear in the Text box.
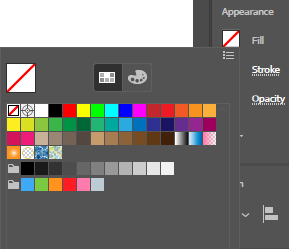
If you want to change the color of the Arrow go to Properties > Appearance > Fill. Select any color from the fill panel. The selected color will be added to the arrow.
4th Method: Brushes
Arrow brushes are also available. You can select any arrow style from the brushes panel and make it. Everything is easy if you follow the step-by-step guide. In this method, we are going to show to make an arrow using brushes.
Step 1: Go to Window > Brushes. You can also press F5 to open the brush panel.
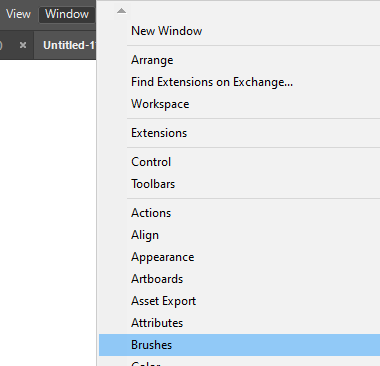
Step 2: Brushes panel will appear.
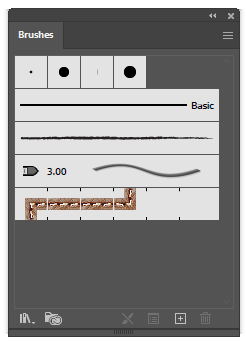
Step 3: Go to More Options > Open Library > Arrows.
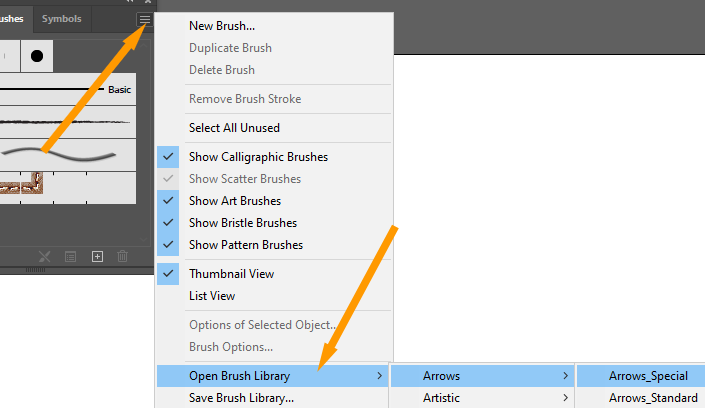
Step 4: As you can see there are three different types of Arrows panels available.
Step 5: Let’s start with the Arrows_Special.
Step 6: Click on Arrrows_Special and it will be open.
Step 7: To make an arrow simply, click and Drag the Arrows on the artboard from the Arrows_Special panel.
Note: If you want to use another arrow from the list, just select any that you want, and its panel will appear.
5th Method: Make arrows By Shapes
If you want to create your arrow and do not want to use any arrows available in the tools, then it’s the best idea to make arrows by shapes.
Let’s see the step-by-step instructions given below to make a perfect arrow using shapes.
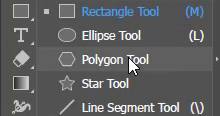
Step 1: Right-click on the rectangle tool and select Polygon Tool.
Step 2: Right-click once on the artboard, and the Polygon panel will appear.
Step 3: Add 3 in the value of size.

Step 4: Click OK.
Step 5: A shape with 3 corners will appear. That is the arrowhead.

Fill it with any color, or you can use it with the stroke only as well.
Step 7: Now select the Rectangle Tool and draw a thin rectangle that will be used as the tail of the arrow.

Step 8: Combine both head and tail to make an arrow.

Step 9: Select both with the help of the selection tool.
Step 10: Make it a group by Properties > Quick Actions > Group.
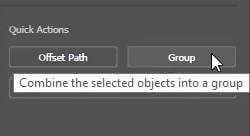
Both shapes will be combined because we made them a group. Now it’s the perfect and simple arrow that we were trying to create using the shapes available in the Adobe illustrator. That is also the easiest way to make an Arrow.
How to make a curved arrow in Illustrator?
You can make a curved arrow in illustrator by drawing a curved line using Pen Tool and then applying the arrowhead to it.
Make a Curved Line in Illustrator
If you don’t know how to make a curved line you can learn it here.
How to Make a Thick Arrow in Illustrator?
A thick arrow can be made in Illustrator by increasing the stroke of the arrow. It will thicken the arrow. You can make an arrow thick by Properties >Appearance> Stroke.
In Adobe Illustrator, as you can see, there are a lot of options available for a single task. All these available tools to perform a single task make our work easy. We can adopt any method to complete our design. This also helps us to save a lot of time and create designs without any breaks.
That’s all for this tutorial on making arrows in Adobe Illustrator. Hope you have learned something good today and you are going to follow this guidance in the Future.
All Done! Enjoy.
Leave a Reply