Dotted lines are mostly used in Adobe Illustrator if you are creating a border for a design page. The dotted line is the easiest to make in Illustrator.
If you are new or you don’t have an idea to make a Dotted line in Illustrator, then you are in right place. In this tutorial, you are going to learn how to make a dotted line in Illustrator.
Let’s Start.
How to make Dotted Line in Illustrator
In this tutorial, you are going to learn How to Make a Dotted line in Illustrator. The steps are easy to follow. To make a Dotted Line in Illustrator you must follow all the given steps accurately.
We’re going to learn how to draw dotted lines today. To begin, open a new document.
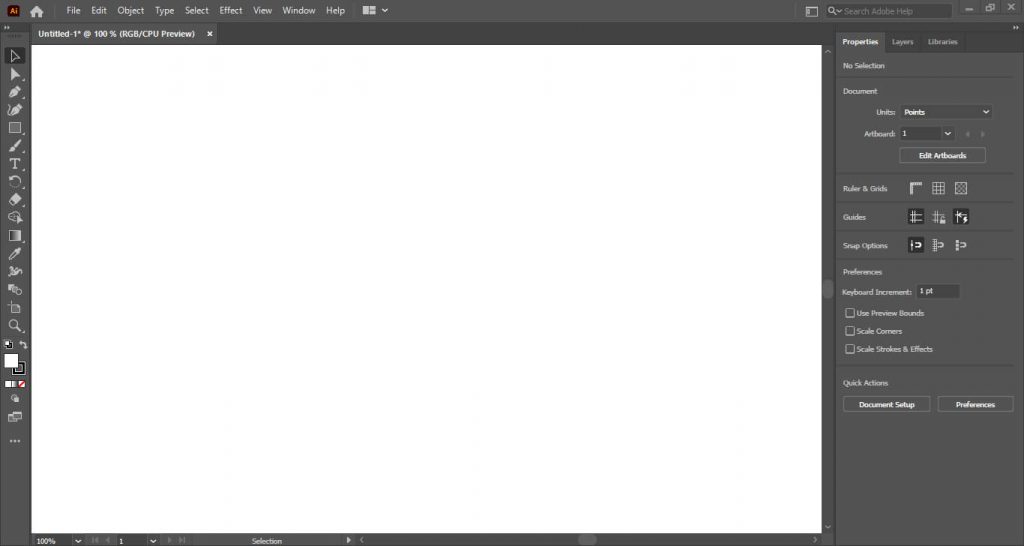
Step 1: Draw the shape or line you want to see. Hold down the shift key while dragging the mouse to achieve a straight shape or line. In this case, I am using a simple rectangle.
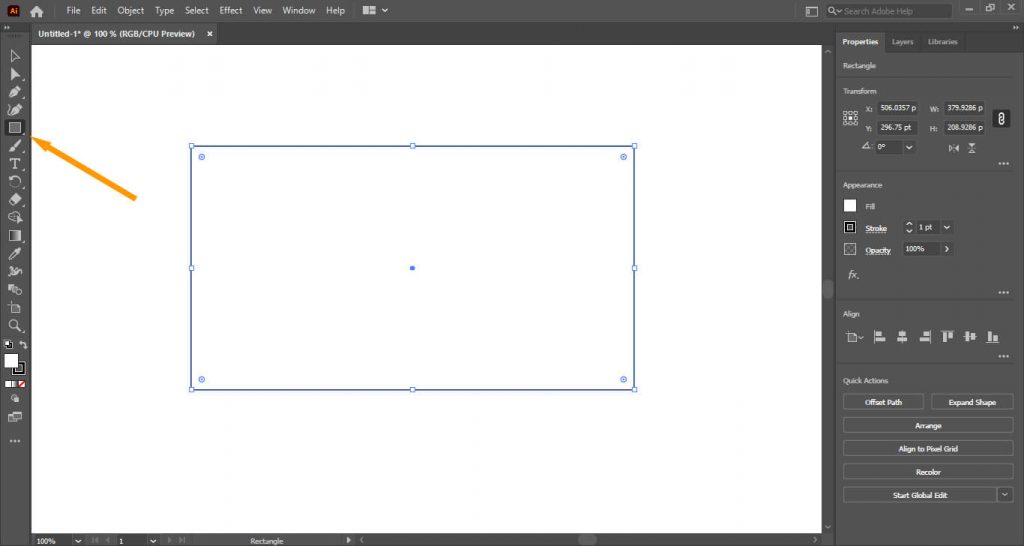
Step 2: Under the Properties panel, you will see the stroke option.
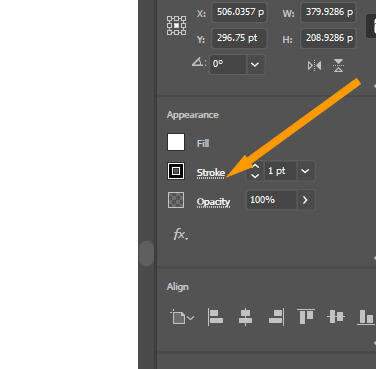
Step 3: The word stroke is underlined. Click the text “Stroke” to explore more options.
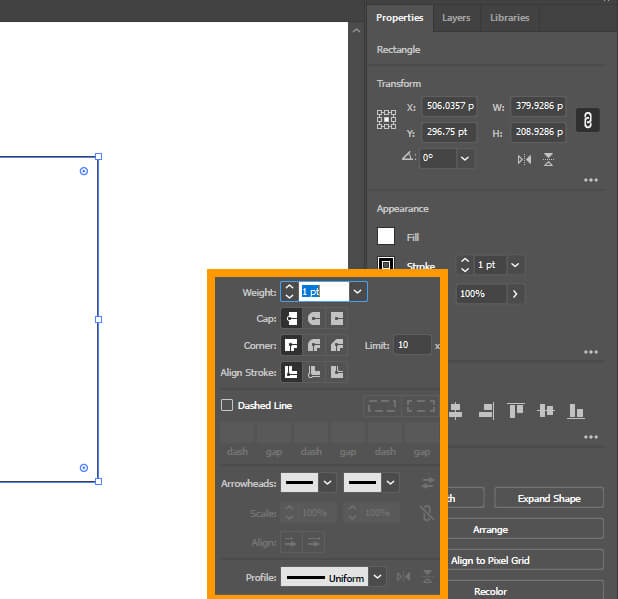
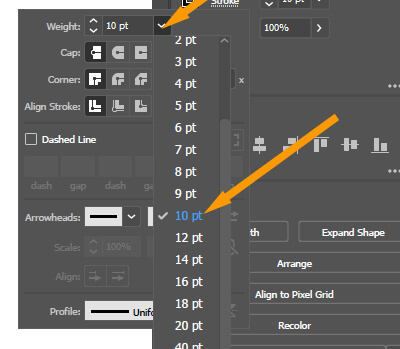
Step 4: We’ll raise the stroke weight to 10 points so that you can see it better.
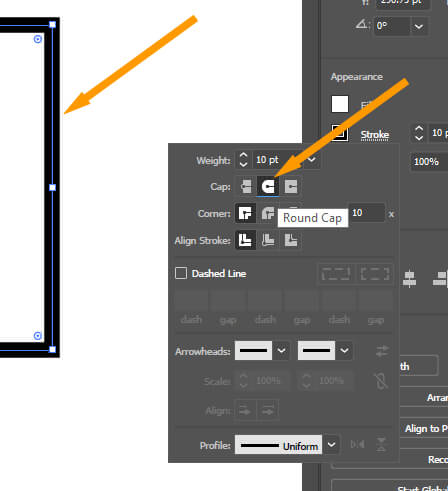
Step 5: Let’s change the cap style to a round cap.
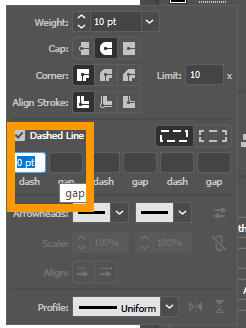
Step 6: Please make sure the dashed line option is selected. The dash should be 0 points in order to get the perfect circles.
Step 7: In this case, I would like to set the gap to 16 points.
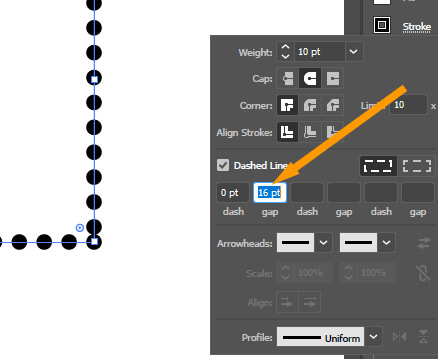
Step 8: The spacing between can be adjusted. To start, highlight the gap number. Press up or down arrow keys to change the spacing between dots.
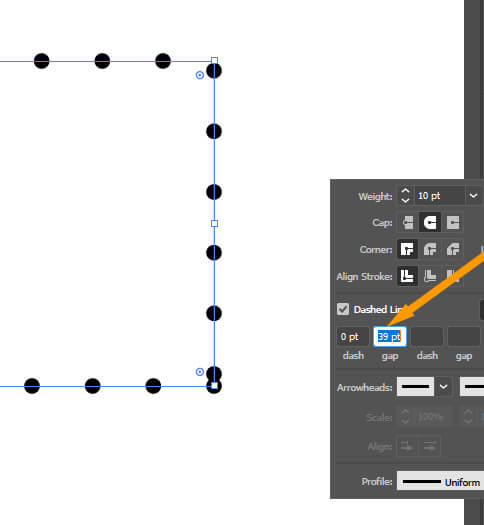
The two dots appear to be overlapping each other. The dots should have equal spacing between them.

You can adjust this issue by clicking on the “Align dashes to corners and path ends, adjusting lengths to fit” icon.
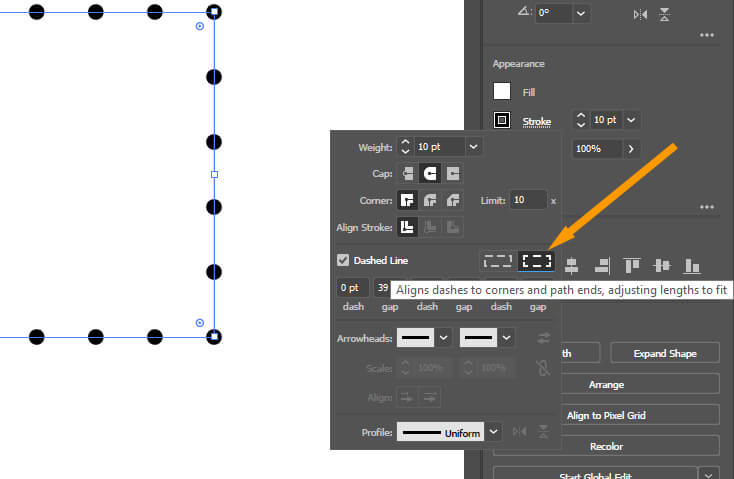
Final Result

In this tutorial, you have learned to make a dotted line in Adobe Illustrator. You can use the LIne Segment tool to draw a line and then follow all the steps to make a dotted line.

Leave a Reply