In Adobe Illustrator, when we try to save a file, by default it saves the file in AI format. The use of this feature is particularly advantageous when working on projects or when preserving a master copy of your work, or sometimes if we don’t have Adobe Illustrator and we still want to open a file and we cannot open and have a look at the design. That is why we want to convert our file to jpeg so that we can easily see it when we don’t have access to Adobe Illustrator.
AI files can only be opened in Adobe Illustrator whereas jpeg can be opened anywhere easily. We can easily share a jpeg with anyone. Illustrator files are usually large, saving them into a jpeg file can reduce the size. Jpeg uses less time to open while illustrator files take time to open.
Save an Illustrator File as a JPEG – Video Tutorial
You can also watch the below video tutorial to learn how to save any illustrator file as a jpeg. So that you can easily save any file whenever needed.
You can also learn:
In this tutorial, we’ll show you how to quickly and easily convert your Illustrator file to a jpeg format using Adobe Illustrator. You can use the following procedures to create a jpeg image from an Illustrator file.
So let’s start.
How to Save Illustrator File as Jpeg
To save the Illustrator file as jpeg, go to File > Export > Export As. The Export panel will appear. Set file name and then from Save as type: > select “JPEG(*.JPG)”. Click Export from the Export panel. JPEG options panel will appear. Click OK to continue. The file will be saved as Jpeg.
Following are the detailed steps to save an Illustrator file as a jpeg easily.
Step 1: Add designs to the artboard
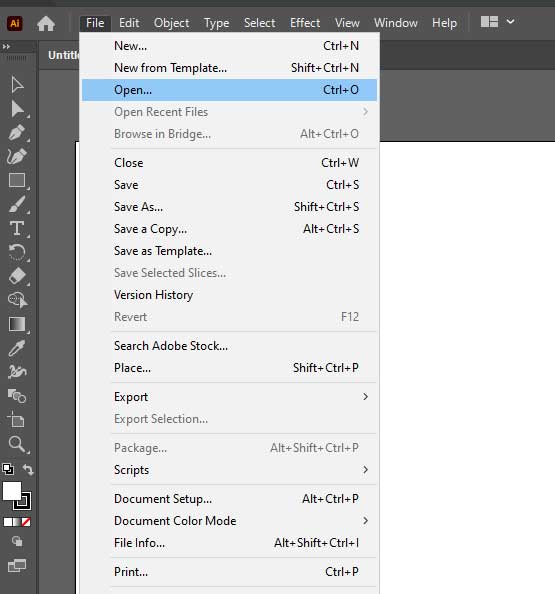
Open the Illustrator file that you want to convert to a jpeg format and click on it. You can open your file by selecting it from the file menu and click on Open.
A window will appear where we can select our file and click Open.
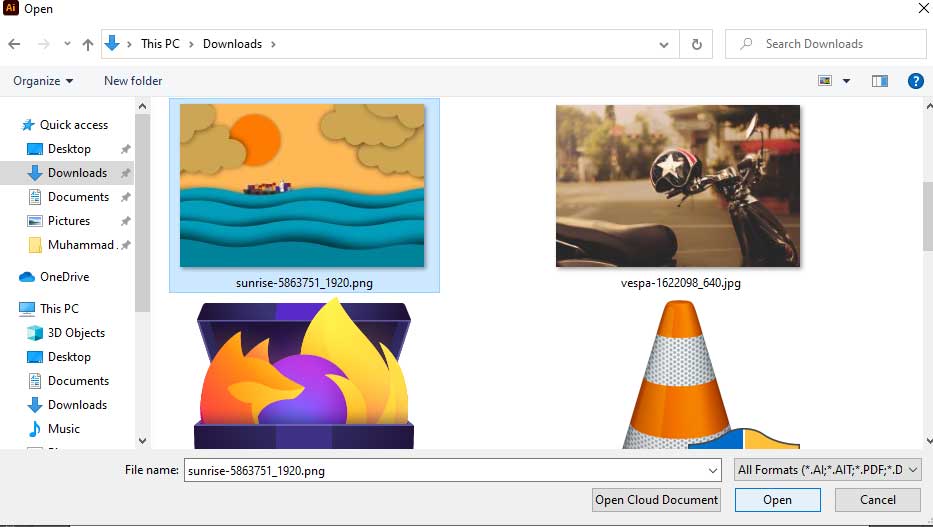
The file we selected to open will open in Adobe Illustrator and we can edit it. You can add text in the file or shapes according to the design you are creating.
If there are a lot of AI files and you may find it difficult to search one out of thousands, you can also type the file name in the folder to search it quickly.
Step 2: Export the Illustrator file.
If your file is already opened and you want to save it as a jpeg, go to the File menu, from the drop-down list click on Export and then select Export As.
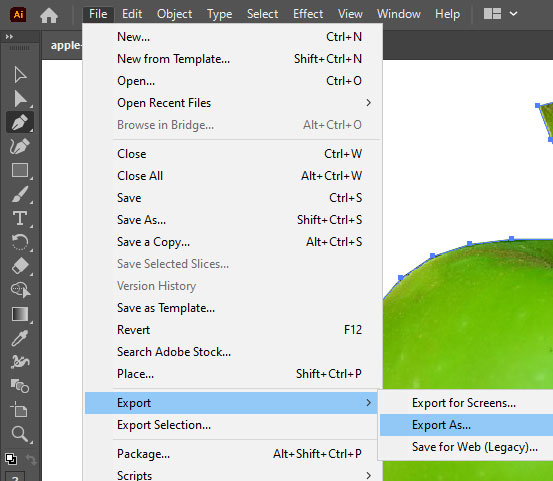
A window will appear to Export our file in any format.
Step 3: Add the file name and select the location to save in the export panel.
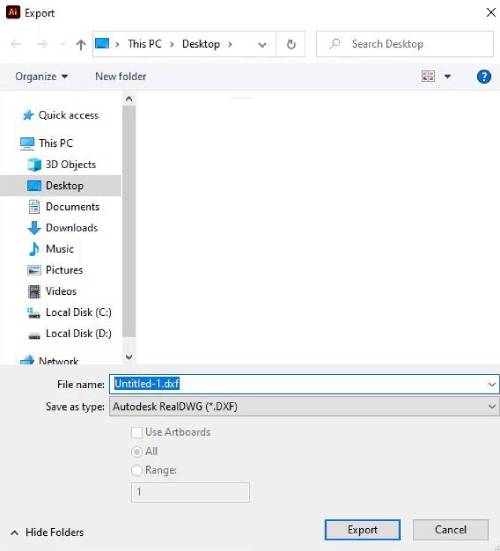
Select the desired location where you want to save your file.
Type file name.
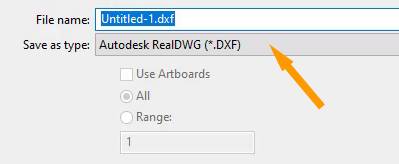
Step 4: Select jpeg from Save as type section and select Export.
Then click on Save as type options bar given under the name area.
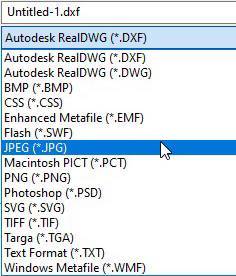
From the drop-down list, select JPEG (*.JPG).
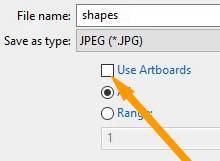
You can also check Use Artboards to include your artboard in jpeg format.
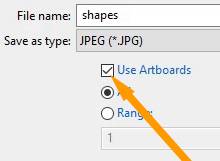
Click on Export.
Step 5: Click OK in the JPEG Options panel
A “JPEG Options” dialog box will appear.
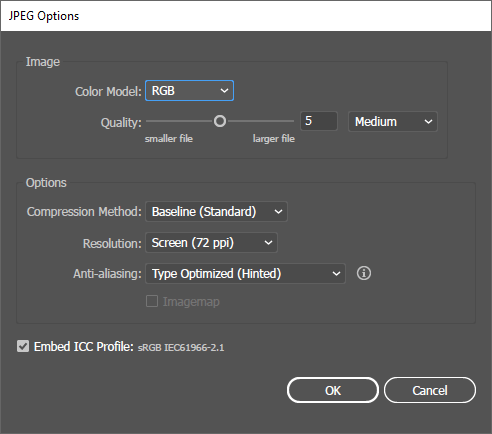
Click on “OK”, and your file will be saved as JPEG.
Your jpeg file will be exported to the location you have selected. You can open and use your file from the location where you exported it.
You have learned to save/export Illustrator files as jpeg in Adobe Illustrator.
In this tutorial, you have learned to save Illustrator files/documents as jpegs in Adobe Illustrator. You can easily export any file or document in jpeg or png format easily.
Have More Questions?
If you have any questions related to saving the Illustrator file as a jpeg, then ask in the comment section below. We have also answered some most frequently asked questions below.
How to save Illustrator file as jpeg without white background
Uncheck “Use Artboards” while saving the file. This option will allow you to save Illustrator files as JPEG without white background.
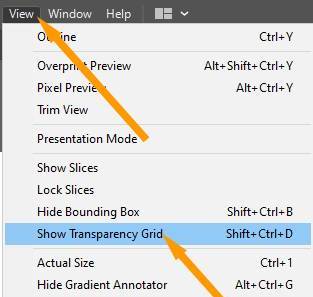
How to Make Background Transparent in Illustrator
To make a background transparent in Illustrator go to the “View” menu and click Show transparency grid.
To hide the transparent background go to the View menu and click on Hide transparency grid.
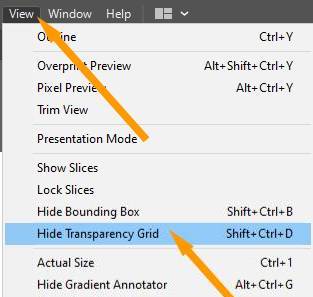
Transparent Background Shortcut
You can also press Shift+Ctrl+D to show or hide the transparent background.
All Done! Enjoy.

Leave a Reply