
In Adobe Illustrator, we have multiple tools to work with. Adobe Illustrator helps to design a lot of graphics very easily and quickly. In the list of tools, we also have the Shape Builder tool.

The shape Builder tool is fun to use. We can make a lot of designs with this that are difficult to make but with this tool, it’s just a matter of seconds. We can erase, merge and exclude by using the shape builder tool.
Before that I will share my story, When I started using Adobe Illustrator, I spent a lot of time making small things as at that time I don’t have an idea how to use different tools and what are the real purpose of those tools. But now with time, I learned a lot, so you will.
So let’s start today’s lesson. In this lesson, we are going to learn the “Shape builder tool”. The easiest and most fun to use. I will share different methods of shape builder tools here.
The following are different ways to use the shape builder tool.
1st Method
Extract:
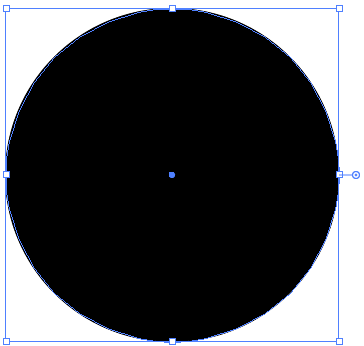
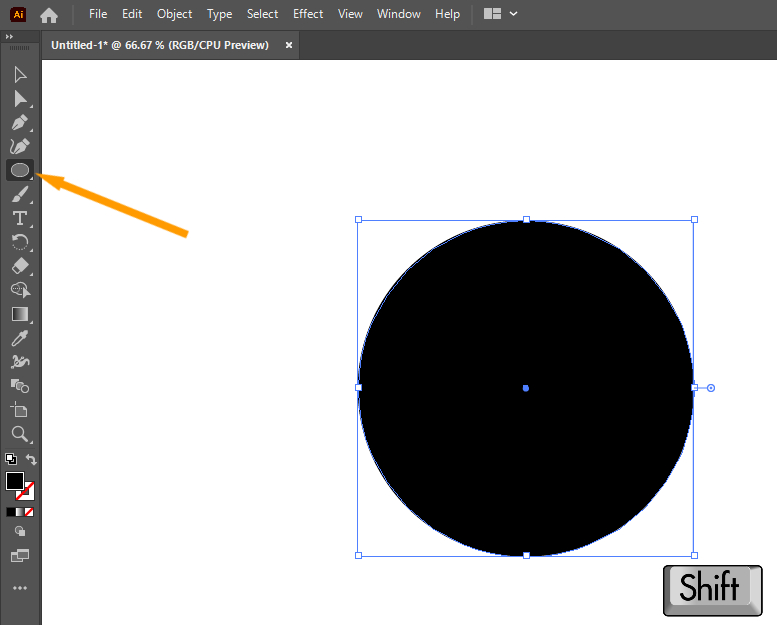
Step 1: Start by drawing a circle on your artboard.
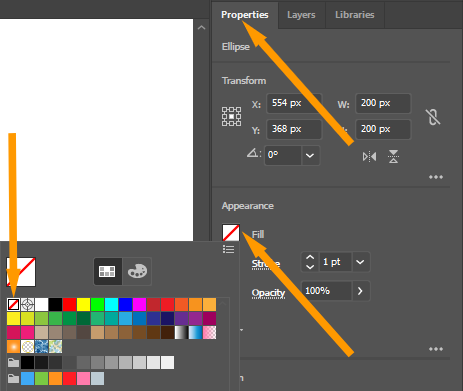
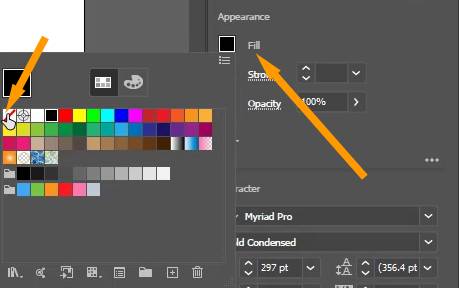
Step 2: Go to “Properties” panel and set circle fill to none.
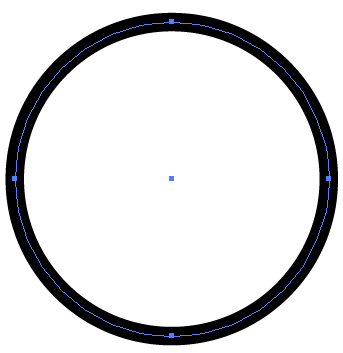
Step 3: Copy your circle and paste it as given by using “Ctrl + C” and then “Ctrl +V”.
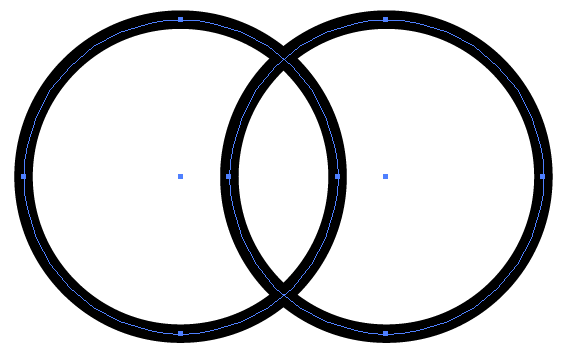

Step 4: Select both shapes by using selection tool.
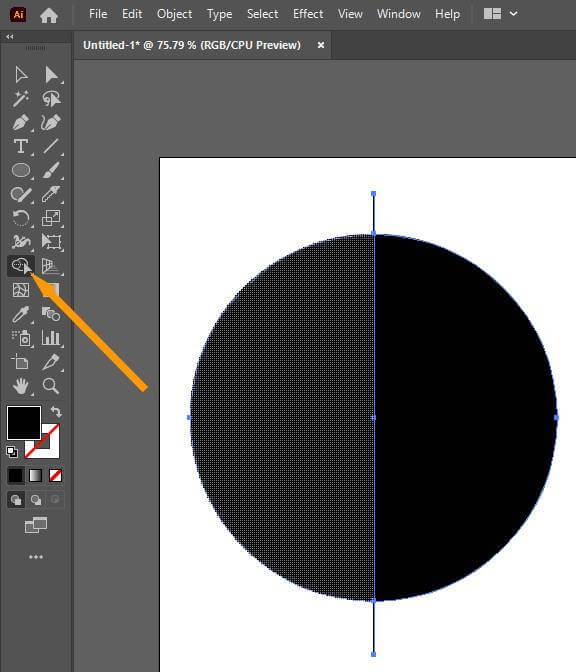
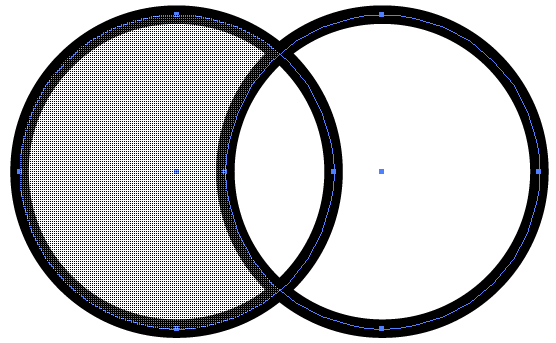
Step 5: Select “Shape Builder tool”, from the toolbar or press “Shift + M” from the keyboard.
Step 6: “Alt + Click” to delete the selected area. Repeat on both sides.
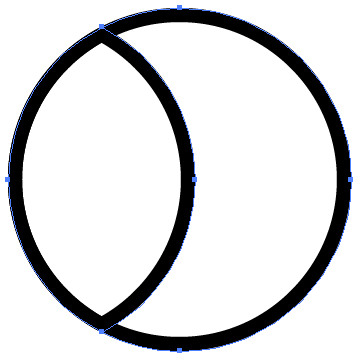
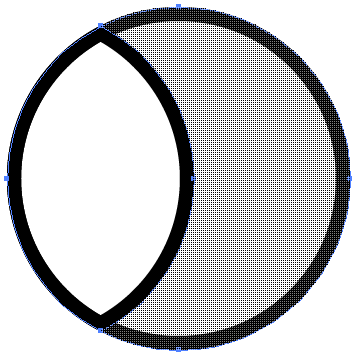
Step 7: We have the desired object that we were trying to make.
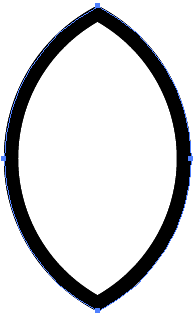
Step 8: Let’s make a flower using this. Copy and paste the Patel to make a flower.


2nd Method
Merge:
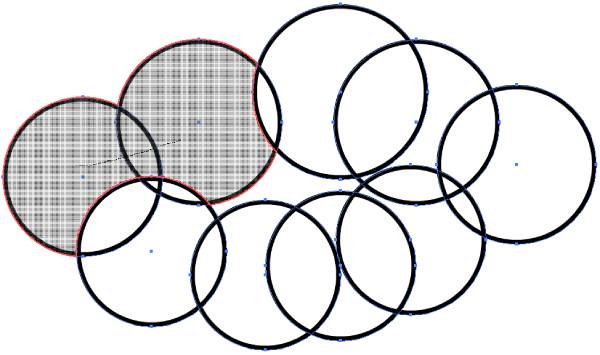
Here we will make a cloud by using the Shape Builder tool. Let’s see how we can do this.
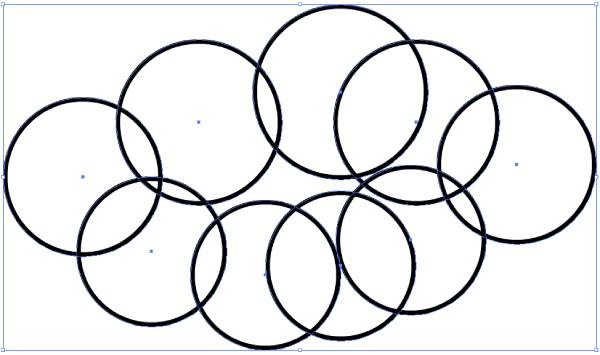
Step 1: Start by creating some circles on the artboard by using the ellipse tool. (Don’t forget to hold the shift key while drawing a circle. Holding the shift key will help you draw a perfect circle).
If any color is appearing in the circle, set the “Fill” color “None” as shown below.
Step 2: Copy the circle by using “Ctrl + C” from the keyboard.
Step 3: Place it by pressing “Ctrl + V” on the keyboard.
Step 4: Place it as given.
Step 5: Draw other circles as given.
Step 6: Select all objects by using the “Selection tool” from the toolbar or pressing “V” from the keyboard.
Step 7: Select “Shape builder tool” from the toolbar or press “Shift + M” from the keyboard.
Step 8: Click inside the circle and drag the pointer by keeping pressing the mouse button until all the needed area is selected.
Step 9: Leave the mouse button as soon as all the area is highlighted.
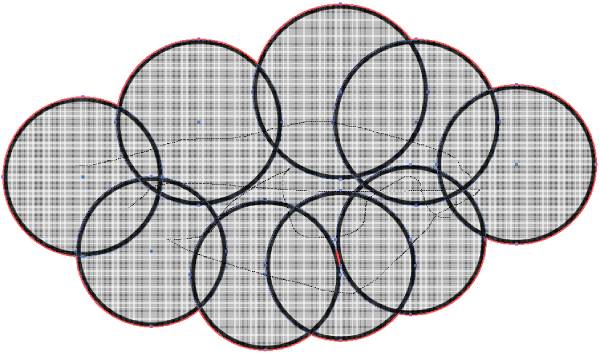
Step 10: The selected area will be deleted and here is the perfect cloud we needed to draw. All Done. Enjoy!

Leave a Reply