Pixel Arts are fun to create, especially when you know the easiest way to create one. Adobe Illustrator can be used to make Pixel Arts although it’s designed for Vectors. But you can create pixel art for any illustrations and images using Adobe Illustrator tools.
You may be confused if you don’t know what is pixel Art.
What is Pixel Art?
The image or Illustration is divided into multiple square-colored boxes. The whole image is divided into pixels and each pixel has one color in it.
Make Pixel Art in Adobe Illustrator – Video Tutorial
You can also watch the video tutorial given below to make pixel art in Adobe Illustrator. In the video, we discussed the easiest way to make pixel art in Illustrator.
Some of us have surely used squares to make pixel art. But now I have tried the easiest way to make pixel art. You can use the Create Object Mosaic to make pixel art of any object or image easily. That’s an easy and quick way to turn any illustration into pixel art.
You can also learn:

If you are new or don’t have any idea to make pixel art in Adobe Illustrator, then you are at the right place. In this tutorial, we will discuss step-by-step the easiest way to make pixel art in Adobe Illustrator. We will learn to create pixel art using the Create Object Mosaic option that is available in Illustrator.
So let’s start.
How to Make Pixel Art in Adobe Illustrator
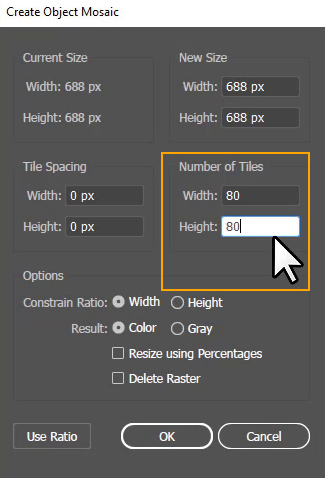
To make pixel art in Illustrator, select the image using the Selection Tool, and go to Object > Rasterize. Select Screen(72ppi) resolution and select Ok. Then go to Object > Create Object Mosaic. Add 80 in the box of Number of Tiles, in both boxes of height and width and select Use Ratio and then click OK. The image will be converted to Pixel Art.
Following are the detailed steps to make pixel art in Illustrator.
Step 1: Place the image on the artboard. To place the image, you can directly select and drag the image to the artboard or use File > Place. Select the image from its location in Place panel and click Place. The image will appear with the pointer and if you click once on the artboard, the image appears there.
Embed the image, if you see two crossed lines on the image, and resize it if needed.
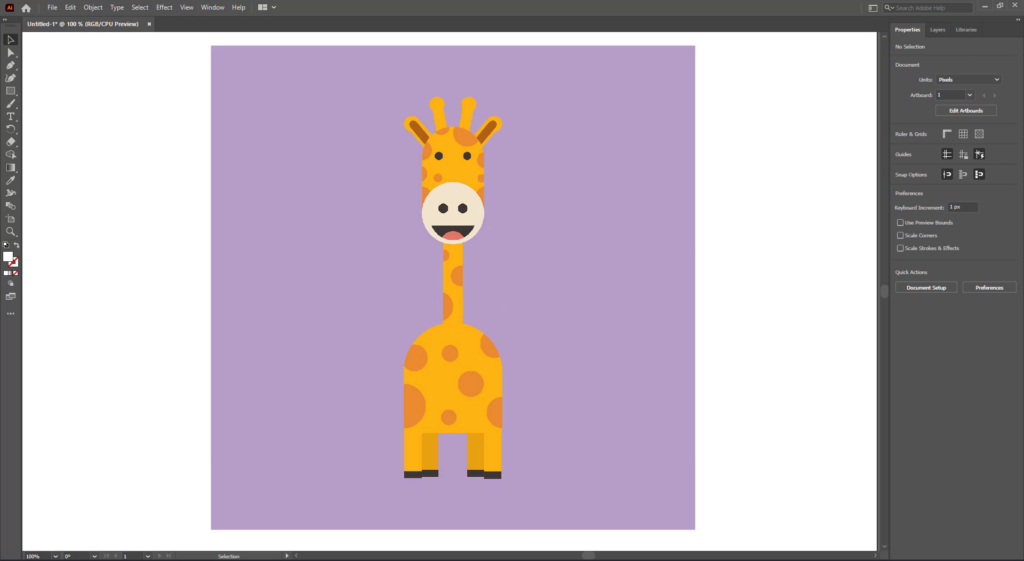
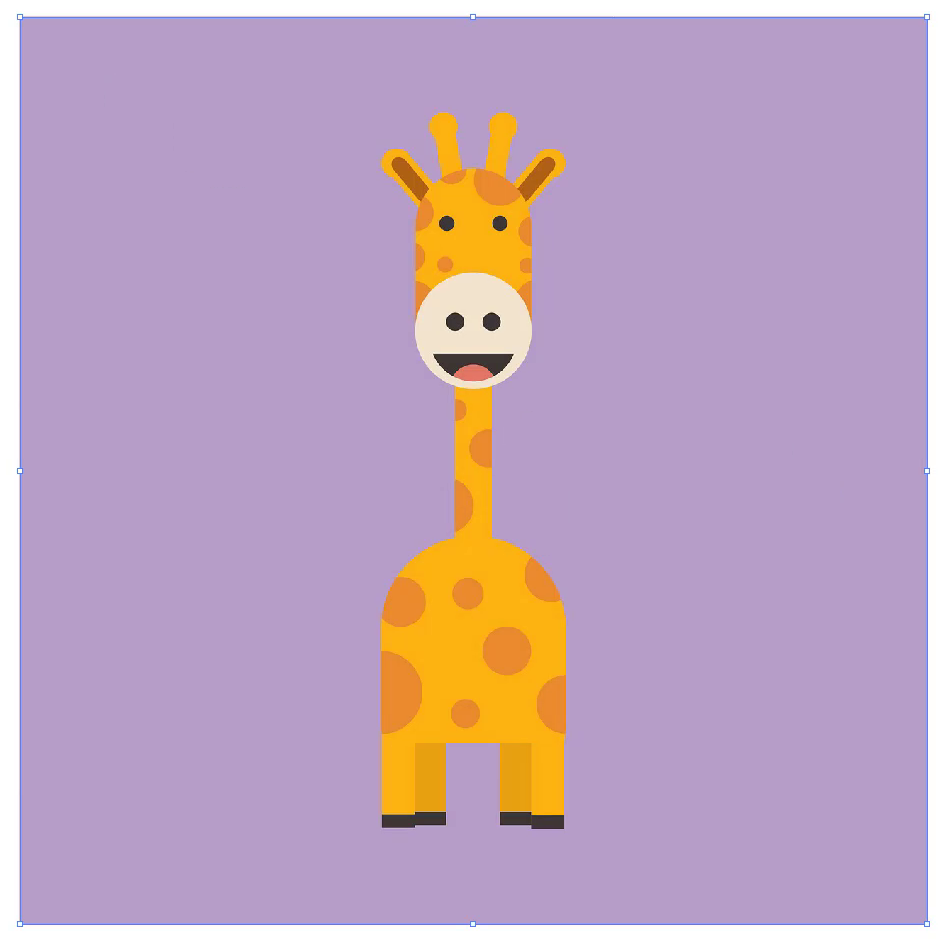
Step 2: Select the image using the Selection Tool. You can grab the Selection Tool from the left toolbar or you can also use the shortcut key V to use the Selection Tool in Illustrator. Click once on the image to select it using the Selection Tool. The image will be selected and you will see an outline of the selection appearing on the outer boundary.
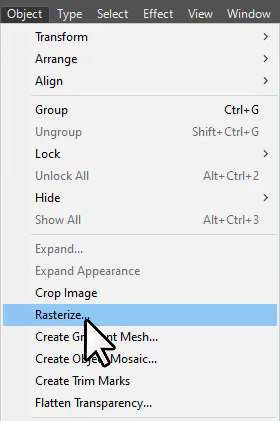
Step 3: Go to Object > Rasterize. By the Rasterize panel, we will rasterize the image or illustration. For some images or illustrations, there is no need to rasterize them first. Rasterizing is used to reduce the size of the image in Illustrator.
Step 4: Rasterize panel will appear. You will see different options available in the Rasterize panel that is used to rasterize any image. Here we will only use the Resolution section to change the resolution of the image.
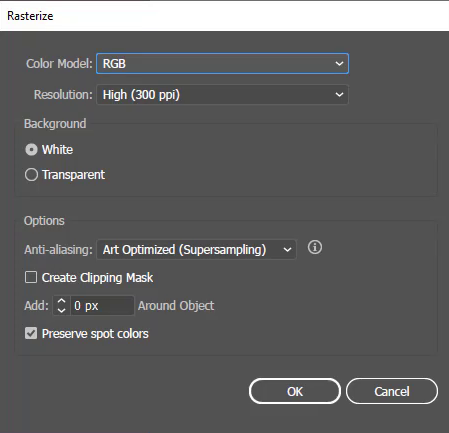
Step 5: In the Rasterize panel, select the Resolution option Screen(72ppi). You can see we have selected Screen(72ppi) resolution to apply to the image that is selected.
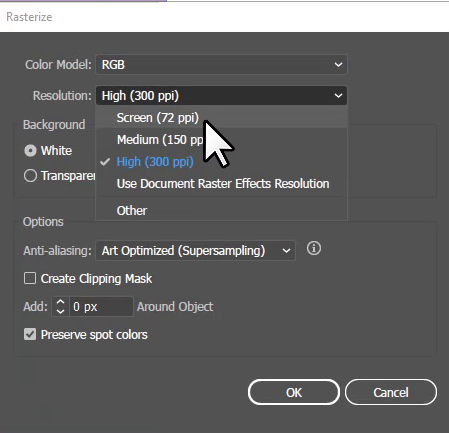
Step 6: After you have selected the Resolution, click OK.
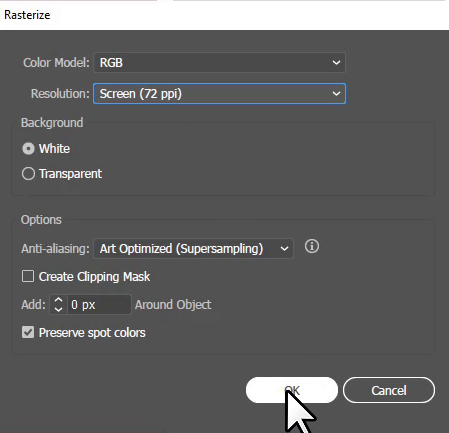
The resolution of the image will be set to Screen72ppi.
Convert Vector to Pixel Art in Illustrator
Step 7: Go to Object > Create Object Mosaic. We are using Create Object Mosaic to make pixel art of the selected image or illustrations. That’s a very easy and quick way to turn any illustration into Pixel Art in Illustrator. The image automatically converts to pixel Art using this option.
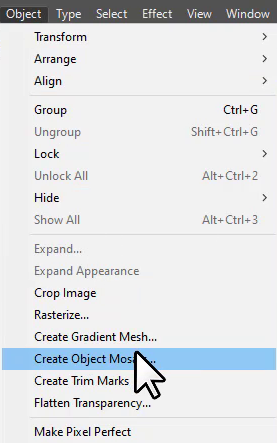
Step 8: Create Object Mosaic panel will appear. In the panel, you will find a lot of different options.
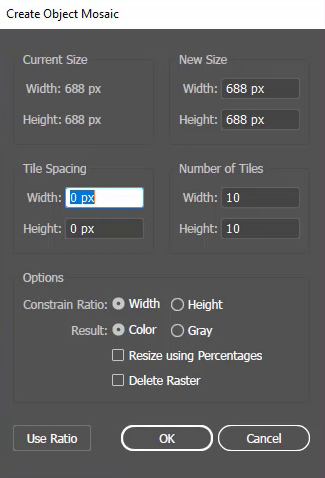
Step 9: In the panel, you will find the option to add the Width and Height of the Number of tiles. Here we are adding 80 in both boxes. You can increase or decrease depending on the result you needed for the illustration or image that you are using.
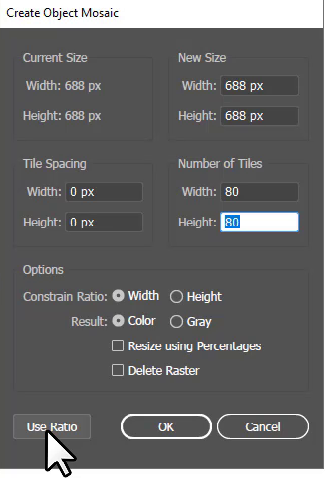
Step 10: Click once on the Use Ratio option that is available in the bottom left corner of the panel.
Step 11: Click OK.
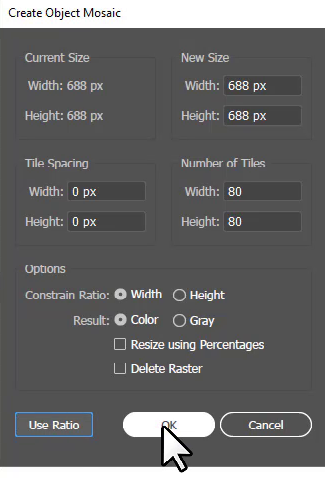
The progress will start to make the pixel art of the image.
After that, the selected illustration is converted to Pixel art as you can see below.

You can delete any area if you want to. Don’t forget to ungroup first and then remove the background colors of the pixel art. Make the group of pixel again, so that every pixel stay accurate.
Here is the final result of the pixel art that we have created.

You have learned to make pixel art in Adobe Illustrator.
In this tutorial, you have learned to make pixel art in Adobe Illustrator, we have discussed the easiest way to make pixel art of the image or any illustration using the Create Object Mosaic option that is available under the Object menu.
Have More Questions?
If you have any questions related to making pixel art in Adobe Illustrator, you can ask in the comment section below. You can also share if you find the method easy to use.
You can also learn: How to Convert Raster to Vector in Illustrator
All Done! Enjoy.

Leave a Reply