Text is needed in almost every design. You may have also seen a lot of designs, banners, posters, cards, wishing cards, and other different stuff that have text on them. Because without text, many designs are incomplete. That is why it’s very important to add text in Illustrator designs and illustrations.
Text is not only used for headings or paragraphs. Instead, the text is used for making text logos as well. You can style the text in many ways and create a perfect design.
Add Text in Adobe Illustrator – Video Tutorial
You can also watch the below video to learn how to add text in Illustrator.
Text can enhance the designs that a designer is creating. You can become a great logo designer by only designing text logos. You can create and design resumes and much more.
You can also learn:
If you are new and don’t have an idea of how to add text to your designs while working in Adobe Illustrator, then you are in the right place. In this tutorial, you will not only learn to add text but also learn some formatting skills.
So Let’s start.
How to Add Text in Adobe Illustrator
To add text in Illustrator, grab the Type Tool from the toolbar. Click on the artboard where you want to add text. Some default text will appear. Enter the text that you want to add to your design. The text will be added. You can click and drag to add a text box in Illustrator.
Following are the detailed steps to add text in Adobe Illustrator.
In Adobe Illustrator, you can add text using the Type Tool. The Type Tool can be accessed from the left toolbar. Click once on the artboard to add text in Illustrator using the Type Tool.
The shortcut key to add text by using the Type Tool is T in Illustrator.
Type Tool in Illustrator
The Type Tool is used to type or add text in Illustrator. Under the Type Tool, you will find the Type on a Path Tool and the Vertical Type Tool in the Basic Toolbar.

But there are a lot more tools in the advanced toolbar. In Advance Toolbar under the Type Tool, there are the Area Type Tool, Vertical Area Type Tool, Vertical Type on a Path Tool, and Touch Type Tool.
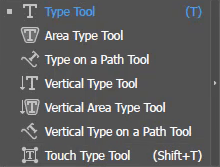
The shortcut key for Type Tool is T and Touch Type Tool is Shift+T.
2 Ways to Add text in Illustrator
You can add text in two different formats.
1st Method: Add text on point
You can text on a point in Illustrator easily by clicking once.
Step 1: To add text on point, grab the Type Tool from the left toolbar or press T on the keyboard to use the Type Tool.

The pointer will turn to type, as you can see here.

Step 2: Click once on the artboard and you’ll see text appear.

Step 3: Keep the text selected. Now type whatever you want to add to your design.

Note: The text will flow and there will be no break in the text. Add text on point is usually used to add short sentences or a few words.
2nd Method: Add text in the text box
You can also make a text box and then add text in a box like paragraphs or if you want to add text in a specific area of your artboard.
Step 1: Select Type Tool from the left toolbar or press T to add text to your artboard.

Step 2: Simply click and drag without releasing the mouse click.
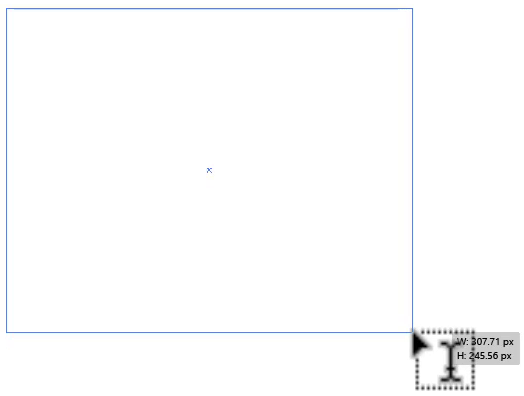
As you leave the click, a text box is created.
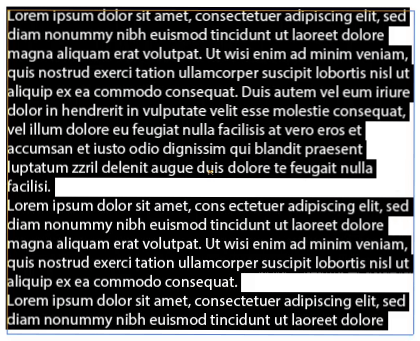
Step 3: Start typing the text that you want to add in the text box.
Or if you want to add text from another file, copy the text from the file and then double-click on the text box in Illustrator and then paste the text.
The text will be added to the artboard.
You have learned to add text in Illustrator.
In this tutorial, you have learned to add text in Illustrator. You can add a few words or many paragraphs as well. It’s easy to edit the text as well using the Character panel or Type menu.
Have More Questions?
If you have questions about adding text in Illustrator, you can ask in the comment section below. We have also answered the most frequently asked questions below.
How to Resize the Text box in Illustrator
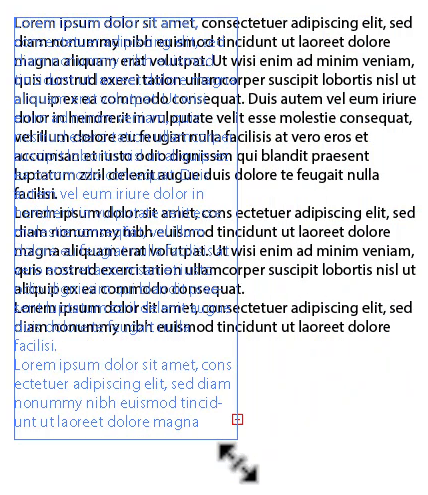
Resize the text box from one of its corners by using the Selection Tool.
How To Edit Existing Text In Illustrator
The existing or newly added text can be edited using the Character panel. First of all, select the text using the Type Tool or select the text box using the Selection Tool and then go to Properties > Character.
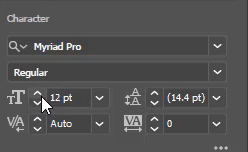
Here you will see a lot of different options that can be applied to the text. You can apply fonts, resize the text, kern the text, and apply a lot of different styles by using the other options that are hidden under the three dots or more options in the panel.
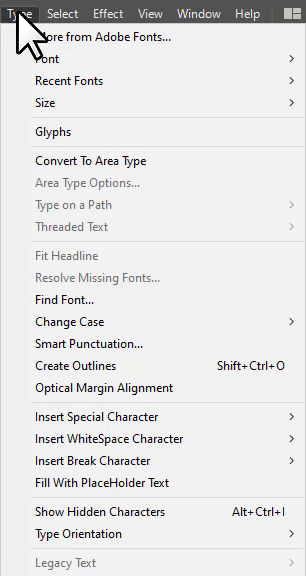
You can also edit the text by using the Type menu.
How to Curve Text in Illustrator
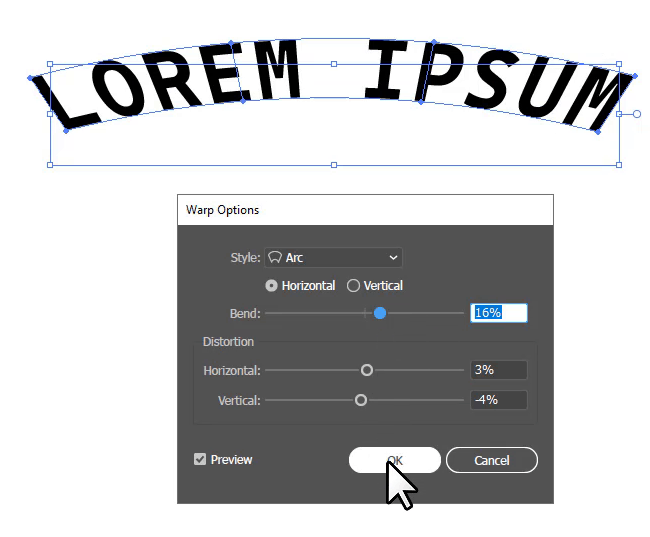
To curve the text in Illustrator, select the text using the Selection Tool. Go to Object > Envelope Distort > Make with Warp. The Warp options panel will appear. Select any style that is according to your choice. Usually, we choose the Arc style for curving text. Change the bend position depending on the curve you need. Click OK.
How to Wrap Text in Illustrator
To wrap the text in Illustrator, select the text and image, then go to Object > Text Wrap > Make. The text will be wrapped around the image.
How to Bold Text in Illustrator
To bold text in Illustrator, select the text using the Selection Tool, press Ctrl+B from the keyboard, or go to Properties > Character > Set font style and select Bold.
How to Add Text to a Shape in Illustrator
To add or fill the text in a shape in Illustrator, select the Type Tool, bring the type pointer on the shape path, and then you will see the type pointer from the rectangle converted to a circle. Click on the shape at this moment and text will be added. Add the text of your choice in the shape.
All Done! Enjoy.

Leave a Reply