
In Adobe Illustrator, you can change the opacity of any object, and, after that, you can also switch between different blending modes. The blending mode blends the color of the top object with the other object that is under that.
You can also watch the detailed video tutorial, to learn how to change blending mode in Adobe Illustrator.
There are different blending modes available in Illustrator, that can be chosen while you are working with the object.
You can also learn:
- How to Change Opacity in Illustrator
- How to Reflect in Illustrator
- How to Make a Shape Transparent in Illustrator
If you are new or don’t have any idea to change the blending mode in Illustrator, then you are in the right place. In this tutorial, you will learn how to change the blending mode in Adobe Illustrator.
So let’s start.
How to Change Blending Mode in Adobe Illustrator
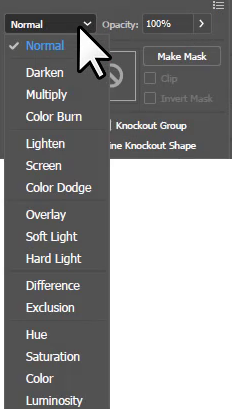
To change the blending mode in Illustrator, go to Window > Transparency. The Transparency panel will appear. Here you can change the blending mode. By default Blending Mode is set to normal, you can click on normal and see more blending options. Select any blending mode of your choice and it will be applied to the selected object.
Below you can see the detailed guide to changing blending mode in Illustrator.
Step 1: Select the object first using the Selection Tool, before changing the blending mode.
Step 2: To change the blending mode, go to Properties > Appearance > Opacity.
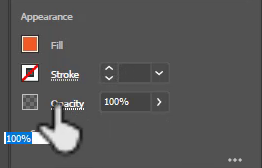
Step 3: When you click on Opacity, Transparency options will appear. You can change the Blending Mode by clicking on Normal.
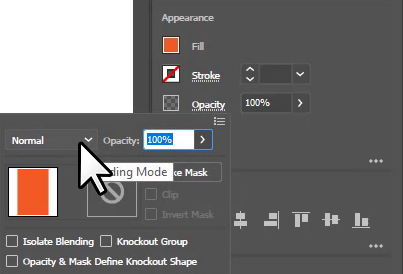
Normal is by default set Blending Mode to any object. You can change and apply any blending mode to the object and you will see the difference on the lower object.
Note: If you can’t find the Transparency panel in Properties then go to Window > Transparency.
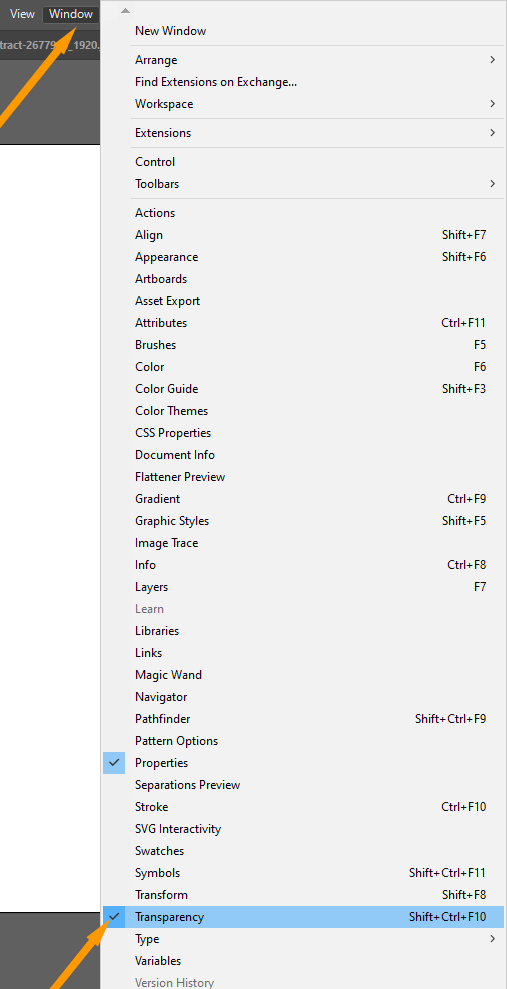
The “Transparency” panel will appear.
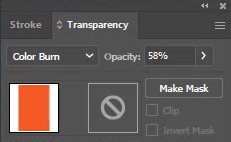
Here you can change Blending Mode according to your choice.
You have learned to change the blending mode in Adobe Illutrator.
In this tutorial, you have learned to change the blending mode in Adobe Illustrator. You can apply any blending mode to the upper object and the effect for the lower object will be changed.
Have More Questions?
If you have any questions related to changing the blending mode in Illustrator, then ask in the comment section below. We have also answered some most frequently asked questions below.
How to Overlay Images in Illustrator
To overlay the image in Illustrator, select the image, go to Edit > Edit Colors > Convert to Grayscale. Now grab the Selection Tool and draw a rectangle on the image. Fill any color like blue or pink, change its opacity to 32% or you can change it according to your choice. The overlay image will be created.
Knockout group Illustrator
To Knockout Group in Illustrator, go to Window > Transparency. From the Transparency panel and select Knockout Group.
Transparency panel Illustrator
To use the Transparency panel in Illustrator, go to Window > Transparency. The Transparency panel will appear.
All Done! Enjoy.
Leave a Reply