
Many times we need to crop in Illustrator, whether it’s a raster or a vector image. Cropping in Adobe Illustrator can be tricky as sometimes the beginners cannot crop the actual part that they want to. Adobe Illustrator provides multiple ways to crop in different styles. Sometimes cropping in any shape or cropping just the exact part of an image is required.
How to Crop in Illustrator 2022
If you don’t know the right way to crop in Illustrator, then you are at the right place. In this tutorial, you are going to learn different ways to crop in Illustrator. With the help of this tutorial, you are going to learn the easiest way to crop in Illustrator.
You can also learn:
The best part of this tutorial is that we are going to share different ways to crop in Illustrator that are gonna help you in your design career. You will not have to switch to other applications to crop an image or anything.
Let’s start today’s tutorial in which you are going to learn multiple ways to crop in Illustrator, whether it’s a raster or a vector graphic. All you want to remove the unnecessary part from the design or image.
Crop in Illustrator (2 ways)
In Adobe Illustrator, we can crop using different methods. If you want to crop an image then the crop option is best. You can crop using the steps below.
1st Method: Crop in Illustrator
Illustrator provides the Crop option for images, that can be easily cropped by adjusting the frame according to your desired area.
How to Crop Image in Illustrator
The easiest way to simply crop an image is by using the Crop option in Illustrator.
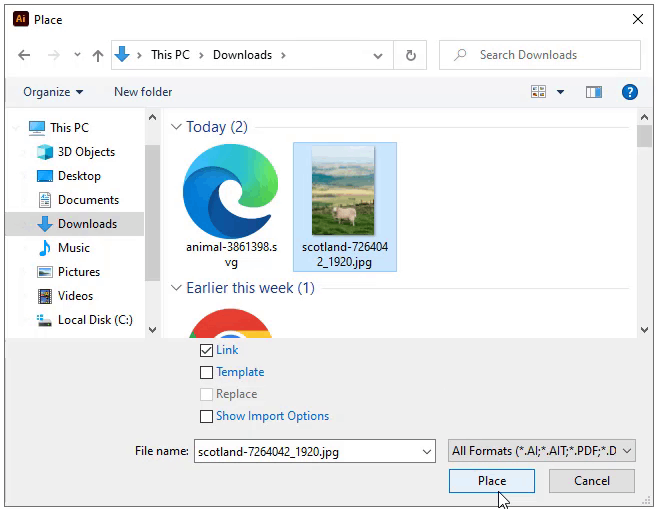
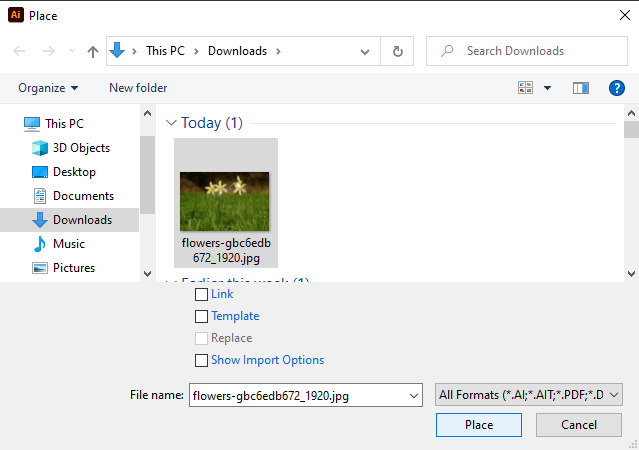
Step 1: Place the image in your workspace that you want to crop by going to File > Place.
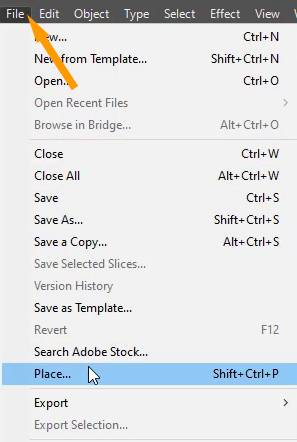
Select the image from its location and click OK. Click anywhere on the artboard and the image will be placed.
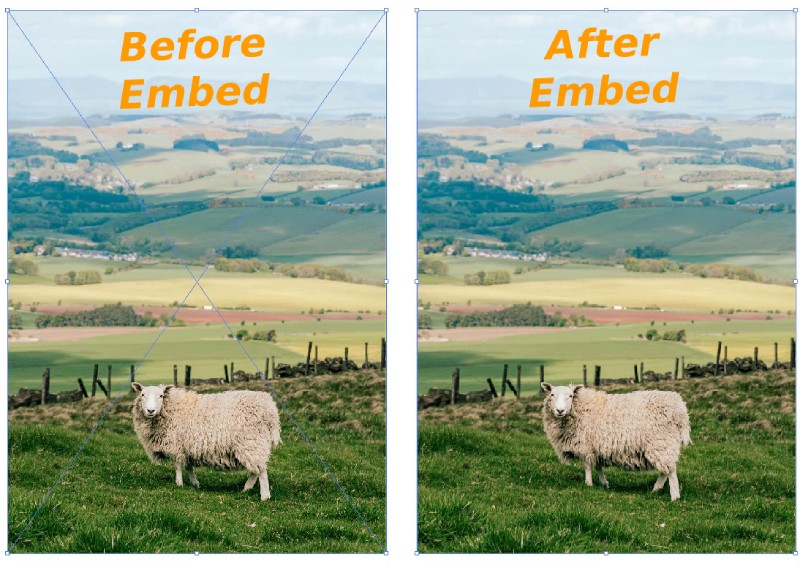
Step 2: First of all, Embed the image so that we can do any type of edits we want to make. You may see two lines crossing each other, we need to embed it. To embed the image go to Properties > Quick Actions > Embed.
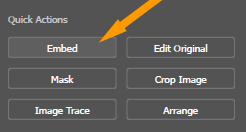
The image is now Embedded. As you can see the crossed lines disappeared.
Step 3: Select the image using the Selection Tool.
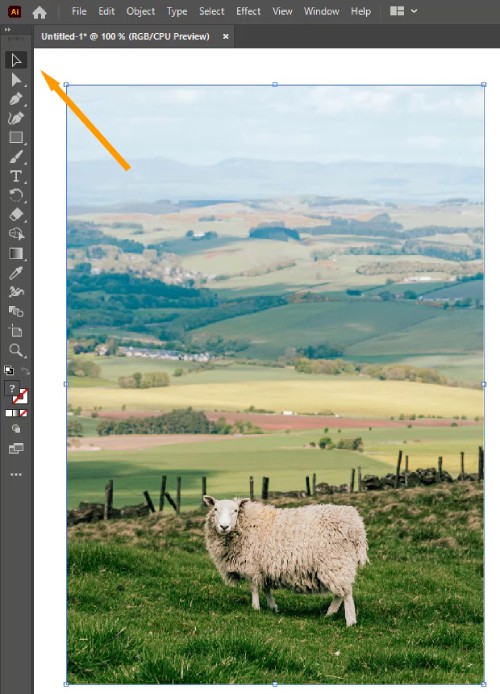
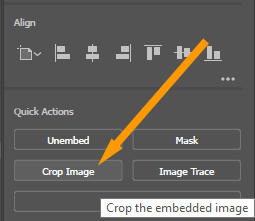
Step 4: Go to Properties > Quick Actions > Crop Image.
Step 5: As we select the Crop option the crop frame appears on the image.
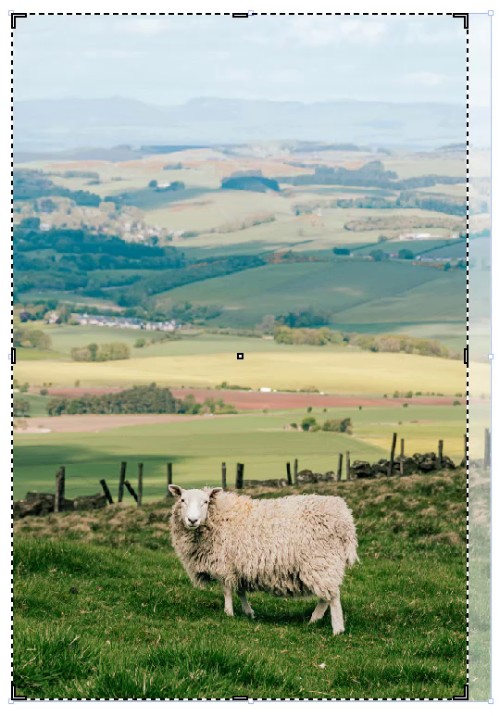
Step 6: We can now adjust the frame on the image according to the area you want to crop. Just like you can see we did here. You can adjust the frame size according to your need.
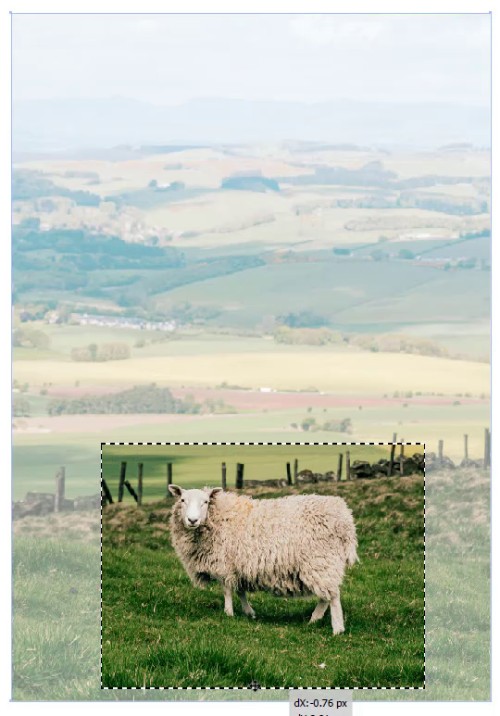
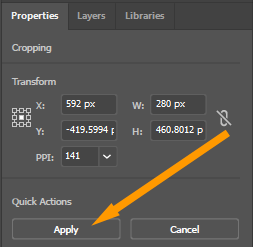
Step 7: After adjusting the crop frame, go to Properties > Quick Actions > Apply or you can also use the Enter key from the keyboard to apply the crop settings.
The selected part is cropped as you can see in the image below.
Note: The part you have cropped, cannot be recovered. If you want to use the full image again then you need to place the image from its location again on the artboard.
If you are in the Essential Classic workspace then you can find all the tools in the upper bar, the cropped image and apply button are also found there.
2nd Method: Crop by Clipping Mask
Clipping Mask can also be used to crop objects in Illustrator. For example, you want to crop a part between two objects, like a leaf. Clipping Mask will help to crop in this regard.
How to Crop Vector in Illustrator
Step 1: Place the vector that you want to crop in Adobe Illustrator.
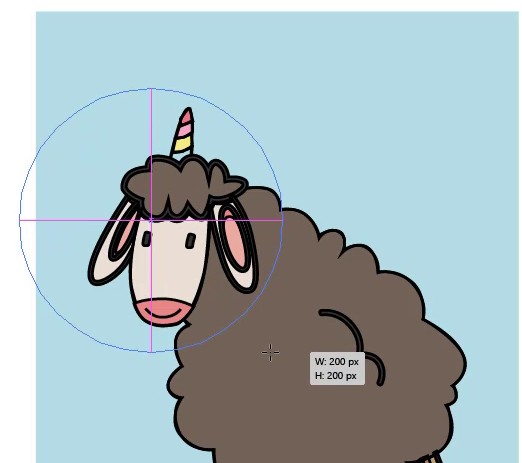
Now it depends on you, in which shape or style you want to crop it. Here we want to crop it in a circle. You can also crop it in any shape.
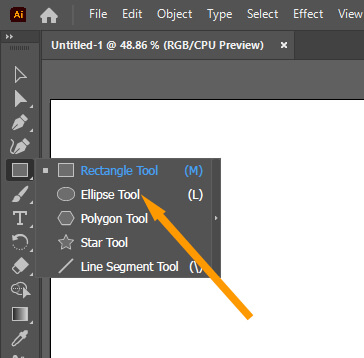
Step 2: Select the Ellipse Tool from the left toolbar.
Step 3: Press & hold the Shift key, and then draw the circle.
Note: If you don’t press and hold the shift key, you will not be able to draw the circle. Instead, it will be an Ellipse.
Keep in mind that the shape should be on the top of the vector graphic.
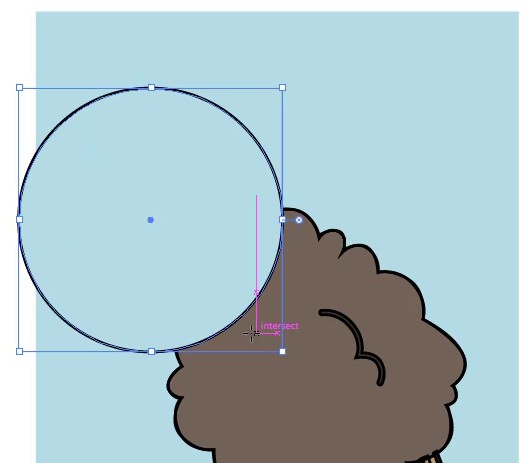
Step 4: Select both, the shape and the vector graphic by using the selection tool.

Step 5: Right-click on the image and select Make Clipping Mask.
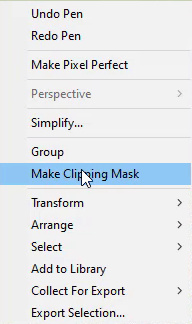
Or you can also go to Properties > Quick Actions > Make Clipping Mask or go to Object > Clipping Mask > Make.
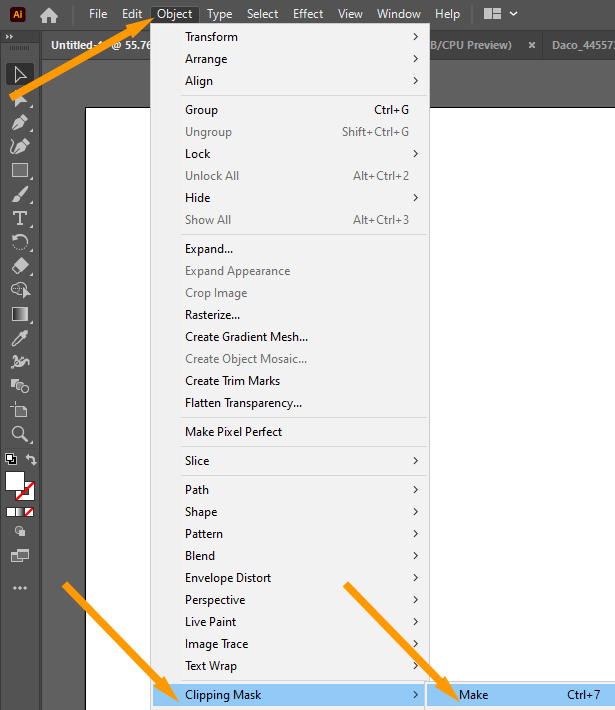
The short key for Make Clipping Mask
You can also use the short key Ctrl+7 to Make a Clipping Mask.
As you can see in the image below when we selected Make Clipping Mask the part of the shapes that were on the top, cropped the image into the shape.

You can use any vector to Make a Clipping Mask.
3rd Method: Crop by Pathfinder
To crop a vector graphic is not like cropping an image. Because when we select it we cannot see the Crop option just like we see for an image.
To crop a vector we need to use the Pathfinder Tool, crop option. To use it follow the correct steps to get an accurate result.
If you want to crop a shape using the other shape then follow the steps given below.
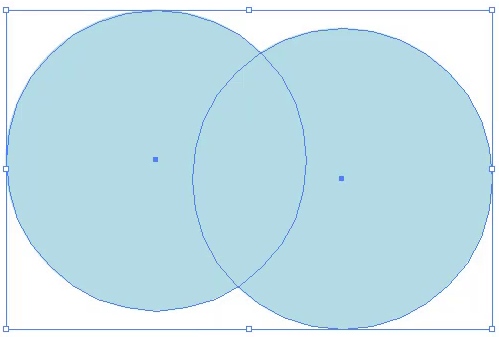
Step 1: Draw two circles on the artboard by using the Ellipse Tool.
The circle can be drawn by pressing the Shift key on the keyboard.

How do I cut out part of a shape in Illustrator?
Step 2: Select both circles by using the Selection Tool.
Where is the crop icon in Illustrator?
Step 3: Go to Properties > Pathfinder > More options > Crop.
If you don’t find the Pathfinder panel in the properties then go to Window > Pathfinder and select Crop.
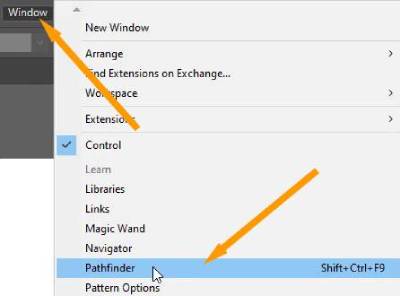
You can use the keyboard shortcut Shift+Ctrl+F9, and the Pathfinder panel will appear.
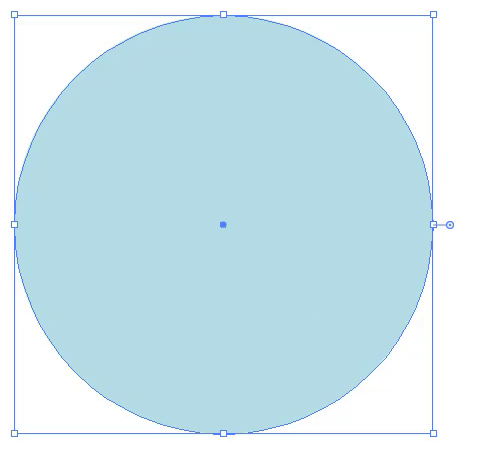
Right after selecting the crop from the Pathfinder, the vector graphic will be cropped into the style of shape as you can see in the image below.

4th Method: Crop by Anchor Point
Any shape or object can be cropped by its Anchor points as well.
How to Crop a Shape in Illustrator
Step 1: Draw any shape on the artboard, here we are drawing a Circle.
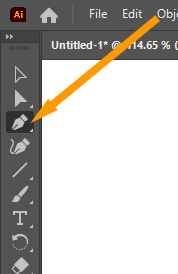
Step 2: Select the Pen Tool from the left toolbar.
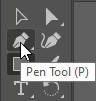
Step 3: Bring the Pen Tool to any anchor point of the shape that we have created earlier.
Step 4: The Anchor point will be more visible if we click once on it using the mouse. That anchor point will be deleted from the shape.
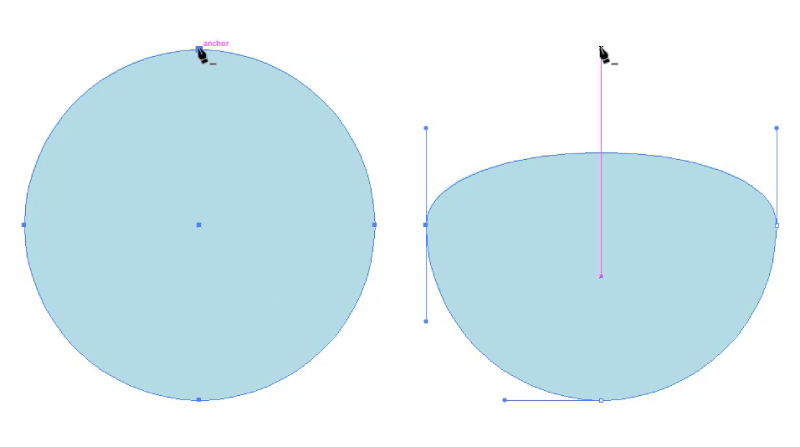
As you can see in the image below that the upper side of the Circle is deleted.

5th Method: Crop by Pen Tool
Pen Tool can also be used to crop image objects freely. We can crop any part of the image by making different anchor points with the help of Pen Tool.
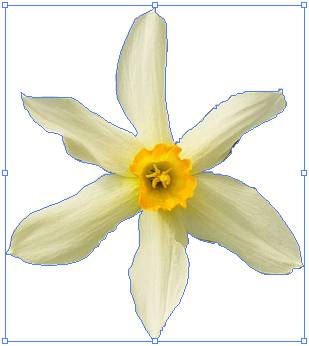
Step 1: Place the image on the artboard, that you want to crop.
Step 2: Embed the image by Properties > Quick actions > Embed.
Step 3: Resize the image according to your choice.

Step 4: Select the Pen Tool from the left toolbar.
Step 5: Start making anchor points on the image using the Pen Tool in the area that you want to crop.

Step 6: After making the anchor point, select the image and the cropped part and then right-click on the artboard and select Make Clipping Mask.
The selected part will be cropped as you can also see in the image below.
You have learned How to Crop in Illustrator.
In this tutorial, you have learned different ways to crop in Illustrator. The different ways are used for so many purposes. Either you want to simply crop an image or any vector into a shape, or you want to crop objects. All the methods are given.
You can also watch the detailed video tutorial, that is given at the start.
Do You Have More Questions?
If you have any questions regarding Crop in Illustrator, then feel free to ask in the comment section below. We have also answered some of the most frequent questions as well.
How To Crop PDF In Illustrator
Draw a rectangle over the area that you want to crop from pdf. Select the pdf and rectangle, and press Ctrl+7 to crop. You can also go to Properties > Quick Actions > Make Clipping Mask.
All Done! Enjoy.
Leave a Reply