
In Adobe Illustrator, you can find seven amazing liquify tools. You can create amazing illustrations using the Liquify Tools. You can create your own fonts, apply different effects, and a lot more.
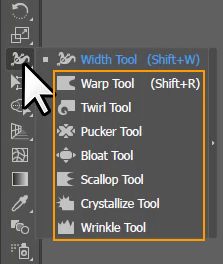
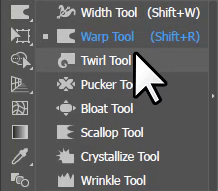
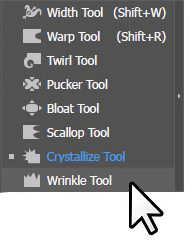
The seven Liquify Tools are Warp Tool, Twirl Tool, Pucker Tool, Bloat Tool, Scallop Tool, Crystalize Tool, and Wrinkle Tool.
You can watch below detailed video to learn about Liquify Tool in Adobe Illustrator.
If you are new or don’t have an idea how to liquify in Illustrator, then you are at right place. In this tutorial, you will learn how to liquify in Adobe Illustrator.
So let’s start.
Liquify Tool in Illustrator
Adobe Illustrator has seven amazing liquify Tool, that can be used to create amazing artwork, font, and much more.
These are the seven liquify tools in Illustrator.
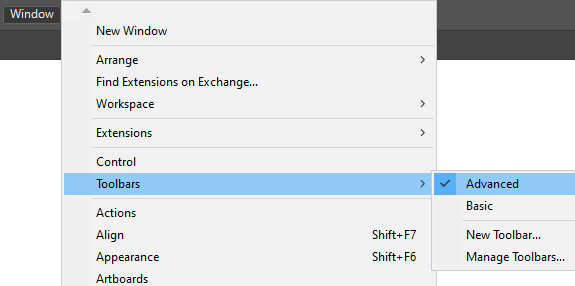
Note: To use Liquify Tool, first switch the toolbar to Advance.
Go To window > Toolbar > Advance.
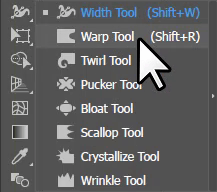
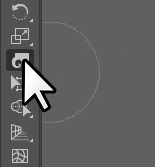
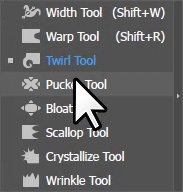
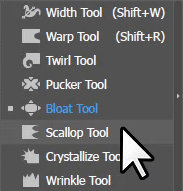
Now under the Width Tool, you can find all seven liquify tools.
How to Liquify in Adobe Illustrator
As you read above there are seven liquify tools that can be used to liquify any shape or text easily. So we will look at them all one by one.
Warp Tool
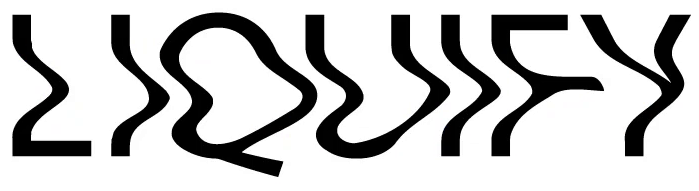
The first one among the Liquify Tool is Warp Tool. It can create an amazing waves effect for the text or shapes.
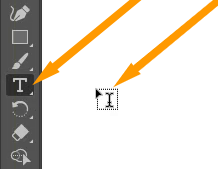
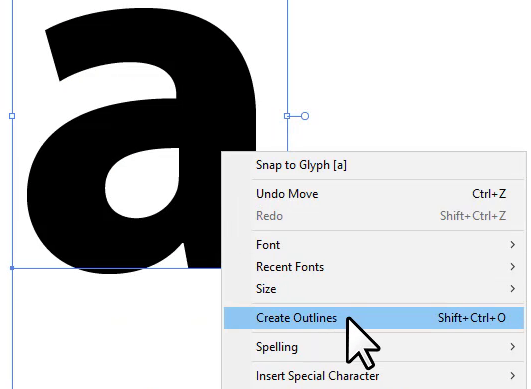
To apply the liquify effect to any text, add the text first using the Type Tool.
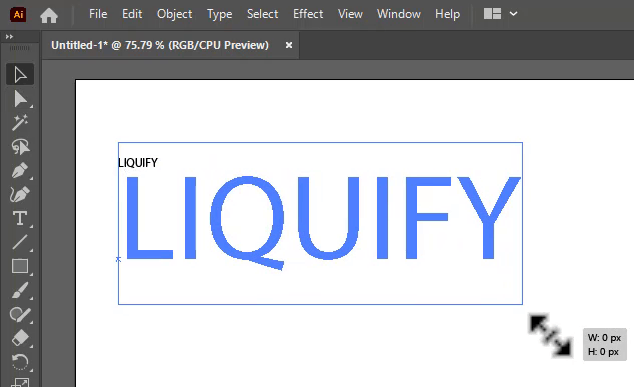
Now type your desired text. Select the text using the Selection Tool and then resize it using its anchor point while holding the Shift key.
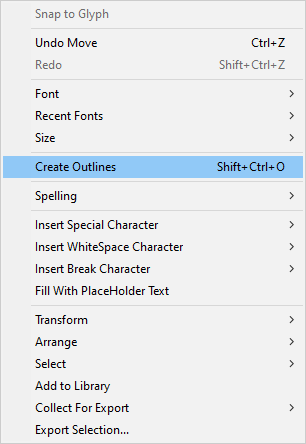
Right click and select Create Outlines.
Now select Warp Tool from the left toolbar that is under the Width Tool from the Advance Toolbar.
Click and drag the tool onto the text and make it liquify.

Here is the final look of the text after liquifying the text using the Warp Tool.
Twirl Tool
Twirl Tool lets you twirl the objects in a most beautiful way. You can twirl to make branches, twirl text, marble designs, clothing designs, and much more that you want.
Let’s make a fantastic design using the Twirl Tool for wall art, floor designing, or pattern.
Grab the Rectangle Tool, press & hold the Shift key and draw a square.
Fill in any of your favorite color in the shape from the Properties > Appearance > Fill.
Right click on the Width Tool and select Twirl Tool.
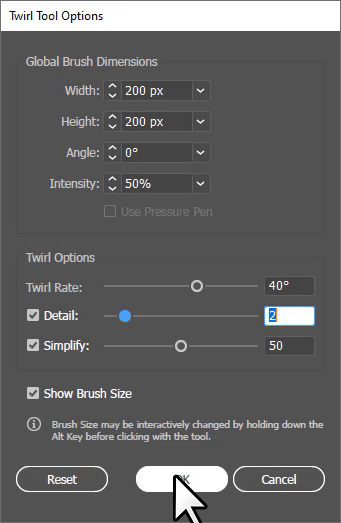
Using the Default settings for Twirl, you can also create the design, but here we are changing some values to get a good twirl for the shape.
Double Click on the Twirl Tool.
The Wrap Tool Options panel will appear.
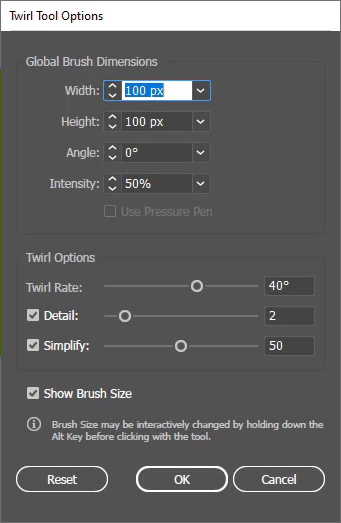
Set all the values as you can see here in the Warp Tool Options panel and then click OK.
Now click on the anchor point of the shape, and you will see it start twirling the corner.
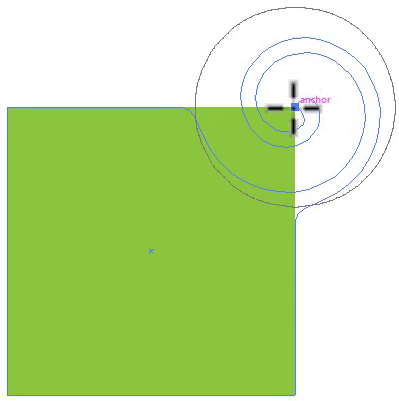
You can leave when you get the perfect twirl that is needed.

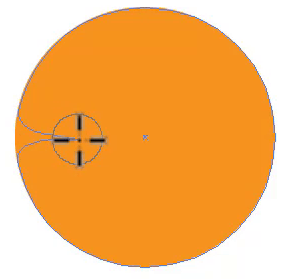
As you can see, the twirl is going from right to left.
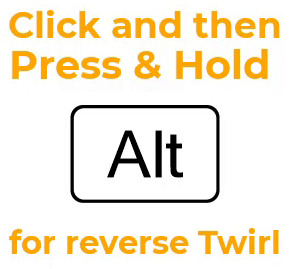
If you want to switch the twirl side, then click on any point of the shape you like. When it starts twirling, press the Alt key. You will see the twirl will flow from left to right.
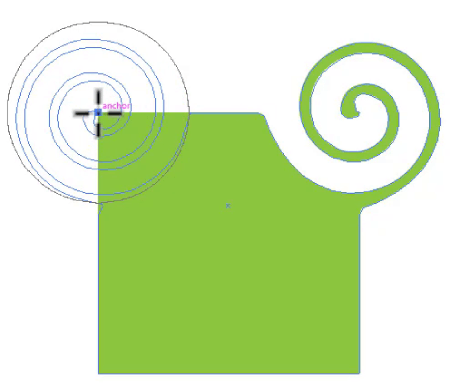
Here is the shape after liquifying it using the Twirl Tool.

You can also create the Twirl effect for the text as well. But don’t forget to create outlines first for the text.

Pucker Tool
Pucker tool can be used to turn the shapes into a flower.
Draw a Circle using the Ellipse Tool while pressing & holding Shift key.
Fill in any of your favorite color in the circle by Properties > Appearance > Fill. Select the Pucker Tool under the Width Tool.
Now click and drag on the lines as we did here.
You can repeat the same steps from every side to liquify the shape into a flower like this.

Bloat Tool
Bloat Tool can be used to add bloats to any shape inward and outward.
Here we are using a rectangle to work with using the Bloat Tool. Create a rectangle using the Rectangle Tool.
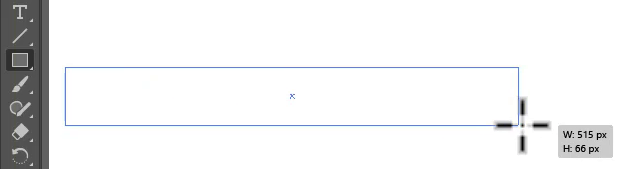
Fill in any of your favorite colors in the shape by Properties > Appearance > Fill. Select the Bloat tool under the Width Tool from the left toolbar.

Click and drag on the shape to add the bloat effect.
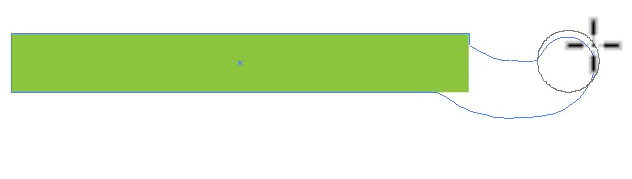
Here is the final look of the rectangle after using Bloat Tool on it.

Scallop Tool
Scallop Tool can be used to add fur texture to any shape.
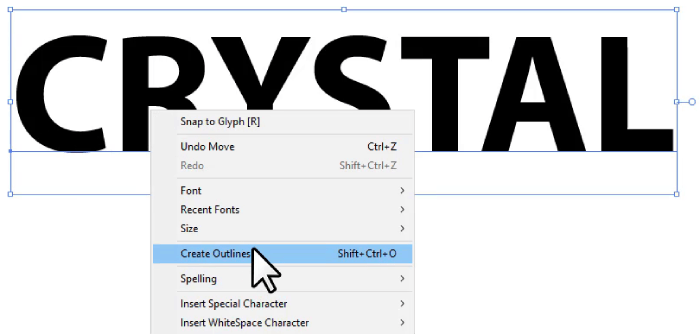
Add text using the Type Tool on the artboard and right-click and select Create Outlines.
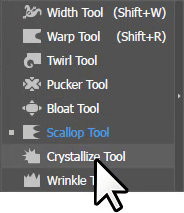
Now select Scallop Tool under the Width Tool.
Click on different areas of the shape to add the Scallop effect to it.

Here is the final result of the text.

Crystalize Tool
Crystalize Tool as the name refers, can add the crystal effect to any shape.
Add text using Type Tool, and then type any words that you want to use. Resize the text according to your choice as well. Right-click on the text and select Create Outlines.
Now select Crystalize Tool under the Width Tool.
Long click on the text to make it crystalize like below.
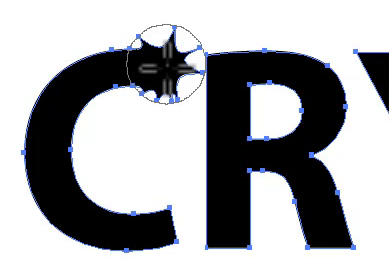
Here is the final result of the text with Crystalize effect on it.

Wrinkle Tool
Wrinkle Tool adds texture to any shape. Let’s see how it works.
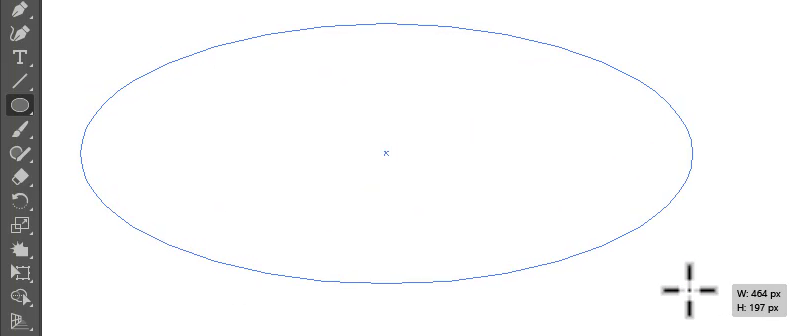
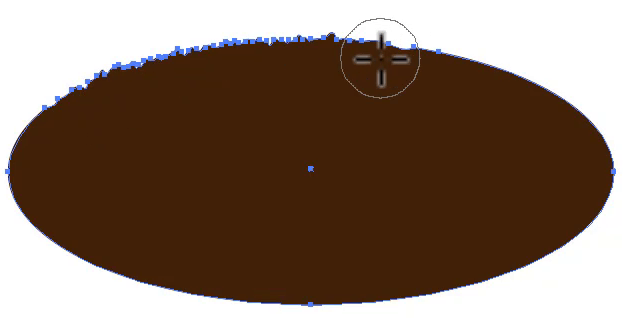
Draw an Ellipse using the Ellipse Tool from the left toolbar.
Fill any color according to your choice. Select the Wrinkle Tool that is under the Width Tool.
Now click and drag outward on the shape to add wrinkle to it.
Here is the final result of the shape after using the Wrinkle Tool on it.

You have learned to Liquify in Adobe Illustrator.
In this tutorial, you have learned to liquify the text using different liquify tools. Here you have learned the complete details of the liquify in Adobe Illustrator. Every tool can create a unique and amazing effect for any shape and text.
Have More Questions?
If you have any questions related to Liquify in Adobe Illustrator, you can ask in the comment section below. Here we have answered some most frequently asked questions below.
Warp Tool in Illustrator
To use the Warp Tool, select Warp Tool under the Width Tool in Advance Toolbar.
Liquify Shape in Illustrator
You can liquify any shape by using the Liquify Tool that is available under the Width Tool in Advance Toolbar.
Where is the Liquify Tool in Illustrator 2022
Liquify Tool are available under the Width Tool in the Advance Tool bar of Adobe Illustrator. There are seven liquify Tool that can liquify any shape or text.
How to Liquify Text in Illustrator
Select the Text, right-click and select using the Selection Tool. Select Warp Tool under the Width Tool in Advance Toolbar. Click and drag on text to liquify the text in Adobe Illustrator.
Where is the Warp Tool in Illustrator 2022
Warp Tool in under the Width Tool in Advance Toolbar in Adobe Illustrator.
Warp Tool Illustrator Shortcut Key
The shortcut key for Warp Tool is Shift+R in Adobe Illustrator.
All Done! Enjoy.
Leave a Reply