
If you want to select a part of the image to color it or move it from one design to another then the best idea is to Trace an Image by using the Pen Tool in Adobe Illustrator. Pen Tool not only helps to create lines but is also used for tracing and then cutting out that part.
If you are new or you don’t have any idea to trace an image in Adobe Illustrator then you are at the right place. Our second post is about tracing an image in adobe illustrator using the pen tool. First of all, we need a logo for tracing. We have selected a sample logo here. It is a very simple and curved logo to trace.
Trace an Image in Illustrator
In this tutorial, you will learn to Trace an Image using the pen tool in Illustrator. With the help of this tutorial, you will be able to trace any type of graphic, logo, or image in Illustrator.
Let’s start.
Placing an Image to Trace in Adobe Illustrator
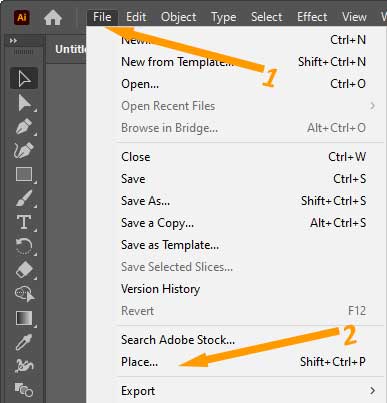
Step 1: Go to the File menu and click on the Place option. The browse window for the Place option will appear. Select your logo from its location and Click Place.
Embed Image
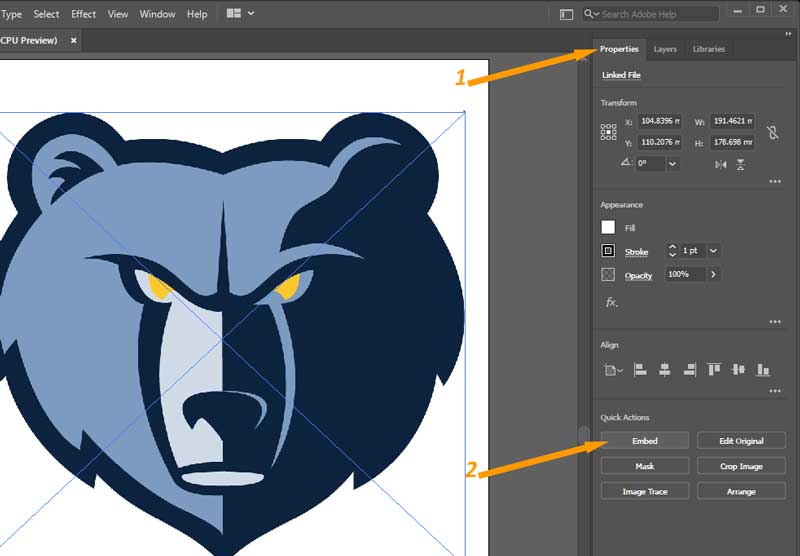
Step 2: Every placed image has a link with it. Its symbol is a cross sign on the image. So click on the Embed button in the Properties panel before we trace the Image. This option will make the image part of the file.
Step 3: Next, we are going to the Layers panel. Select the image layer and click on the flyout button. Click on the template button.
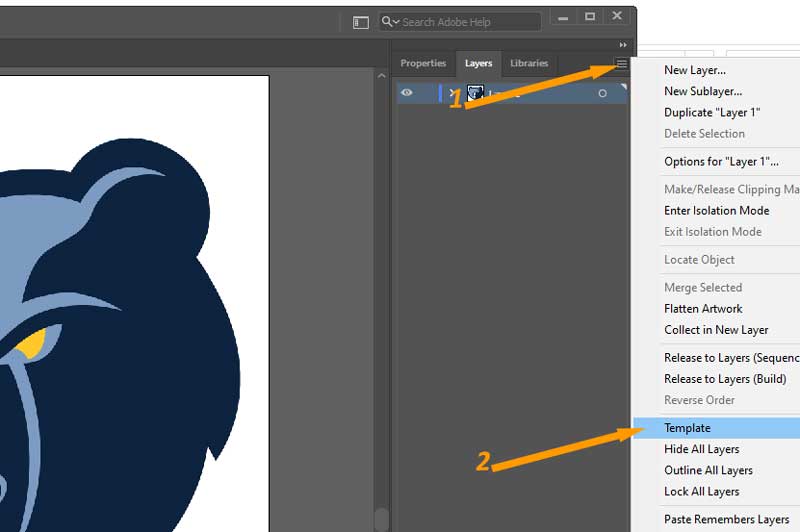
The image layer will be locked. And its opacity will decrease itself.
Creating New Layer
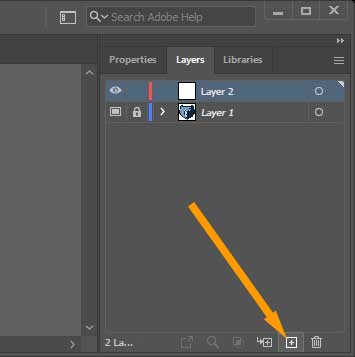
Step 4: Click on Create New Layer option at the bottom. Now, we can do our tracing easily.
Selecting Pen Tool
Step 5: As we are tracing by using the pen tool. So select the pen tool from the left toolbar to trace the image with its help.
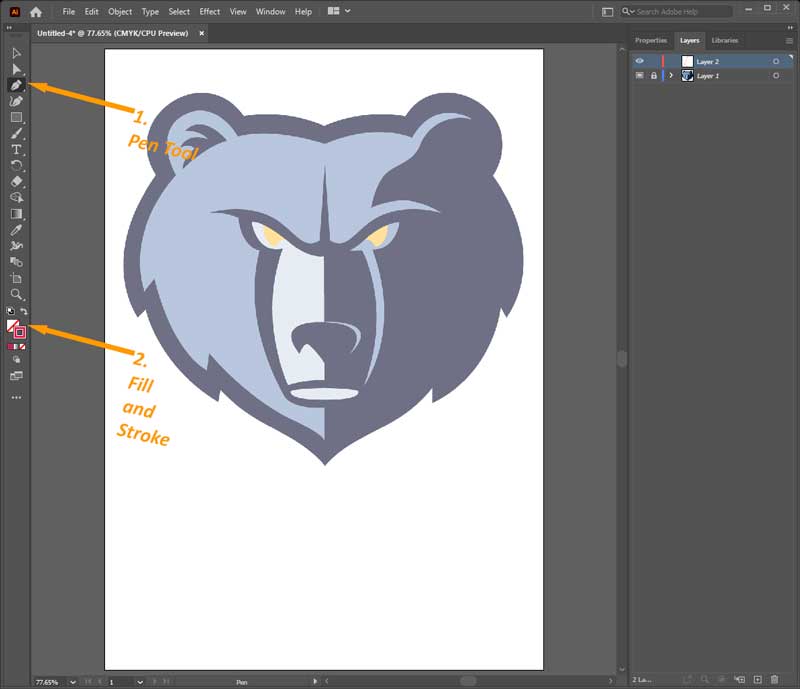
Trace Image using Pen Tool
Step 6: At the start, we will draw a complete outline. So we suggest you to off the fill color. Also, select the red color for a clearly visible outline.
We can start from any part. We are starting from the center. Because this logo is very symmetrical. If we make half and copy it, this is very simple work.
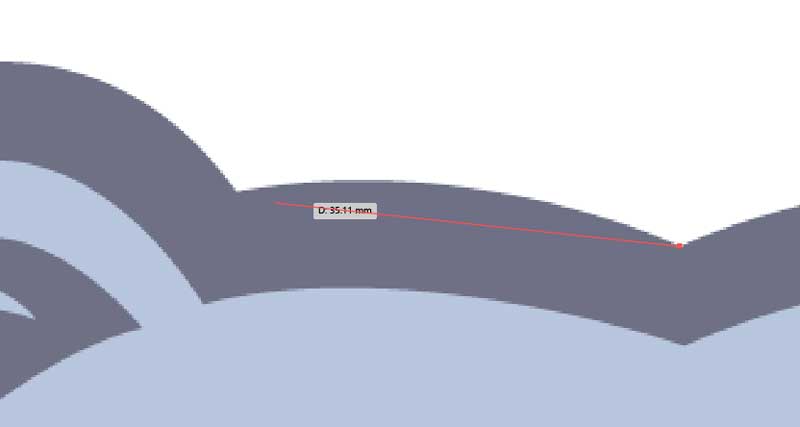
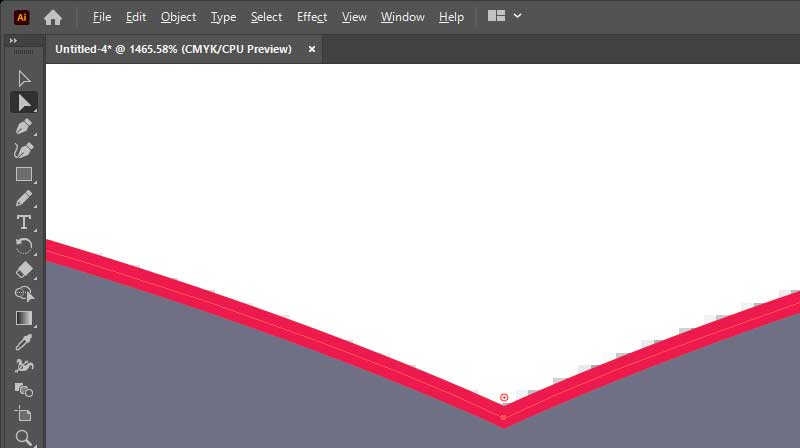
Step 7: We need a smooth curve at the start. So click and drag the cursor.
For corners, we will click on the anchor point.
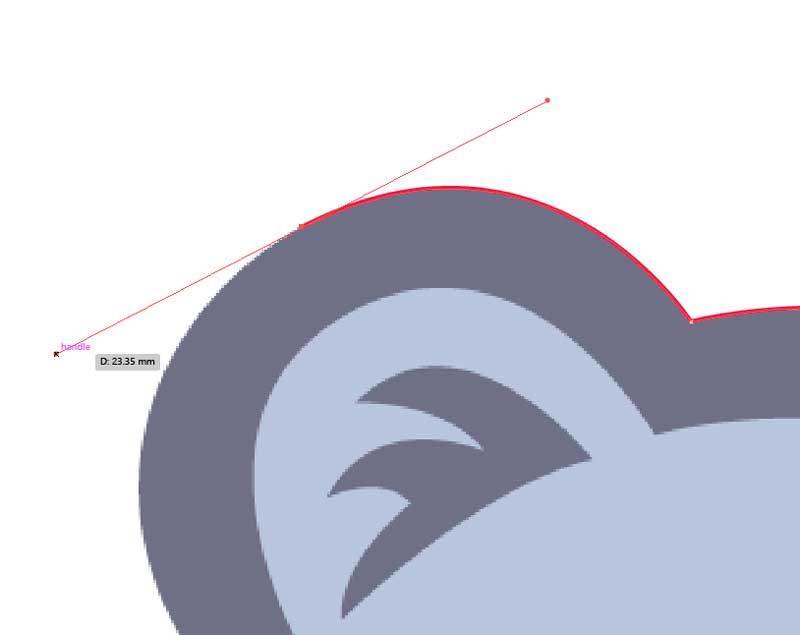


We will draw the complete outline. If some points are not correct, we will adjust them later.
We traced half image.

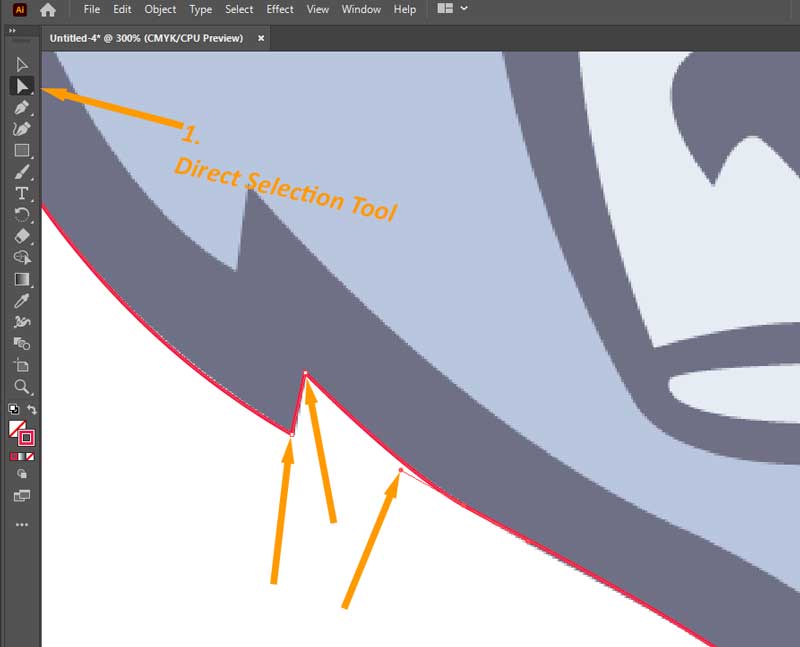
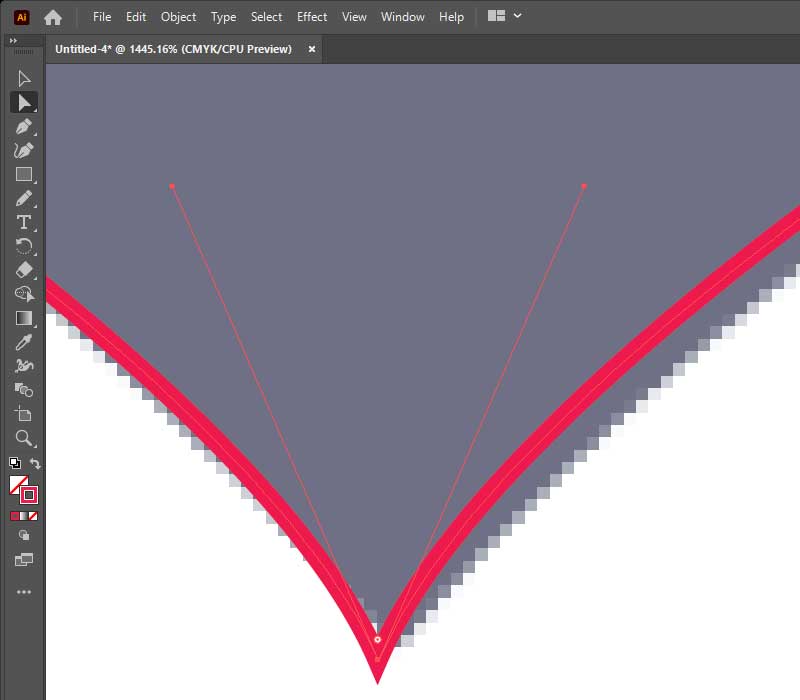
Step 8: Now select the Direct Selection Tool to resolve the curve issues by clicking and dragging the lines and curve handles.
At this point, our half part is completed.
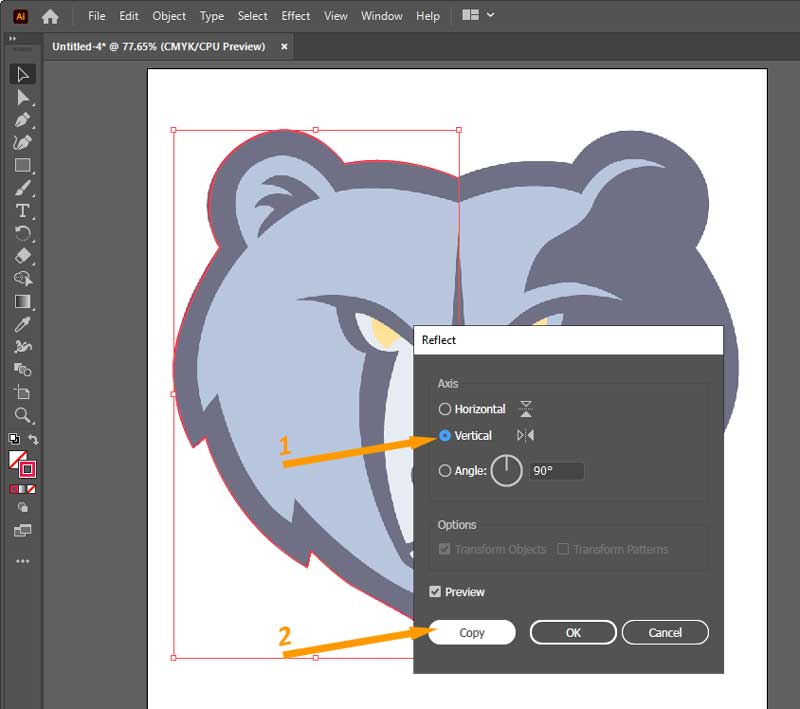
Now, we are copying the half part.
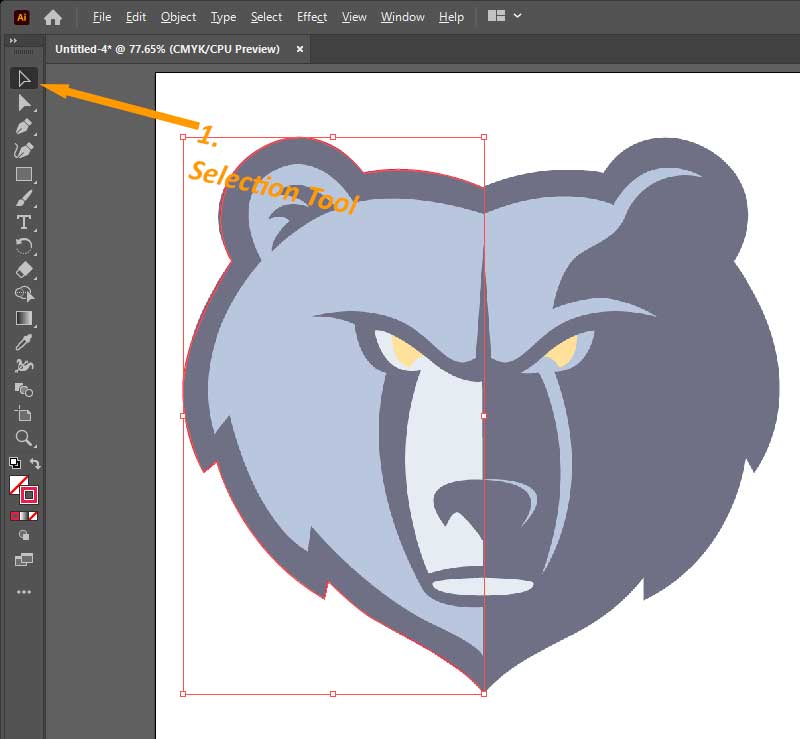
Step 9: Select Selection Tool.
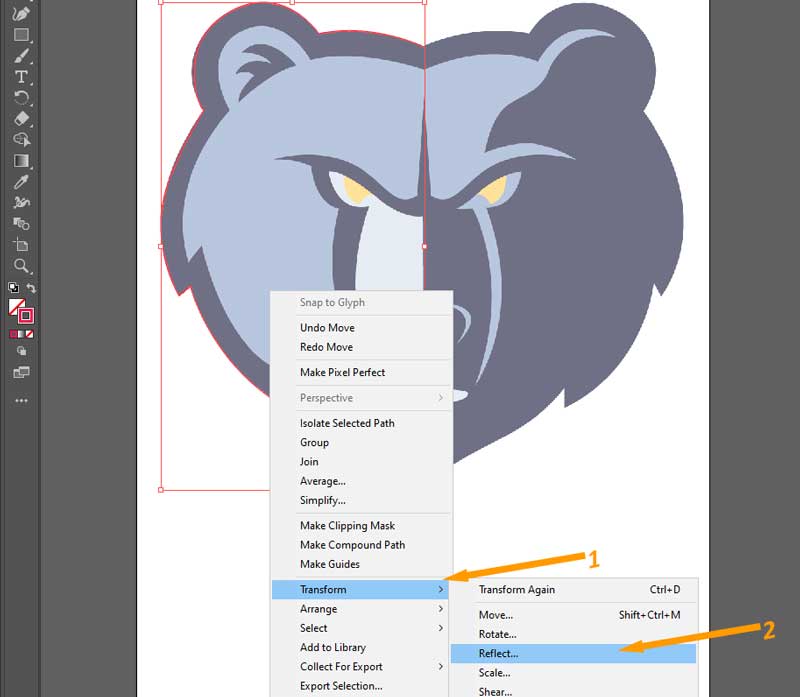
Step 10: Right click > Transform > Reflect > vertical > Copy.
Selecting End Points
Now select both lines’ endpoints by using the direct selection tool.
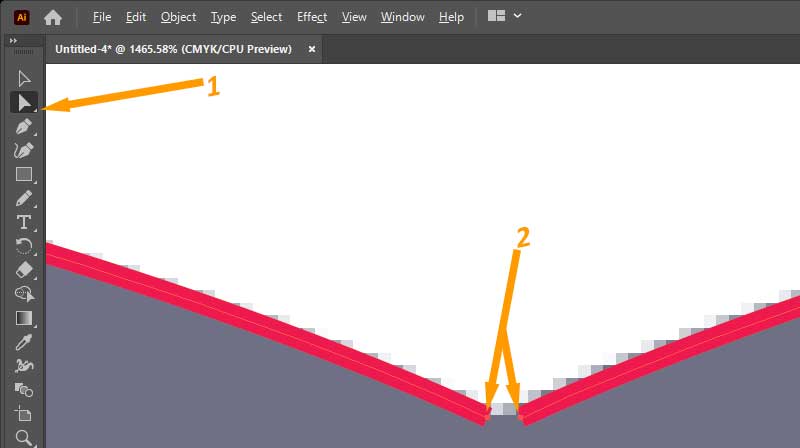
Press “Control + Alt + Shift + J”. This is the shortcut key of average and join. These lines will become a shape.

So, instead of making new lines, we used a simple way.
As you can see, there is little difference. So we will adjust these lines.
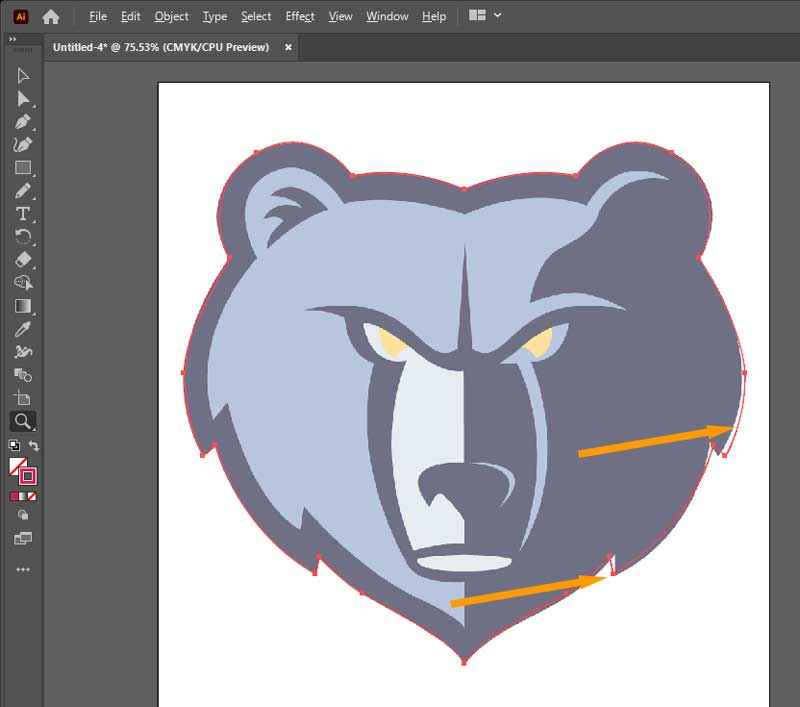
Now, our outline is traced.
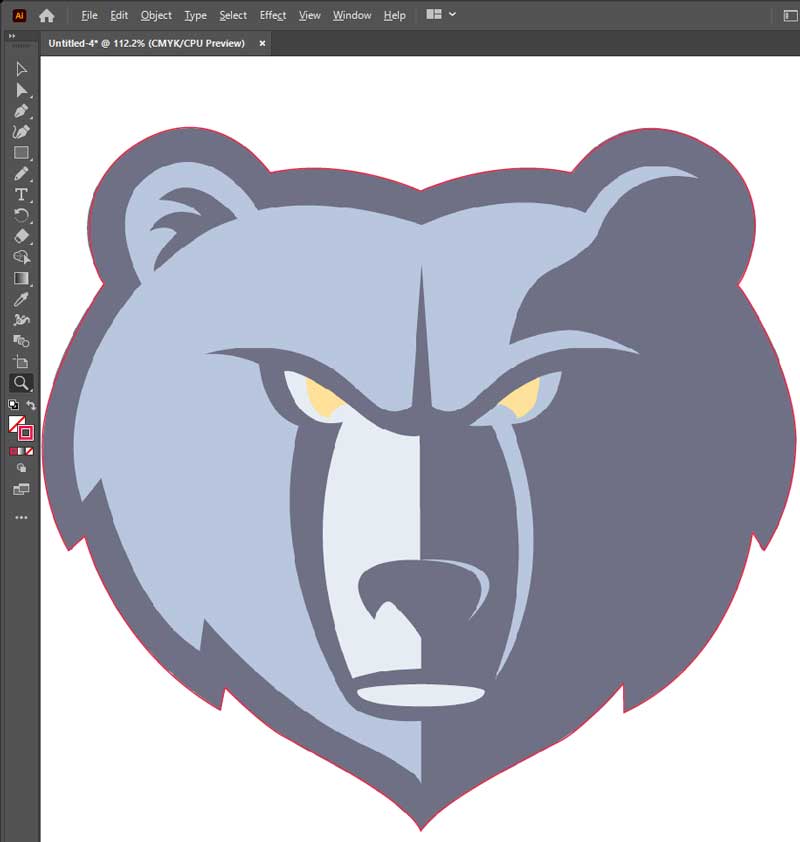
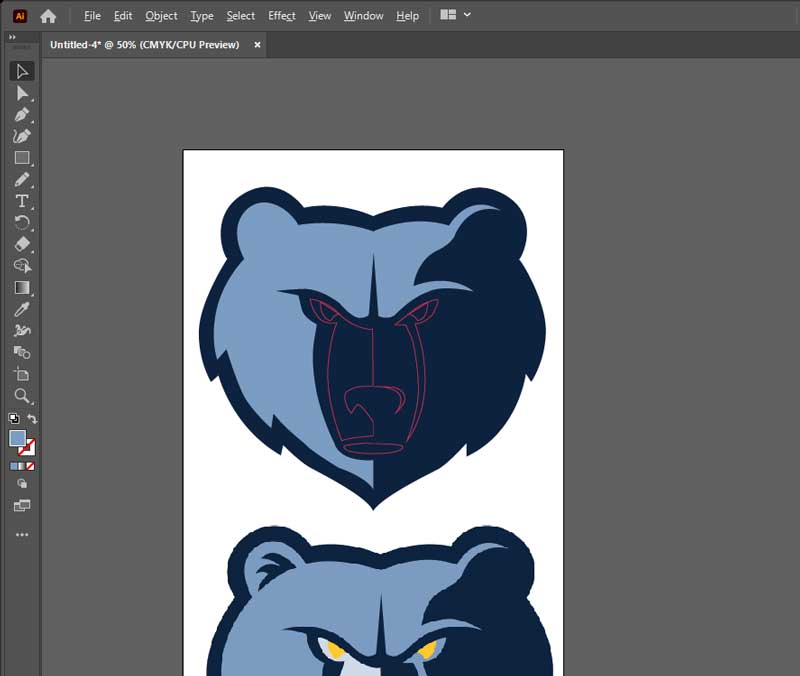
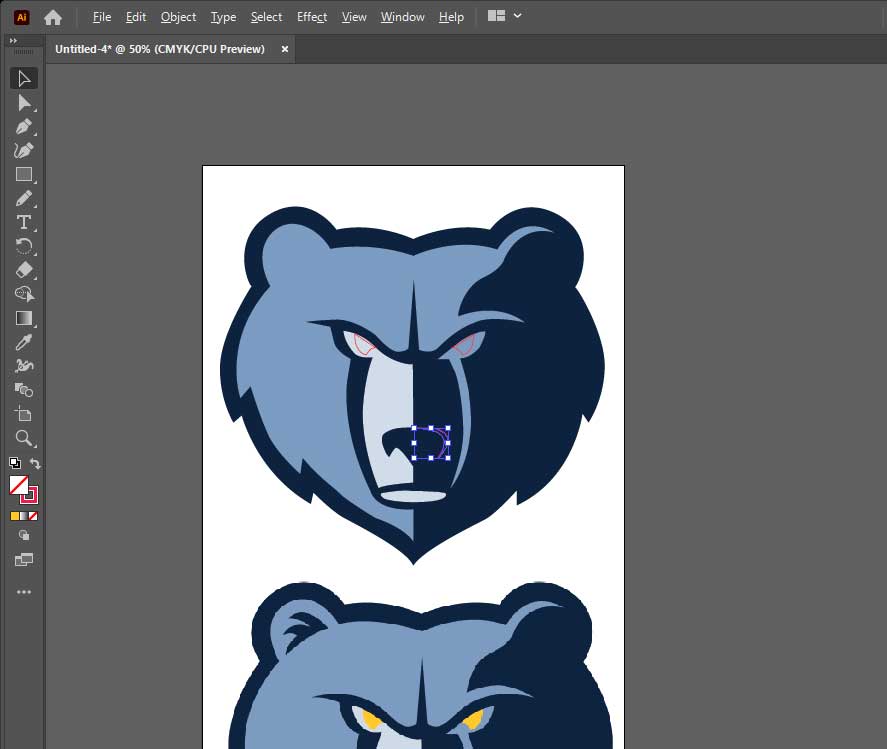
Now, Make new layers to make the inner parts. Select the pen tool and repeat the above-mentioned steps.

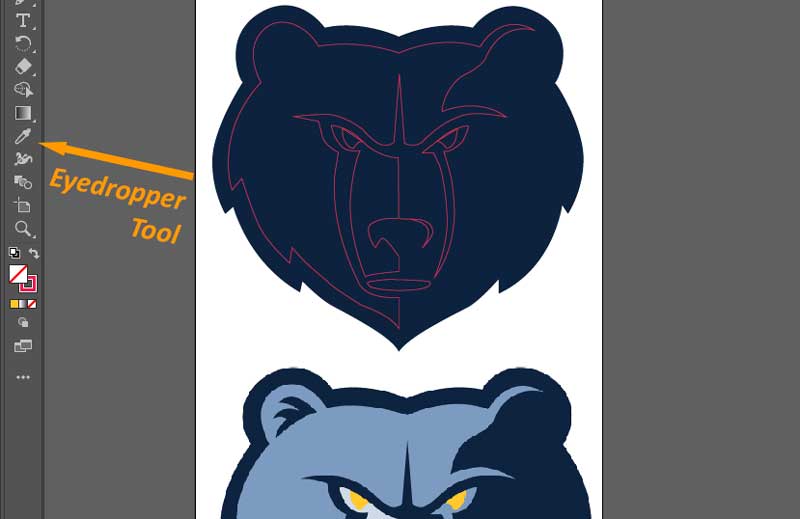
To fill the color first select the shape you want to fill by pressing the Ctrl key. Now select the Eyedropper Tool and click on the image color you want to fill.
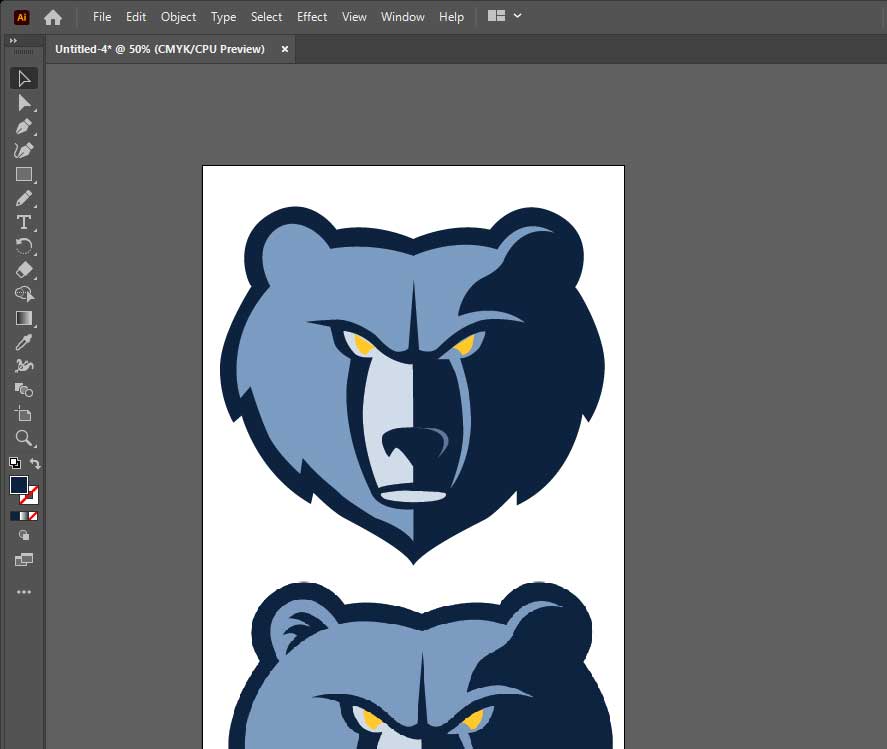
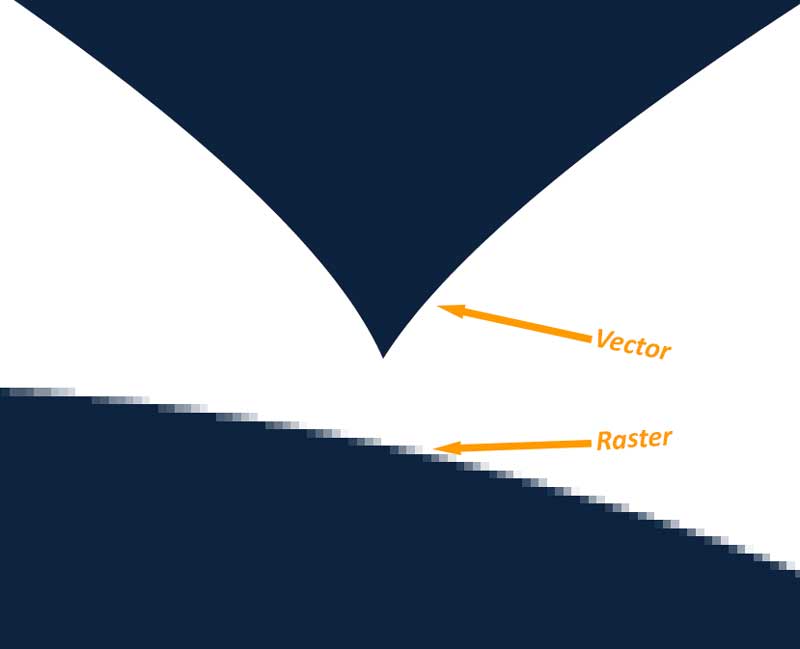
You can see the difference in both files. The first image was a raster image. If we zoom, it will pixelate. But, if we zoom the vector file, its quality will remain the same high. We can use this technique to print a huge file.
Now as you can the image is Traced. It’s very easy to Trace any image by using the Pen Tool in Adobe Illustrator.
Do You Have More Questions?
If you have any questions related to tracing, you can ask in the comment section below.
Leave a Reply