
Making shapes like clouds is more fun than downloading. You can create different vector shapes and it will become your favorite task when you learn the easy ways. As the clouds are required, you can easily make them by using the Shape Builder Tool. So, now you will not have to search for the vectors and pay for them.
You don’t need any other tool when you can create clouds with circles. You don’t need to use the Pen Tool to make each curve of the cloud and spend a lot of time. Many vector shapes are created using the Pen Tool, but this is not the case with the clouds.
Make Clouds in Adobe Illustrator – Video Tutorial
You can also watch the below-detailed video tutorial, to learn how to make clouds in Adobe Illustrator.
You only need to use the Ellipse Tool to make a perfect circle, and then we will use Shape Builder to make clouds from the circles.
You can also learn:


If you are new or don’t have any ideas on how to make clouds in Illustrator, then you are at the right place. In this tutorial, you will learn how to make clouds in Illustrator using circles.
So let’s start.
Make Clouds in Adobe Illustrator
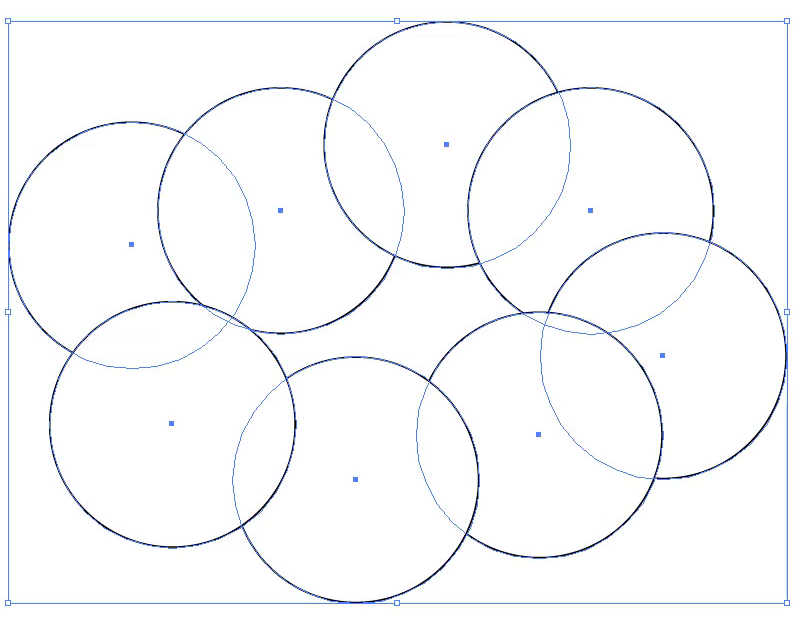
To make clouds in Illustrator, make some circles and arrange them in the shape of a cloud. Select all the circles and grab the Shape Builder Tool. Click and drag on all the shapes until all the inner areas are selected. Release the click and the cloud shape is created.
Following are the detailed steps to make clouds in Adobe Illustrator.
Using Shape Builder Tool
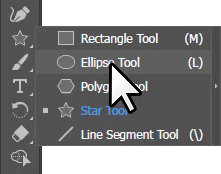
Step 1: Grab the Ellipse Tool from the left toolbar. The shortcut key for Ellipse Tool is L in Illustrator. To make the clouds, you need to make circles, and in Illustrator Ellipse Tool is used to create circles.
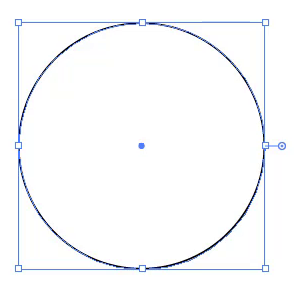
Step 2: Press and hold the Shift key on the keyboard and click and drag to draw a circle.
Here is the circle that is drawn and will be used to make clouds.
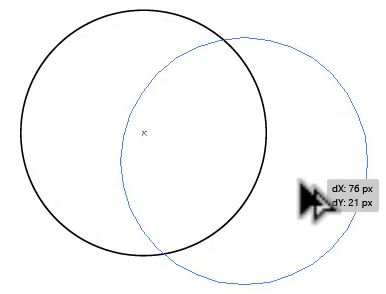
Step 3: Duplicate the circle, while holding down the Alt key, and then drag it to the new location. A duplicate of the circle is created.
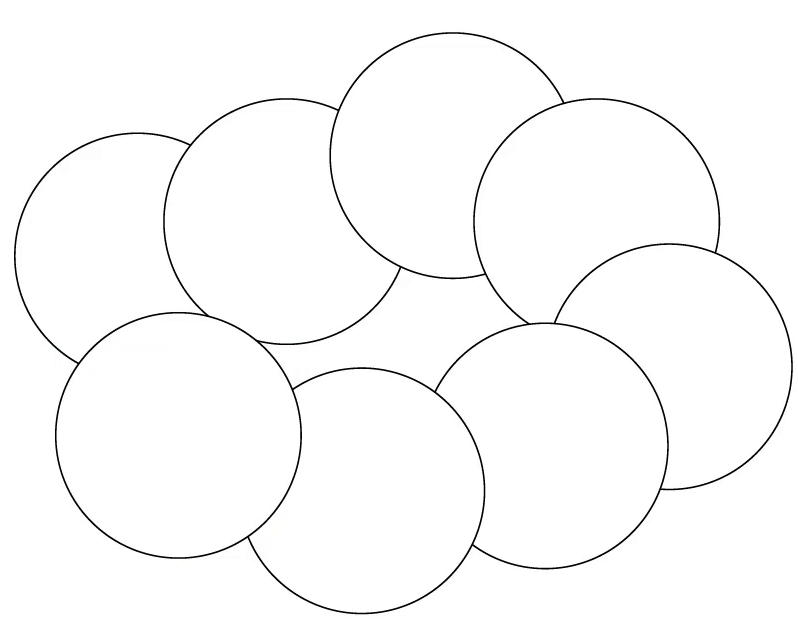
Step 4: Now, in the same way, make several copies of the circles and arrange them in the shape of a cloud. You can see below how to arrange the circles.
Step 5: Grab the Selection Tool from the left toolbar. The shortcut key to use the Selection Tool is V from the keyboard.

Step 6: Select all circles using the Selection Tool.
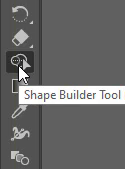
Step 7: Grab the Shape Builder Tool from the left toolbar. The shortcut key to use the Shape Builder Tool is Shift+M in Illustrator.
Step 8: Click and drag from the shape to combine them together and make it a single shape. It’s necessary that you don’t leave any area and all circles are combined.
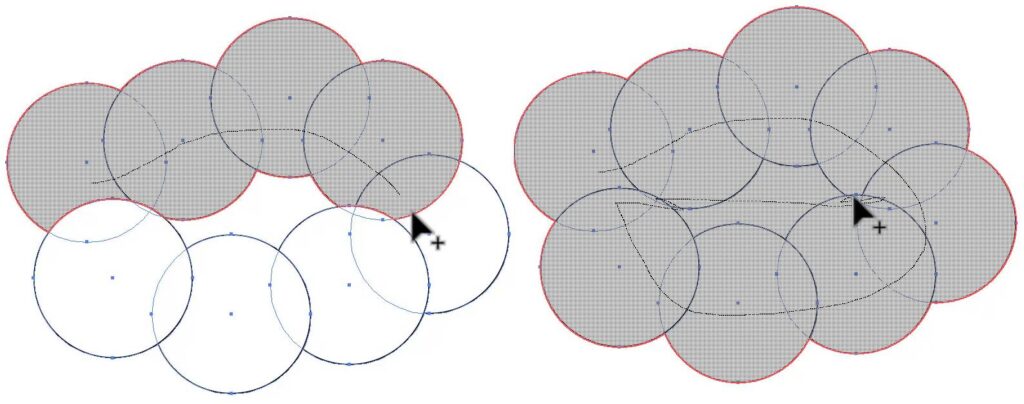
Here is the cloud shape, formed using the Shape Builder Tool.

You can add a sky background and then give a white fill to the cloud.

Using Pencil Tool
You can also use the Pencil Tool to make clouds in Adobe Illustrator. Grab the Pencil Tool that is available under the Brush Tool. You can create freehand clouds using the Pencil Tool.
You have learned to make clouds in Adobe Illustrator.
In this tutorial, you have learned to make clouds in Adobe Illustrator. You can easily make clouds using the Circles and Shape Builder Tool. You can increase the number of circles depending on the size of the cloud you need. The clouds that you have just created can be used in any project that you want to create.
You can include them in the sky designs if you are creating them. Adding clouds will give life to the other designs, and the fantastic part is that it just takes a few clicks to make a cloud in Adobe Illustrator. You can add any color to the cloud depending on the design that you are creating. If you are creating a design that includes rain, then it is a good idea to add a gray color to the clouds to make them look like rain clouds.
Have More Questions?
If you have any questions related to making clouds in Illustrator, then ask in the comment section below.
All Done! Enjoy.
Leave a Reply