In Adobe Illustrator, you can change the opacity of different objects, to see through the objects. You can create a stylish or designed background design with low opacity and add text on top of it. The text will be more visible and the background will have designing that can also be seen.
You can also watch the detailed video tutorial, below to change the opacity in Illustrator.
If you are new or don’t have the idea to change opacity in Illustrator, then you are in right place. In this tutorial, you will learn how to change opacity in Adobe Illustrator.
You can also learn:
- How to Make a Shape Transparent in Illustrator
- How to Export from Illustrator with Transparent Background
- How to Make Neon Effect in Illustrator
So let’s start.
How to Change Opacity in Adobe Illustrator
To change the opacity in Illustrator, select the object, and go to Properties > Appearance > Opacity. Change the opacity by adding value, or click on the arrow and change the opacity from the slider.
You can also read the detailed instructions to change opacity in Illustrator.
Step 1: We have a picture on the artboard and we need to set it as a background and then add some text on top of it. That’s why we will change its opacity so that the text that we will add should be visible and clear.
Select the image using the Selection Tool. You can use any other object and do the same as we are doing for an image.
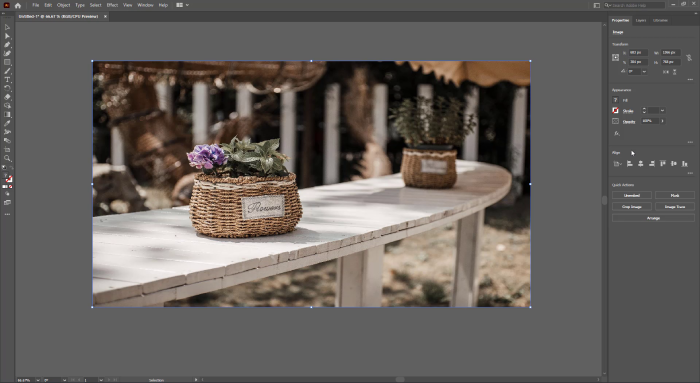
Step 2: As you select the image the opacity option appears in Properties > Appearance > Opacity. Change the opacity value from the box, or you can also click on the little arrow to see the slider. Change the position of the slider and see the opacity changes in the image.
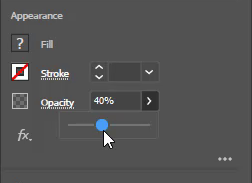
The image opacity is changed and now you can add some text and the text will be more clear and more visible.
Before:

After:

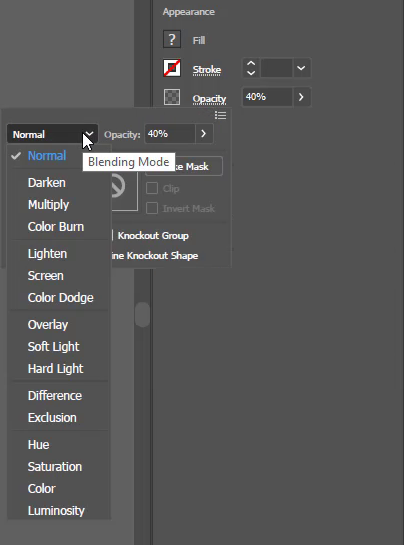
You can see the more opacity settings if you click on the Opacity, and its options appear. Here you can change the modes, and opacity option here as well.
Don’t worry, if you can’t find the opacity option in the Properties panel. You can see the opacity option in the Transparency, go to Window > Transparency.
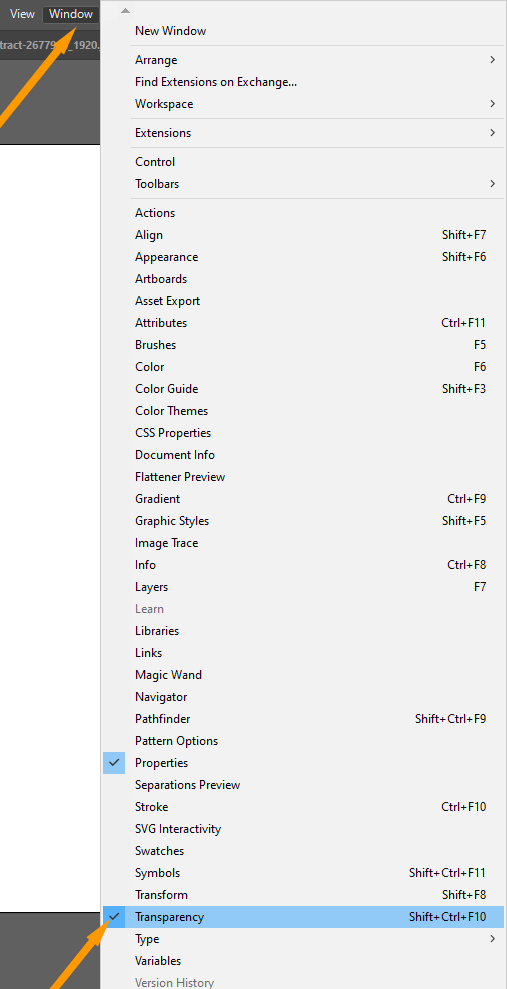
The transparency panel appears. You can easily change the opacity from the transparency panel as well.
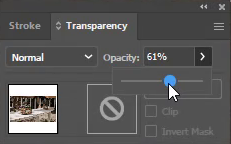
You can also make any object or shape transparent by changing the Opacity.
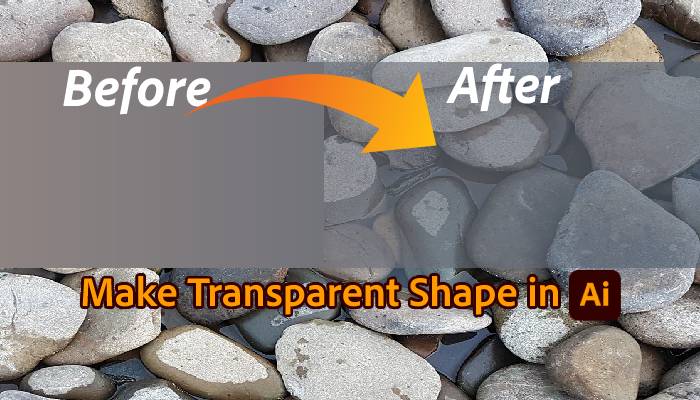
You have learned to change the opacity in Adobe Illustrator.
In this tutorial, you have learned to change the opacity in Adobe Illustrator. You can easily change the opacity of any image, shape, and text to make your design look more amazing.
Have More Questions?
If you have any questions related to changing opacity in Illustrator, you can ask in the comment section below. We have also answered some most frequently asked questions below.
Can’t Change Opacity in Illustrator
Make sure to select the object first and if they are grouped, ungroup them first and then change the opacity by Properties > Appearance > Opacity.
Opacity Shortcut in Illustrator
You can change the opacity by shortcut in Illustrator, first, go to Properties > Appearance > Opacity. Click once on the opacity box value and press Shift+up or Shift+down to change the value.
How to change fill opacity in Illustrator
To change the fill opacity in Illustrator, go to Window > Appearance. The Appearance panel will appear. Double-click on the Opacity option under Fill. Now change the Opacity from the Transparency panel that is appeared.
How to change blending mode in Illustrator
To change the blending mode in Illustrator, go to Window > Transparency. Click on Blending Mode Option, the default blending mode is normal. You can see more blending modes under Normal.
All Done! Enjoy.

Leave a Reply