Most of the designs, like cards, billboards, sale banners, logos, and others, are created using text. So that’s the reason you have to edit the text to look more organized and fit the design that you are creating.
You can also watch the detailed video tutorial to learn how to edit the text in Adobe Illustrator.
So you need to edit the text in different styles. You can change color, size, font style, font appearance, spacing, individual color for every character, and much more.
You can also learn:
- How to Add Text in Illustrator
- How to Move Text in Illustrator
- How to Justify Text in Illustrator
- How to Stretch Text in Illustrator
If you are new or don’t know how to edit text in Adobe Illustrator, then you are in the right place. In this tutorial, you will learn to edit text in Adobe Illustrator.
So let’s start.
How to Edit Text in Adobe Illustrator
To edit the text in Illustrator, you can use the Character panel to edit the font style, size, spacing, and kerning of text. Text can be edited by using the “Appearance” panel to add colors and strokes. You can also create outlines of the text and then select individual colors for every character or edit the text by anchor point with the help of the “Direct Selection Tool.” Make text 3D and warp with the “Effect” menu.
Following are the detailed steps to edit the text in Adobe Illustrator.
Step 1: All you need to do is select the text using the Selection Tool before editing it.

Once you have selected the text now, you can apply edits to the selected text easily.
Step 2: You can edit the text with different tools.
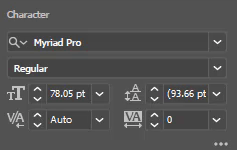
i. Character panel
ii. Appearance panel
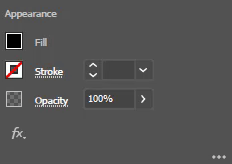
iii. Type menu
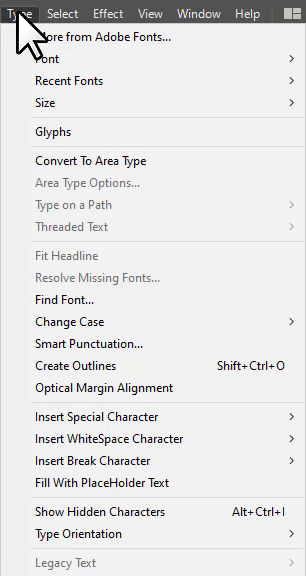
iv. Effect menu
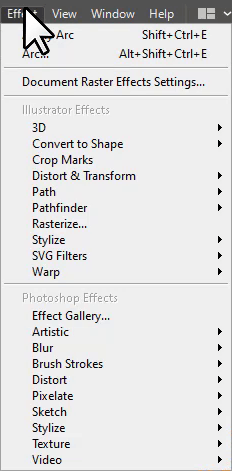
Also learn: How to Make a Text Logo in Illustrator
1st Method: Character panel in Illustrator
The character panel is used to set the font family and change the font size, font style, kerning, and tracking.

You can see the Character panel in the Properties on the right side of the workspace.
Read Also: How to Distort Text in Illustrator
2nd Method: Appearance panel in Illustrator
The appearance panel is used to change the fill color of the text and set the stroke color. You can also increase or decrease the stroke “pt”. You can also change the Opacity of the text from 0% to 100%.

3rd Method: Type Menu in Illustrator
The “Type” menu can also be used to edit the text. You can select any font from the Type menu. Change the text size, and case, and add different types of special characters like Symbols, Hyphens and Dashes, and Quotation marks.

You can also change the type orientation from horizontal to Vertical.
4th Method: Text Effect in Illustrator
Different text effects can be applied in Illustrator using the Effect menu. You can apply the 3D effect.

You can warp the text in different ways. 15 different warp styles can be applied to text.
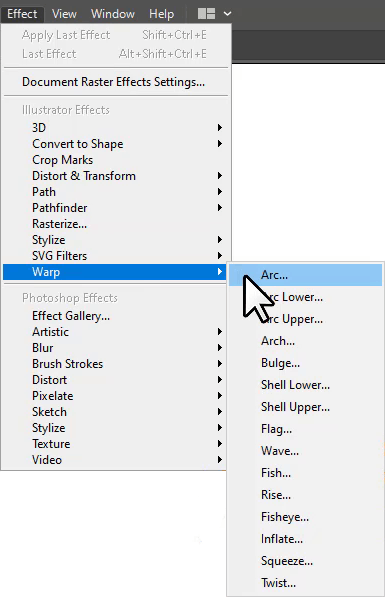
You can also add shadows, inner glow, and outer glow to the text as well.
Different types of effects can be applied to any text, whether it’s a single character or a sentence.
5th Method: Curve Text in Illustrator
You can also curve the text in Illustrator by Effect > Warp > Arc.

The Warp Options panel will appear. You can change the bend if needed and then click OK.
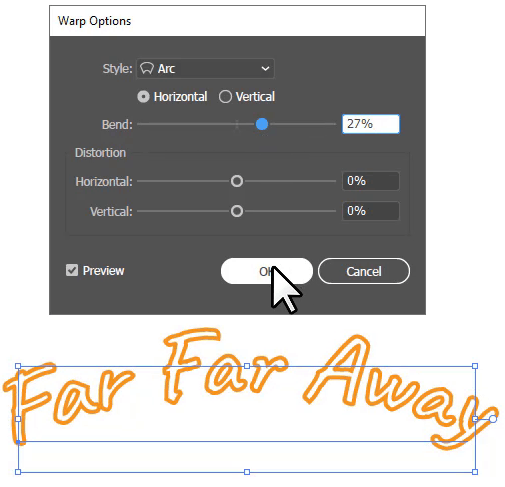
The text will be curved.

Create Outlines Illustrator
If you want to edit each character individually, then you must first create the outlines of the text by right clicking on the text and selecting Create Outlines, and then select Ungroup by right clicking again and selecting from the list.
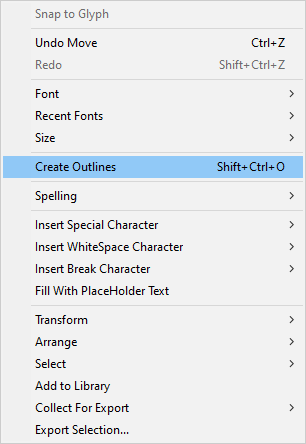
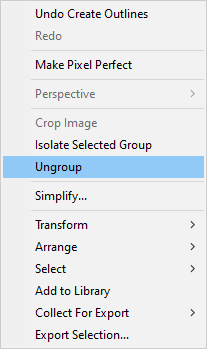
You can fill in different colors for each character and also change the characters by using their anchor points.

You have learned to edit the text in Illustrator.
In this tutorial, you have learned to edit the text in Adobe Illustrator. You can use different ways to change any character or text for use in logos, banners, and other designs.
Have More Questions?
If you have any questions related to editing text in Adobe Illustrator, then ask in the comment section below. We have also answered some of the most frequently asked questions below.
How to Curve Text in Illustrator
To curve the text, select the text using the Selection Tool, and go to Effect > Warp > Arc. Warp Options panel will appear. Change the Bend according to your choice and Click OK. The text will be curved.
Read the Complete tutorial about curve text below:
Illustrator Text Effects
To apply different text effects to any text, select the text using the “Selection Tool,” go to the “Effect” menu, and select from any style that you want to apply. You can choose 3D, Warp, Drop Shadow, and Add glow to the text.

All Done! Enjoy.

Leave a Reply