Images play an important role in the design. Whether you are designing any billboard, making a logo, invitation cards, flyers, brochures, creating a book cover, or any other design, images are used. Images can make the design more interesting and easy to know about the information that is being delivered.
Adobe Illustrator has made it easy for the designers to use the image by placing them on the artboard by different methods. Different methods can be used to place an image in Illustrator. A designer can adopt any method to place an image in Illustrator. After placing an image in Illustrator you can easily use it as background, crop it, resize it, add the image in design, trace the image, or anything else that you want to do with the image.
You can also learn:
- Trace an Image in Illustrator using Pen Tool
- Cut out an Image in Illustrator using Pen Tool
- Cut out Text from an Image in Illustrator
- Fill Text with an Image in Illustrator
- Change the color of an Image in Illustrator
- Wrap an Image around an Object in Illustrator
In Adobe Illustrator, any image is selected and placed on the artboard to use it. Placing an image in Adobe Illustrator can help you create designs by using the Image.
If you are new or you don’t have any idea to place an image in Adobe Illustrator, then you are in right place. In this tutorial, we are going to give you a step-by-step guide to placing an image in Illustrator.
Let’s Start.
How to Place Image in Illustrator
To place the image in Illustrator, go to File > Place. Select the image using the Place panel, then click on Place. The image will appear with the pointer. Click anywhere once on the artboard. The image will be placed.
Create a New Document in Illustrator
First of all, in this tutorial, we will start by creating a new document in Adobe Illustrator.
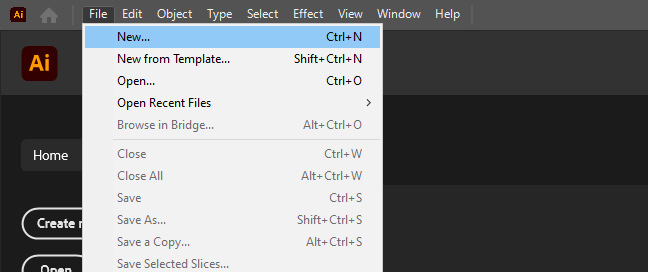
Step 1:Create a New File by using File > New.
Step 2: You can select your desired file size, I am selecting the Common Document from the New Document window.
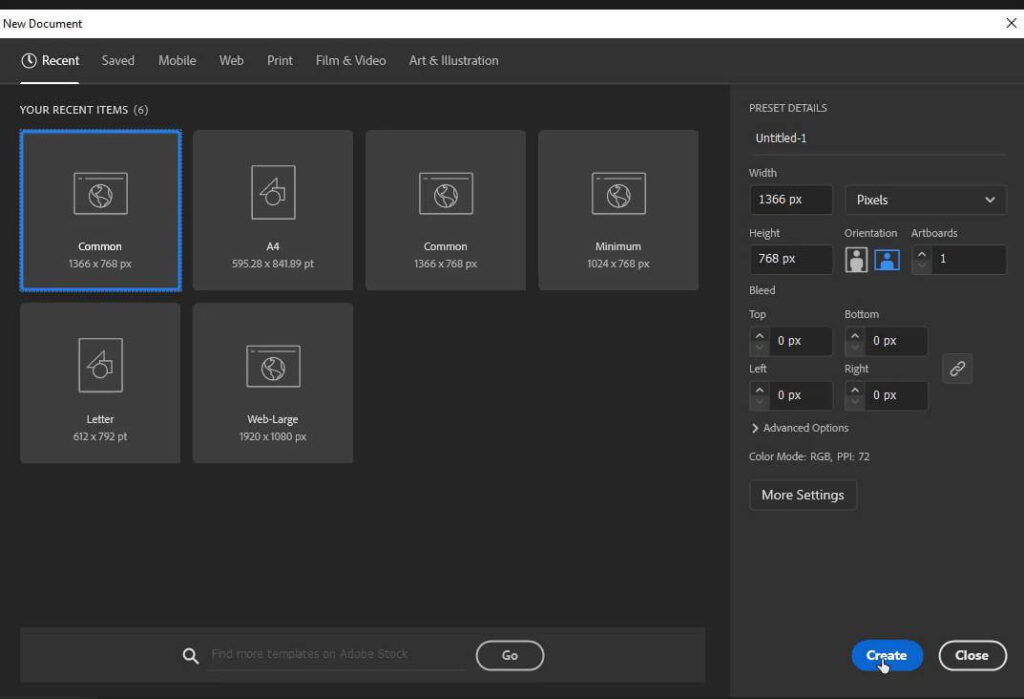
Step 3:Adjust Preset Details according to your choice and click Create.
(Easy & Quick) 2 Methods to Place an Image in Illustrator
In Adobe Illustrator, 3 methods are available to place an image on the artboard. All methods are easy and quick. You can pick any method to place an image according to your choice.
1st Method: Place an Image by Drag & Drop
In Adobe Illustrator the easiest method to place an image is by using Drag & Drop technique. You can direct the image onto the artboard. Let’s see how it works.
Select the image that you want to place in Illustrator. Click and drag it directly to the Adobe Illustrator artboard.
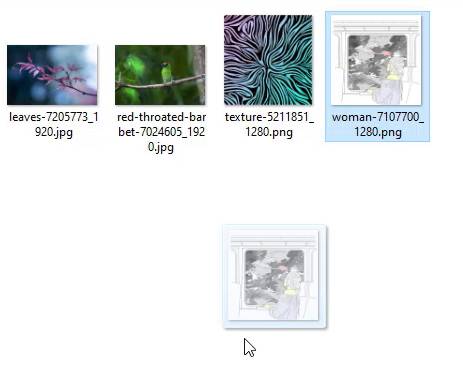
The image will be placed in Illustrator.
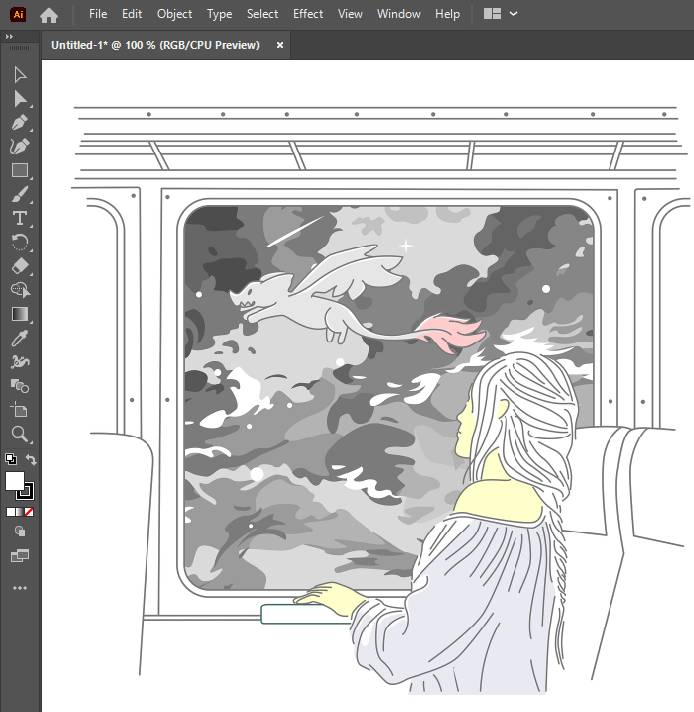
Now you can use it according to your need and edit it. According to us, the Drag & Drop method is the easiest, fast, and most convenient way to place images in Adobe illustrator.
2nd Method: Place an image by File Menu
The second method that we are going to discuss placing an image in Illustrator is by using the File menu. The steps are easy and are given below.
Step 4: In the main menu, go to File > Place. The shortcut key can also be used to place an image on the artboard in Adobe Illustrator. The shortcut key to Place an Image in Illustrator is Shift+Ctrl+P.
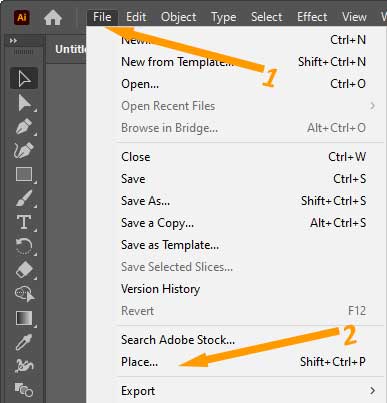
Step 5:Place Dialog box will appear.
Step 6: When the Place dialog box appears, select the location of the image from where you want to select the image and select the required image that you want to place you can also type the name of the image as well.
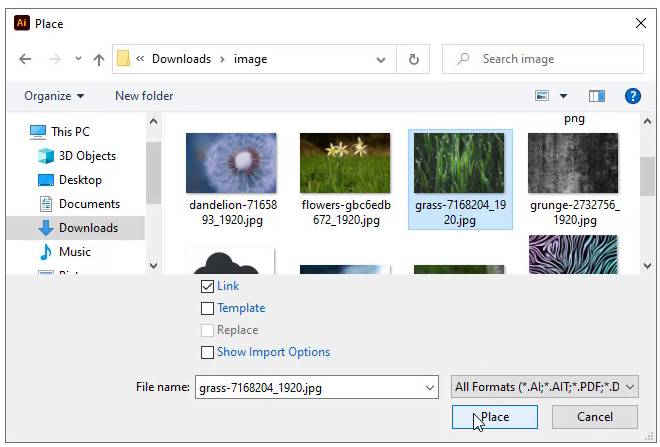
Step 7:Click on the Place button.
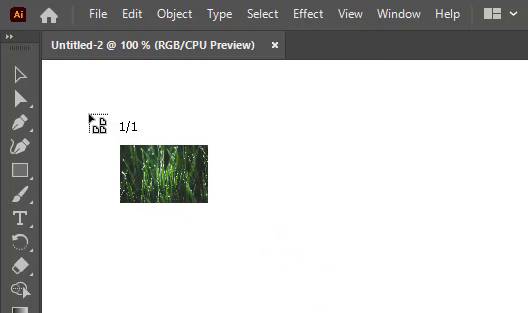
Step 8: The image will appear with the cursor. Now it’s time to place it on the artboard. So if you left-click once anywhere on the artboard, the image will be placed on the artboard in the illustrator.
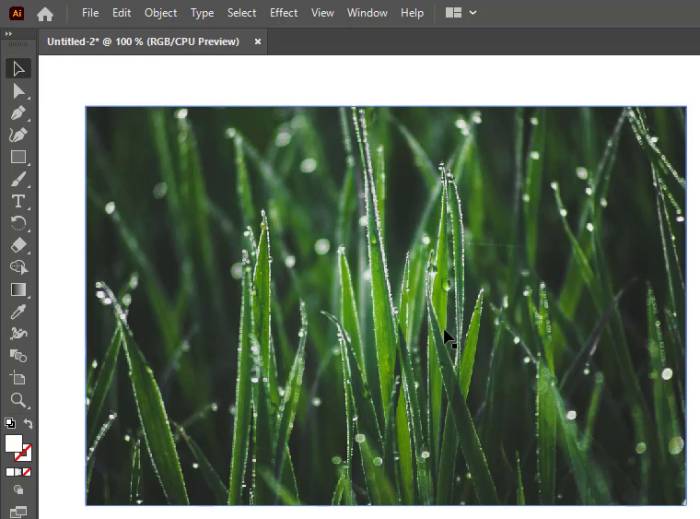
Now you can embed it and then use it according to your need. You can also resize it, crop it add it as the background, or do any type of edit according to your need.
3rd Method: Open an Image by File Menu
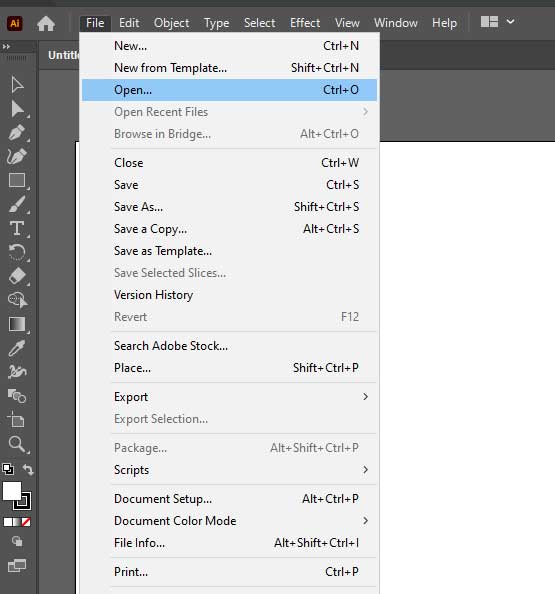
Another way to place an image in Illustrator is by using Open from the file menu. The image will be open in a new workspace.
Step 1:Go to File > Open. You can also use the keyboard short key Ctrl+O to open an image in Illustrator.
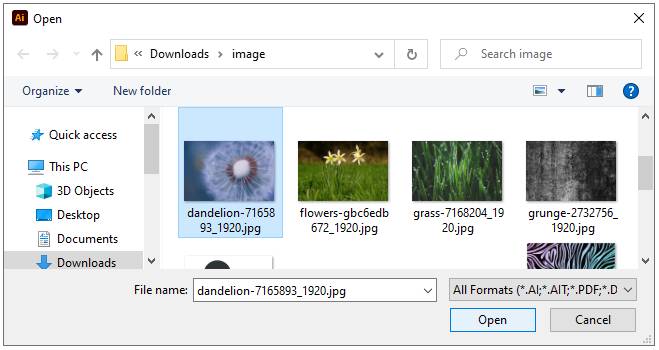
Step 2: Open dialog box will appear.
Step 3: Select the location and then select the Image
Step 4: Click on the Open button.
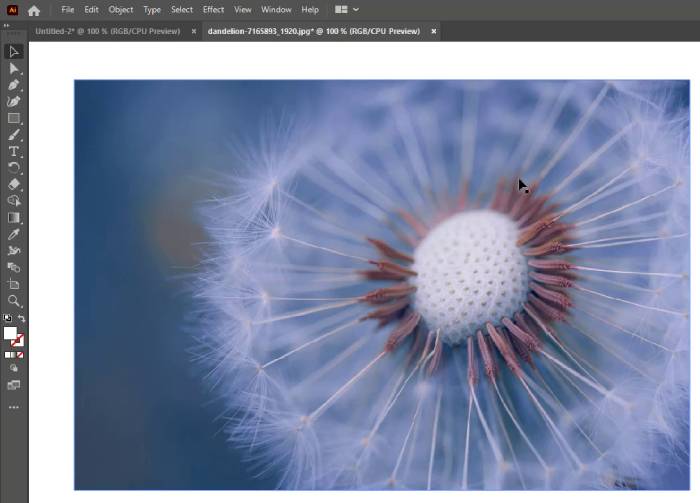
The image will open in a new document. Only this method creates a new document automatically and the image is placed in that document.
It’s Easy to Learn How to Place an Image in Illustrator.
Now you know how to Place an Image in Adobe Illustrator. You can use any of the given methods to place your images on the artboard in Adobe Illustrator and use them according to your need. You can also watch our complete video tutorial that is given at the start of this tutorial. This tutorial provides you with complete knowledge and methods of Placing an Image in Illustrator.
How to Trace an Image in Illustrator
Image can be traced by using the Pen Tool. Select all the areas by making anchor points and then. If you want to learn how to Trace an Image in Illustrator then you can learn in our complete tutorial here.
How to Crop an Image in Illustrator
To Crop an Image in Illustrator, select the image that you want to crop. Go to Properties > Quick Actions > Crop. The Crop box will appear. Adjust the position and press Enter from the keyboard or Properties > Quick Actions > Apply. The image will be cropped.
Adobe IllustratorInsert Image into Shape
If you want to insert an image into a shape then adjust the position of the image on the top of the shape and then select the image then Properties > Quick Action > Arrange > Send to Back. Select Image and Shape then Properties > QuickActions > Make Clipping Mask.
How to Add a Picture as Background in Illustrator
If you want to add a picture as a Background in Illustrator then resize the image as much as you want it as a background. Go to Properties>Layers> Lock the layer that has the image and name it Background.
All Done! Enjoy.

Leave a Reply